Stylemaker Fabrics + Carolyn Pajamas + M7907 = Ace
Earlier this year, Michelle from Stylemaker Fabrics contacted me asking if I would like to be part of a blog tour. The tour showcases Stylemaker’s new Spring fabric collection. Given the wonderful selection, how could I pass this offer up? There is such an array of colours, prints, types that I was pretty overwhelmed by choice. i decided on a gorgeous coral stretch denim, which I had high hopes of turning into a boiler suit, but there was serious demand for it so I was pipped to the post by others on the tour, dammit!

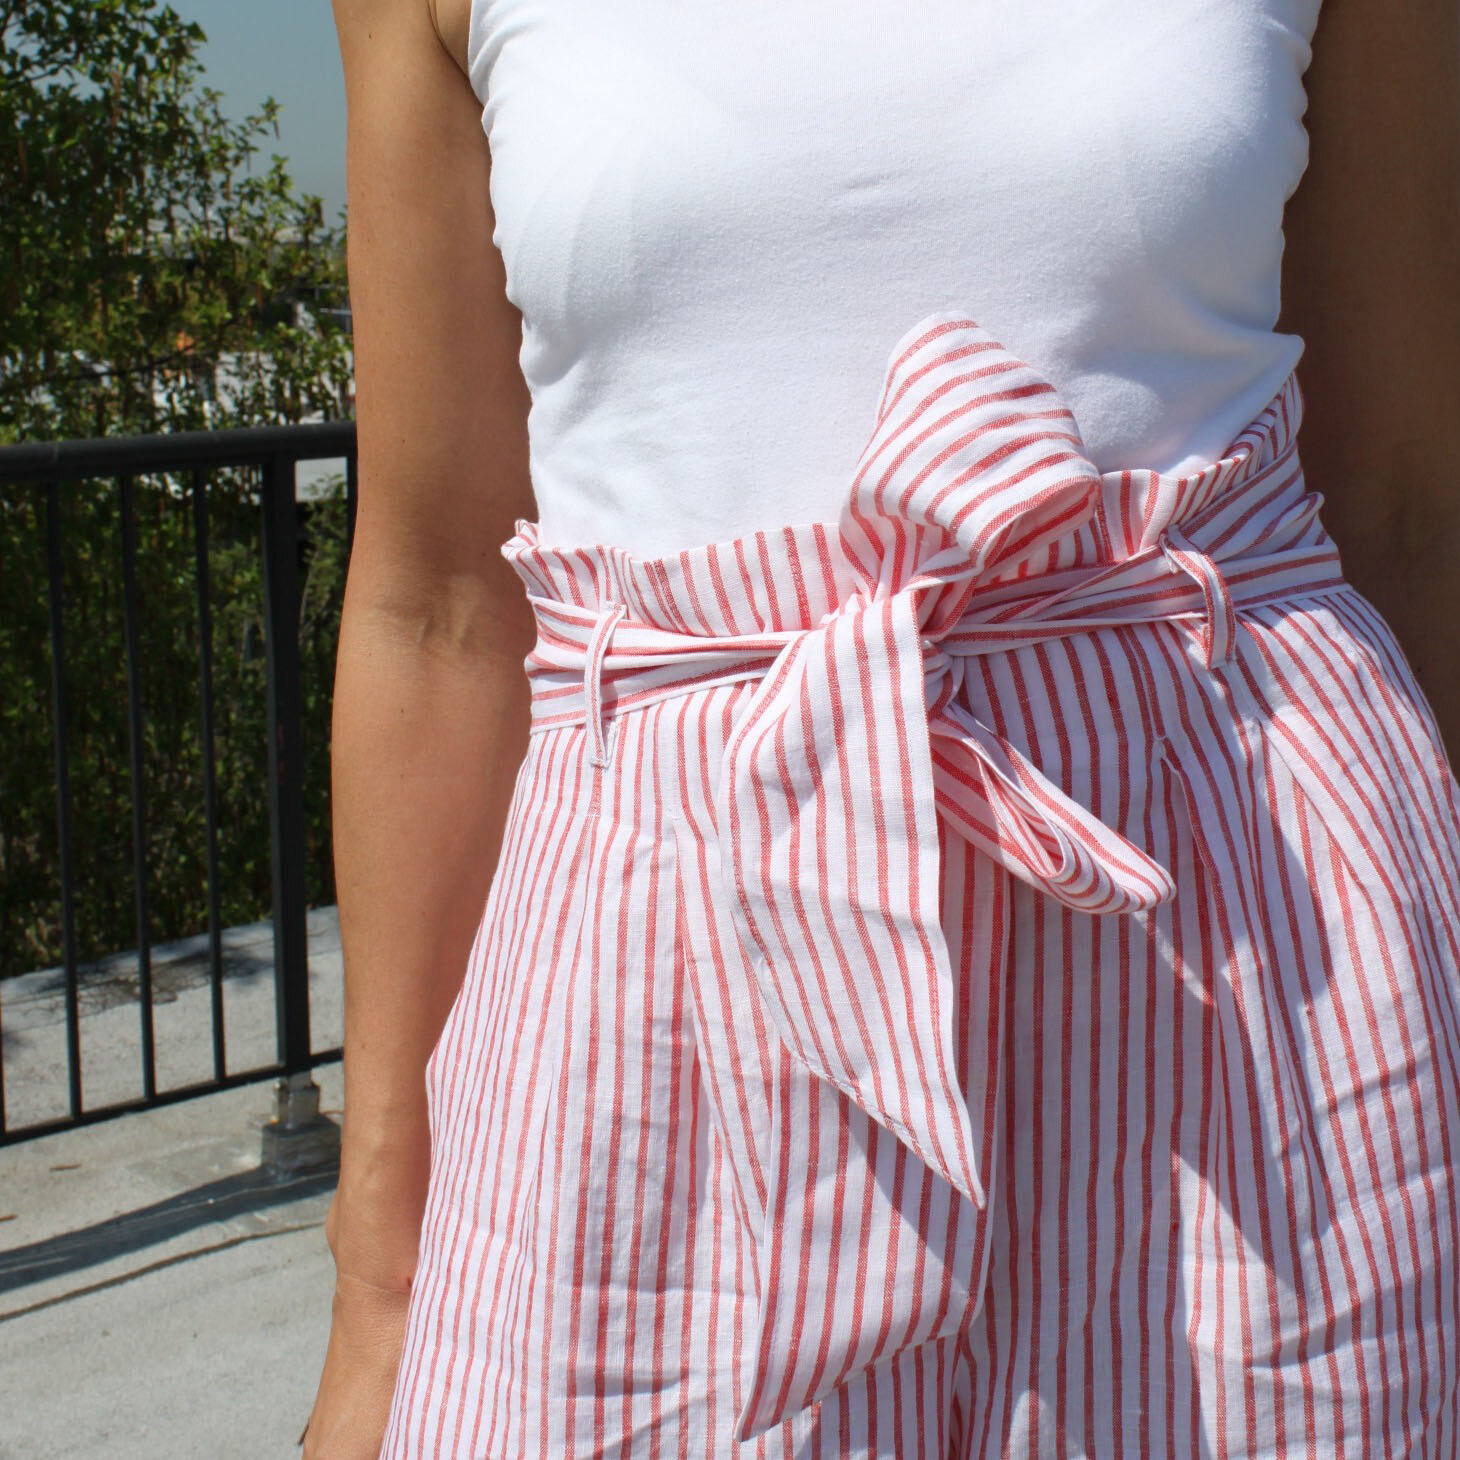
So I had a bit of a rethink and was really taken with this leafy rayon crepe. It is such a lovely, fun print, the softest fabric imaginable and completely opaque. I knew straight away that I wanted to make a blouse rather than a dress, so I asked Michelle if she had any navy twill for some trousers that would go with this. It wasn’t in the Spring collection she had shown us, but she kindly sent me this gorgeous stuff. It is a pretty hefty twill in a lovely French navy and was an absolute dream to work with. It’s almost denim weight and holds the pleats and shape of these trousers really well.

I’ve been wanting to make the Closet Case Patterns Carolyn Pyjamas top as a blouse for a while. I saw a girl wearing a tropical print blouse similar to this style with jeans last summer and it looked just ace, so this seemed the perfect fabric to try it out on.
I made some alterations which included squaring off the hem and straightening the side seams. I also lengthened the sleeves by a couple of inches.

As with all Heather’s patterns the construction of this is really clever and I like the fact that she found a way to omit a back facing which can be so flappy and difficult to get to lie flat.

I think perhaps because this is one of Closet Case’s earlier patterns the instructions were a little unclear at times but I got it in the end and am really pleased with the result.
One change I made to the order of construction was to make buttonholes and attach buttons prior to sewing the hem. Whilst this makes the finishing the hem at the facings a little fiddly, it ensures that the plackets line up at the hem, which I’ve had issues with in the past. The crepe was a little slippy and my stitching was a bit loose and wonky. That said it was pretty easy to work with - especially when I remembered that my machine has a fine fabrics foot pressure setting. *Eye roll*

I really wanted some pleated tapered leg pants for the twill. I was on the hunt for something a little slimmer leg than what I ended up sewing, but was mooching around on the McCalls website and came across these. I was really intrigued by the seam just below the knee which creates the taper.

I think they walk a fine line between fun and interesting, and clown pants. Finally I decided the shape wasn’t that different to Pattern Fantastique’s Terra Pants, which I have made before and love, so I could overcome my clown pants feelings - even though an instagram poll on the subject was pretty much straight 50 / 50.
I did consider straightening the leg a little but that would have been a little complicated as the bottom section is a semi-circular piece that only has one seam compared to the two seams of the upper leg. And I, lazily, couldn’t be bothered to figure it out. The pattern is M7907 View B.

I have one major gripe with McCalls patterns. It is so frustrating when the patterns are sold in two different size brackets, as my top half fits the smaller size and my waist and hips in the larger. I’ve made the mistake of getting the larger size in the past which are just too big in the bust which is so much harder to alter. So it means I have to grade up the smaller version myself in the areas where needed, where normally I would just blend between sizes on the same pattern.
I understand that the larger sizes need a different block to the smaller sizes, but surely they could still be included in the same packet?

As such I had to make a few fit changes, which is fine, it’s just grading can be a little daunting. I cut the largest size in this packet - the 14 - and added a quarter inch to each side seam at the waist and blending it to the 14 hip line therefore adding a total of 1 inch to the circumference. I didn’t add to the hips, which I normally do, because there is a lot of ease. I added 1 inch to the back rise and half an inch at the front, tapering to nothing at the centre front. I’ve finally found my perfect crotch adjustment! I also added an inch to the upper leg. I am thrilled with the fit and absolutely love how the fabric responds to the design.

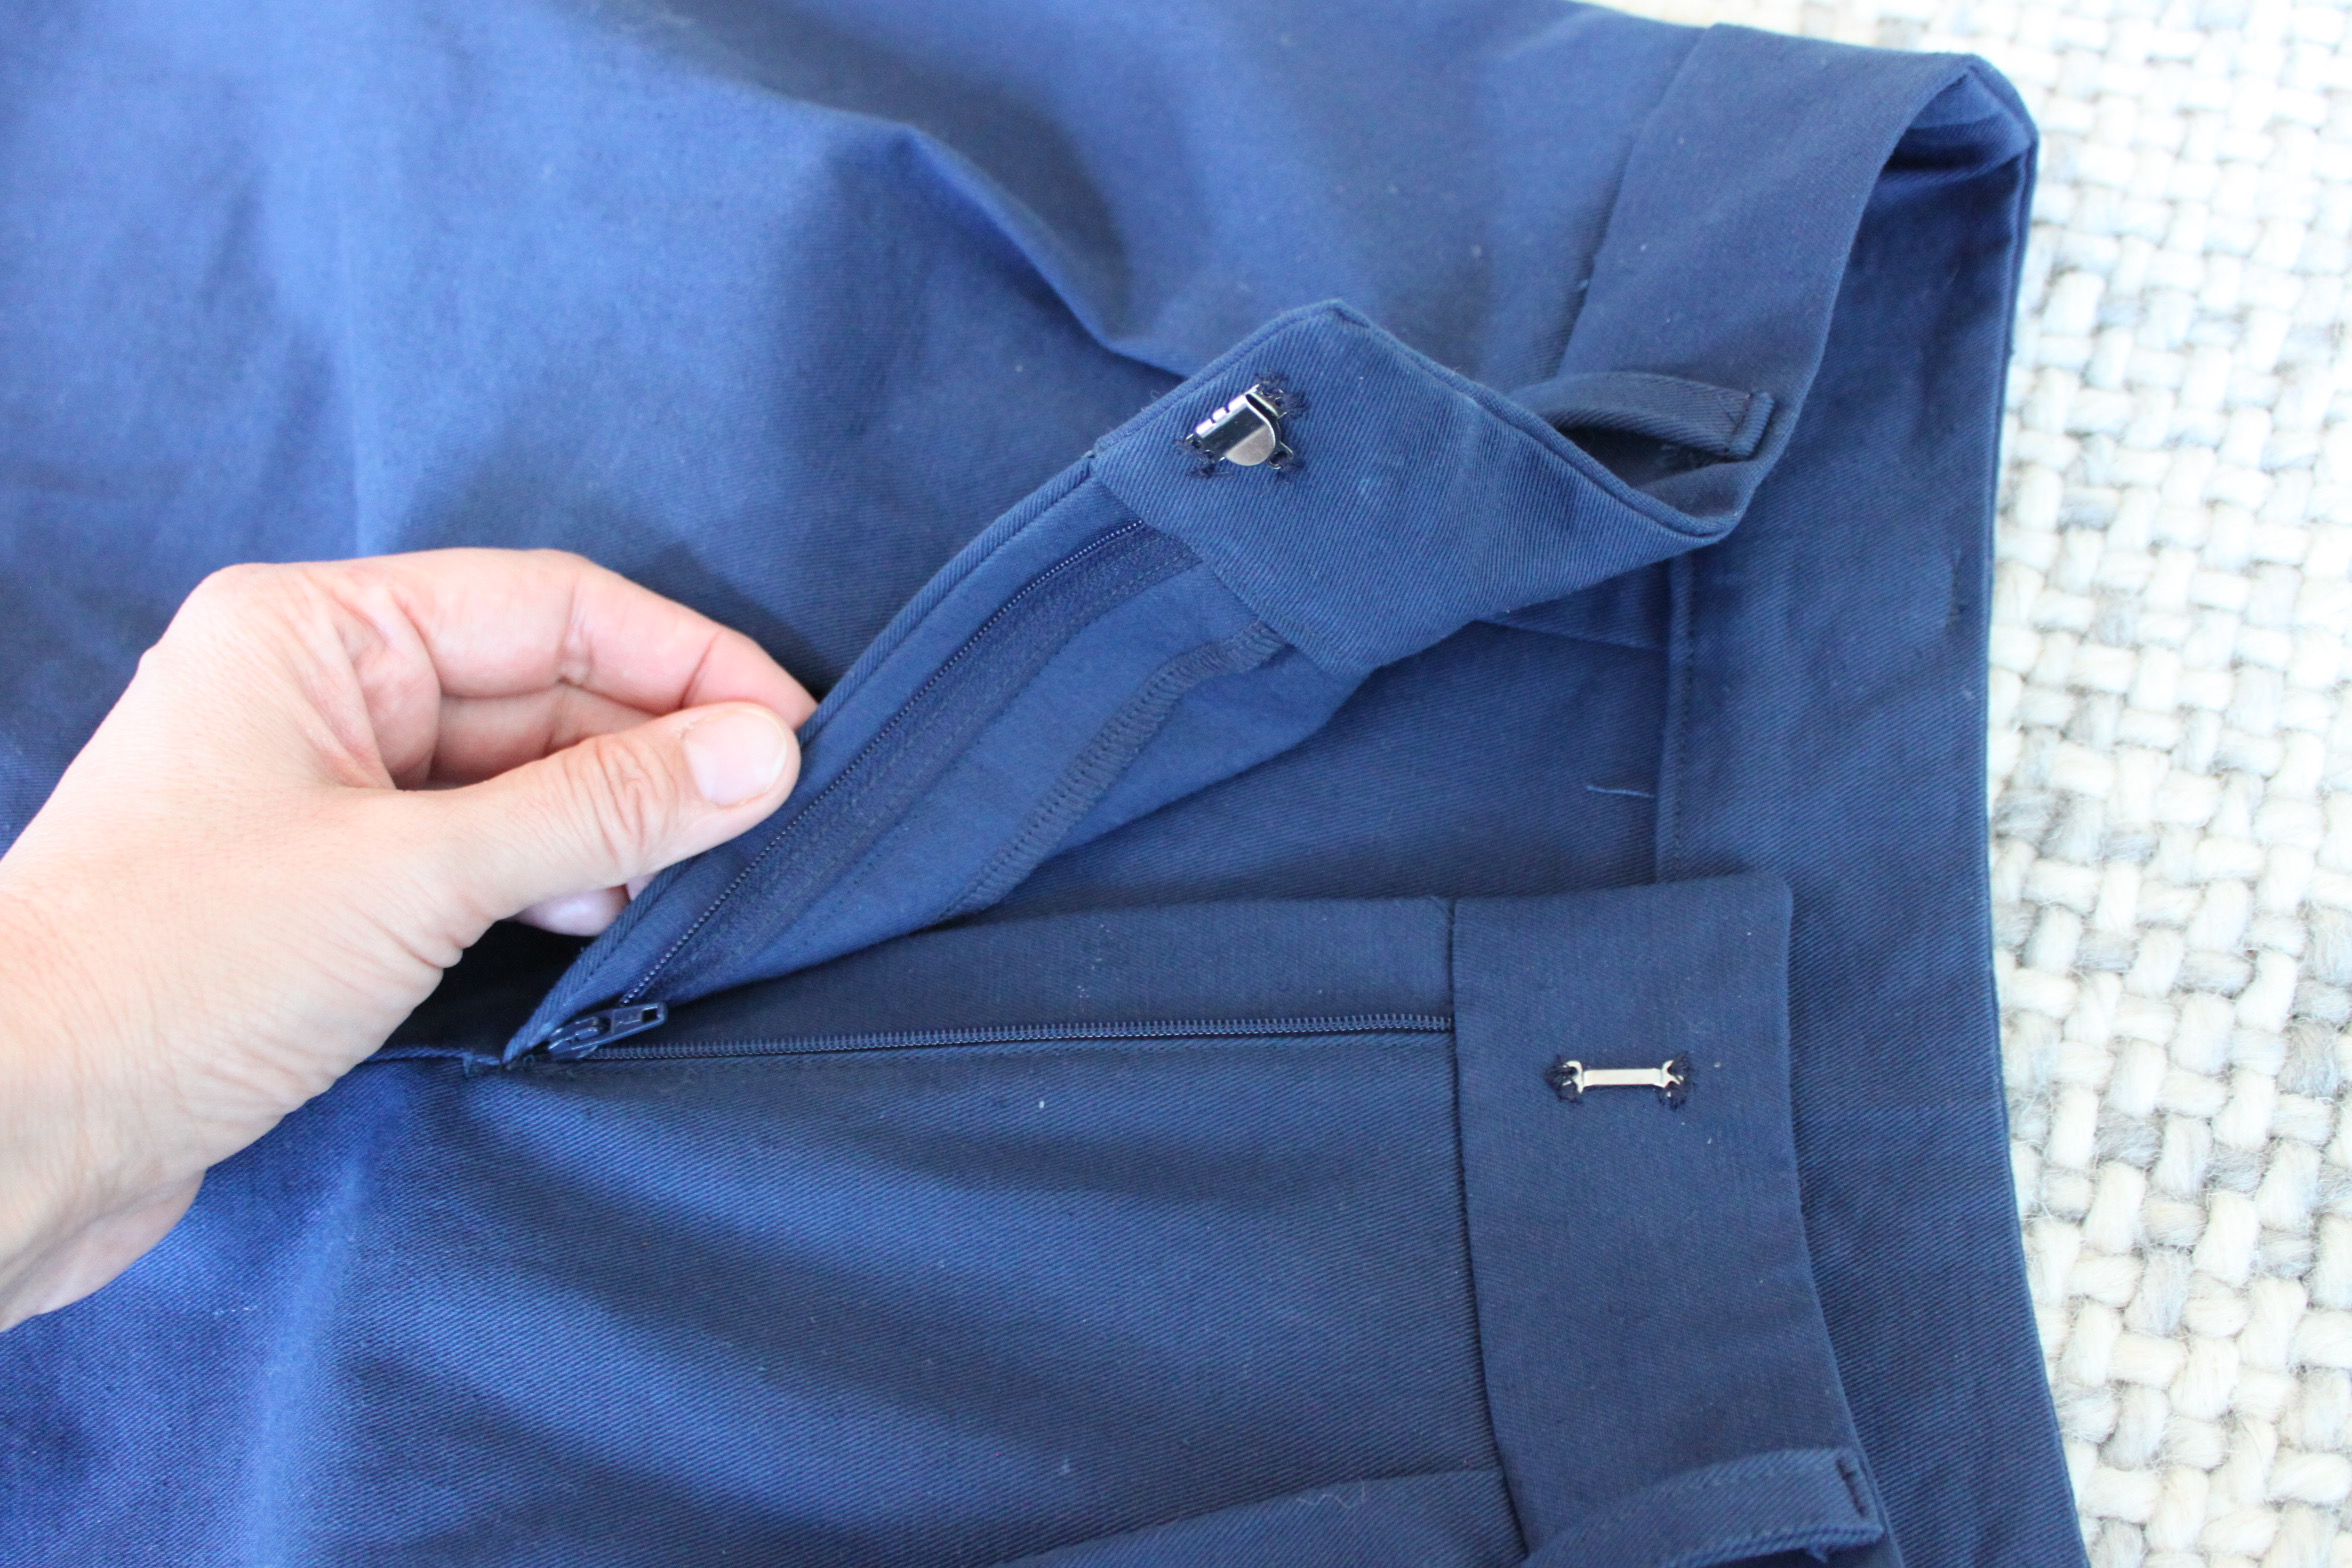
The only change I made to the construction was to add a facing to the inside of the pocket. They are inseam pockets which is OK, but I don’t like when you can see the lining fabric. So for the rear pocket section I added an inch or so wide facing to prevent this. I think it looks so much neater. (She says patting herself on the back!)

I also had really good results with the fly. I have really struggled to find a fly zip tutorial that gives me the kind of finish I want, and I have tried many, and controversially this Big Four method was simple and gives a really nice finish.
I love these fabrics and I love the garments. I’m not sure I’ll wear them together as much as separately as it feels a bit matchy-matchy and the blouse could tend a bit middle-aged (which I am, although I try very hard to pretend that I’m not). But the blouse with stonewash jeans and the pants with a skinny top or tee, would be some nice alternatives.

And the major bonus to all of this is that I have enough of the crepe left to make an Ogden Cami, which will be so pretty.
I was so pleased to be asked to be involved and end up with two garments in such interesting and qulaity fabrices, that I’ll really enjoy wearing in the spring and early summer - before it gets so hot that sleeves and trousers are unthinkable.
There are lots of other gorgeous fabrics on the Stylemaker site, so go check them out.
Elizabeth from Pins and Pinot is next on the tour - see what she got up to tomorrow!
Thank you Michelle for the wonderful fabric!
See you soon x