The Refashioners 2018
Refashion, a definition: taking an existing garment and turning it into something else - usually another garment.
The Refashioners: The brainchild of the incomparable Portia Lawrie of Makery who - for, I think, six Septembers now - has aimed to promote the practice of reusing unwanted garments and making them into something wanted by hosting The Refashioners. She gives a handful of sewing bloggers a brief and features their refashioned makes each day throughout September. Then during October, she encourages the wider sewing community to refashion their own creation for the chance of winning some awesome prizes.
This year I was delighted when Portia asked if I’d like to be involved, having been totally amazed by the creations I’ve seen in previous years. I mean this suit refashion is just mind-blowing. And well this from this year - floored.
The brief this year is looser than it has been previously; simply to start with an image/ person/ icon/ outfit that inspires you and recreate the look with only existing, unloved garments.
I LOVE this idea. I have been known to try and recreate looks I’ve been inspired by on many occasions - here, here, here and here, being a few examples - but I’ve never done it by refashioning an existing garment before. In fact, my refashioning experience is shamefully limited.
My lack of experience became clear when I started looking at inspiration images. All the items I wanted to recreate were kind of in line with my style generally, involving voluminous shapes and lots of fabric. It soon dawned on me that finding existing garments to take apart and put back together wasn’t going to generate the amounts of fabric I would need to recreate this, for example:

Seeing Elisalex’s amazing creation from last week makes me think I should have thought of curtains! But I didn’t so I was struggling to think of what I could do when I saw this:

Leandra Medine Cohen wearing Rosie Assoulin
I am a huge fan of Leandra Medine. I’ve talked about this before, but I love her approach to stretching the boundaries and acceptability of high fashion and her very self-deprecating humour. Nowadays, she may or may not have all the money and all the access to all the high-end fashion houses, but she stays true to her distinct, dysfunctional style and I love that. I also adore the designs of Rosie Assoulin. Her whimsical yet edgy aesthetic, shapes, fabrics and details always make me dreamy-eyed and seem to me to transcend trends, occupying their own bubble in the fashion atmosphere.
This combination is so representative of both of their styles. An almost safari-inspired utilitarian jacket made feminine when worn with a ruffled confection of a skirt. (And killer Balenciaga shoes - which sadly won’t be featuring any further in this post.)
So I took this picture and headed to my local thrift stores. I was feeling so so smug when I walked into Housing Works and picked up a ponte Everlane dress for $25, thinking it was exactly the weight and fabric I was looking for when comparing it to the above photo. Turns out it is completely wrong for this, as on closer inspection, the skirt is actually made from what looks like seersucker and is lightweight, ruched, asymmetrical and epically ruffly. I should really have known that ponte was unlikely for Assoulin, but ….
But no way I was finding something with enough yardage that I could transform into that so I’m sticking with the original inspiration image and what I initially thought it was made from. So this is where I ended up.

With these as the starting point.


The item for the jacket (or Emotionally Vested Vest as it is called) took a little longer to find. I really wanted to find a jacket with lots of pockets and made from a poplin or heavier weight twill, but just couldn’t find anything. I eventually settled on this men’s cotton twill shirt from L Train Vintage which fit the colour requirement, cost $5, had limited embellishment, good weight of fabric and, critically, no centre back pleat (they were positioned close to the edge of the back yoke instead) as I really didn’t want to remove and reattach a back yoke.


Images from Moda Operandi
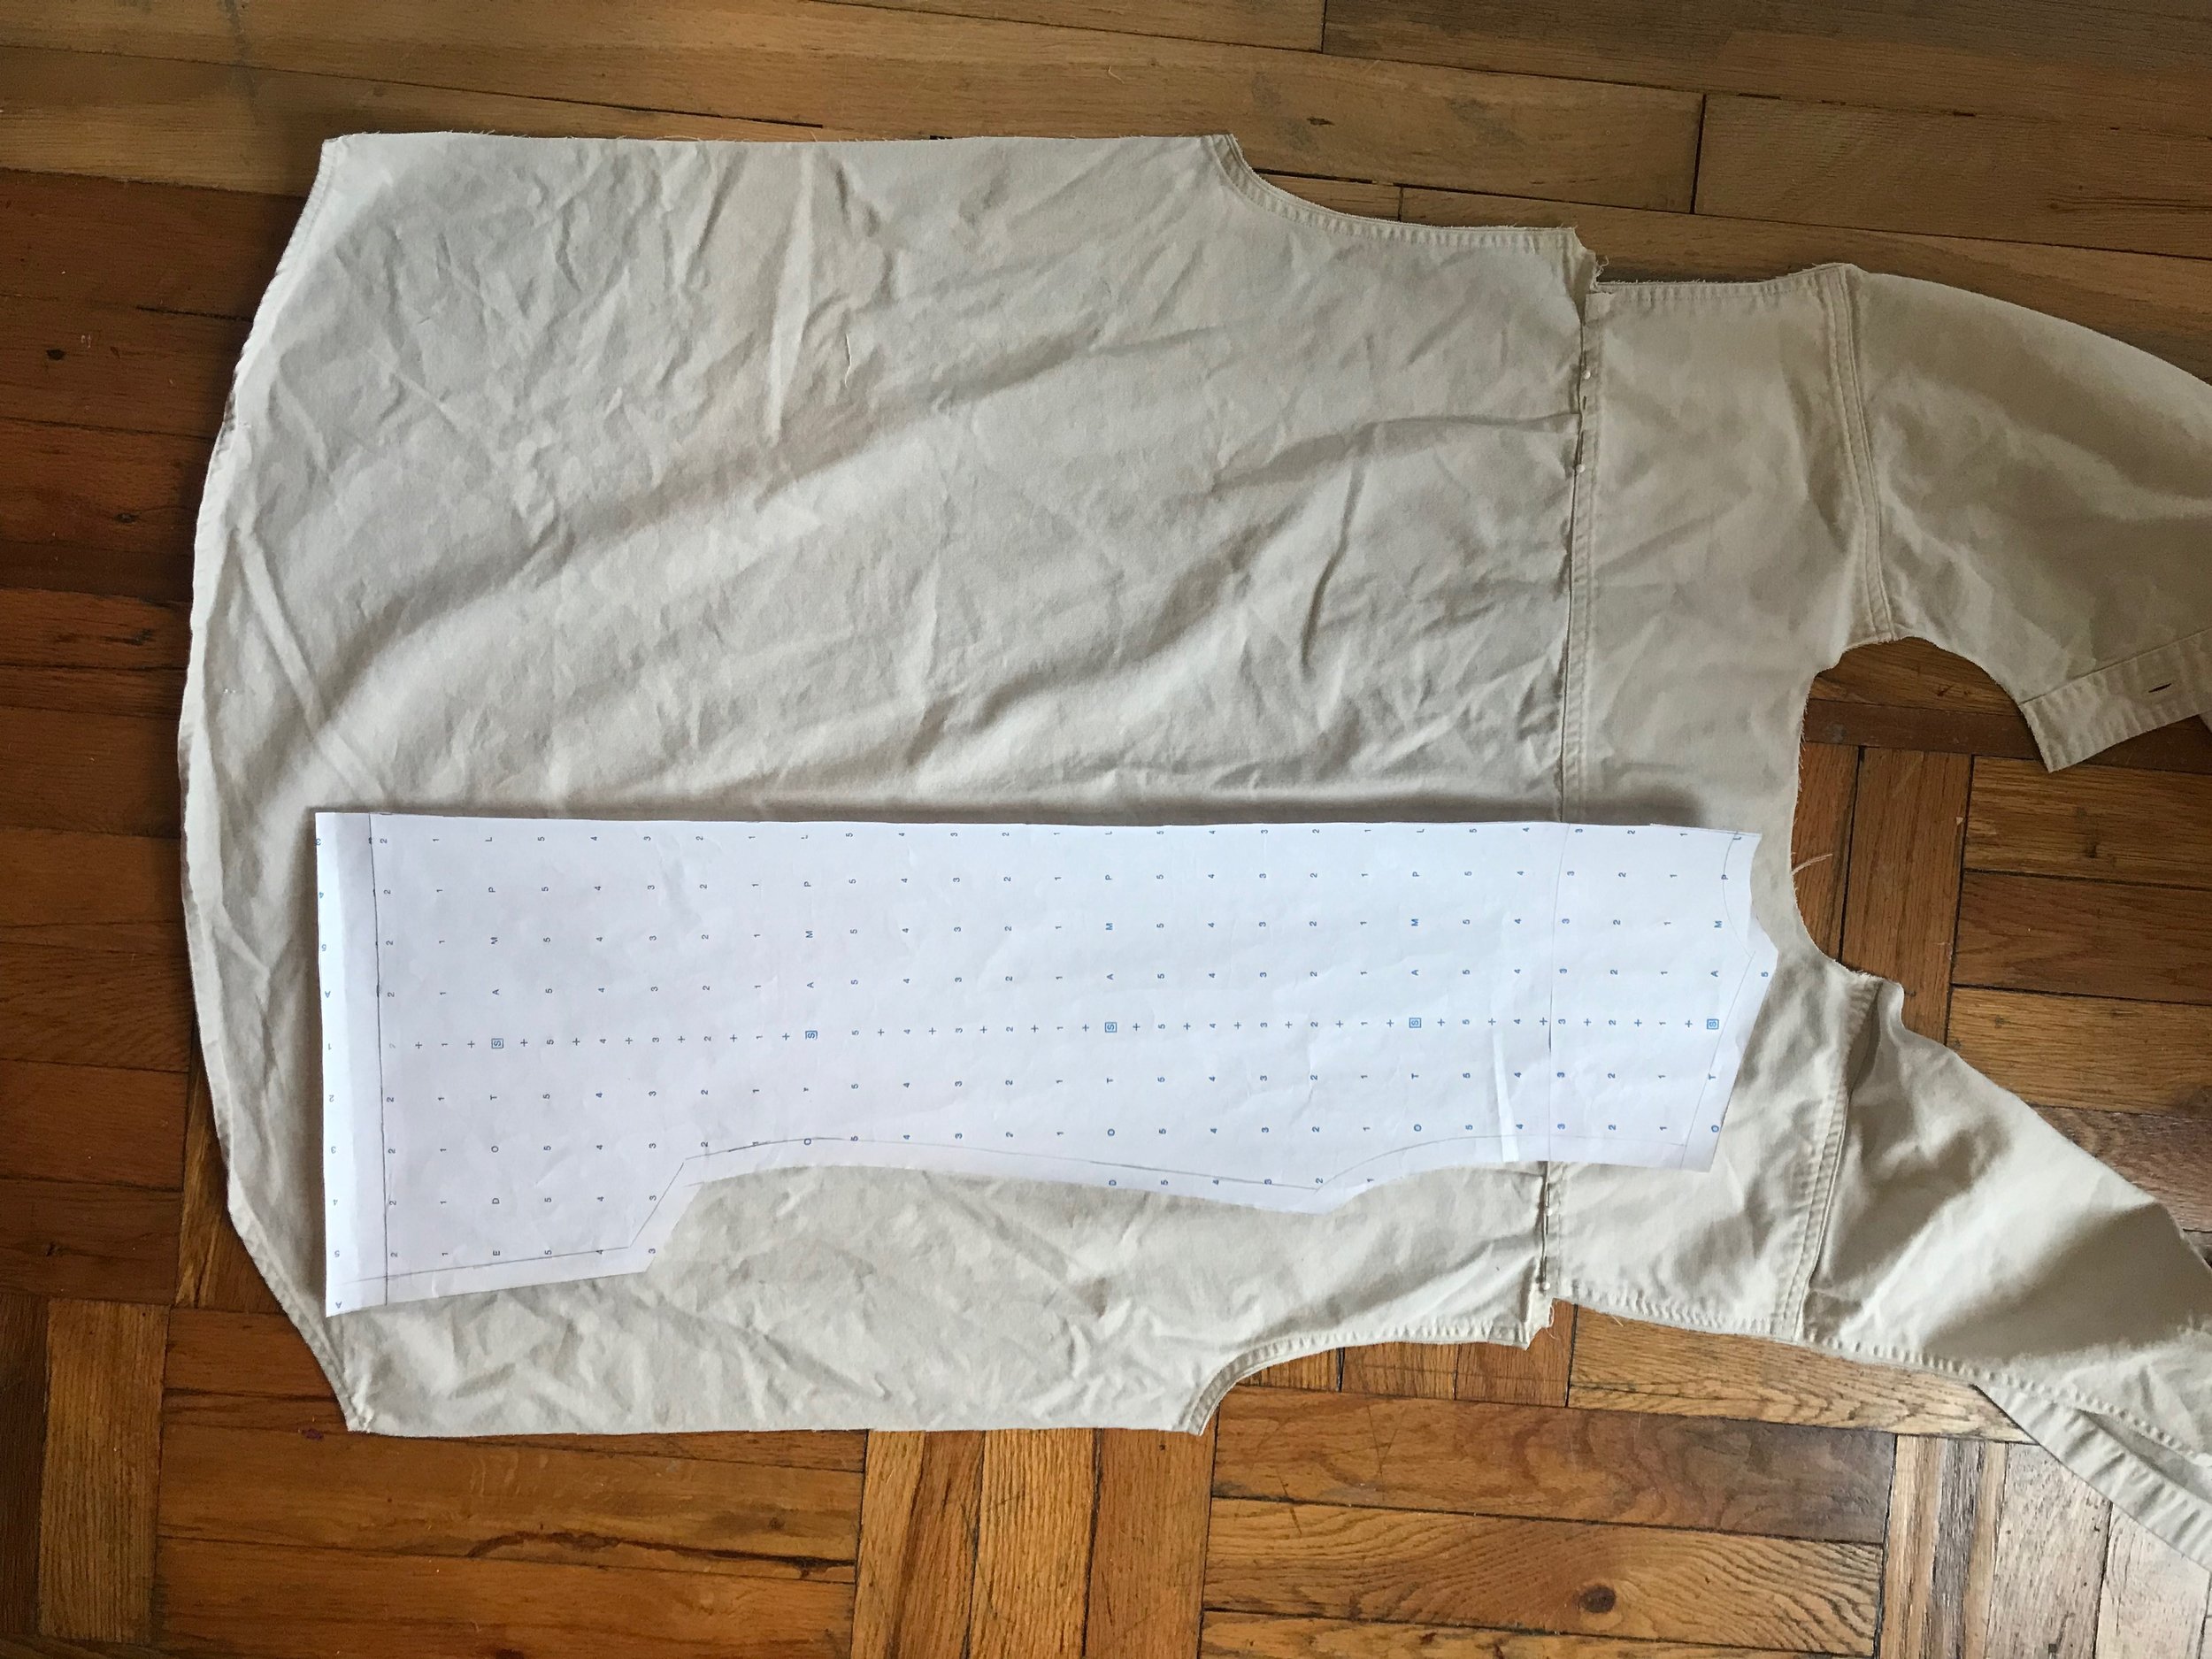
My initial thought was to use the shirt as it was and pin out excess fabric where required, but when I found more detailed shots of the vest (above), I became fixated on getting as accurate a representation of the interesting seamlines and construction as possible. So, that would include; paneled construction, welt pockets, double back vent and fixed back belt. That therefore meant pattern drafting. Oh goody!

That all said, my pattern drafting skills couldn’t quite work out how the hip seamline worked with everything else so I kind of abbreviated. I drafted a panel pattern - kind of like a princess seam, but it doesn’t run over the bust, and still includes a small dart - to emulate the seamlines on the original. The back was fairly simple as I could use the panels to create the shaping, but needed to include the back vent, so I drafted a vent as one would do for a pencil skirt on the seamline that would adjoin the side panels.

I unpicked the pockets, collar and cuffs of the shirt and then carefully cut along the side seams to separate it into useable pieces. I unpicked the side pleats under the back yoke to get the back to lie flat.
I realised I didn’t have enough room to make a separate placket but couldn’t use the existing one due to the buttonholes, and the plackets being too wide, so opted to fold them towards the inside so that they could give me a finished edge there without using more precious fabric whilst also providing enough reinforcement to hold the snaps I would be adding.
I just managed to get the main pieces out of the shirt, using the sleeves for the side panels and throwing grainlines to the wind.


One of the things I really enjoyed about this process was the fact that you kind of make it up as you go along. Once I had all the main pieces cut out, I started thinking about details and the more I looked at the pictures, the more I fell down the rabbit hole of adding more and more.

(Wonky) topstitching was essential, so I used gold topstitching thread I’ve had since I bought one of Heather Lou’s (Closet Case Patterns) and Jenny’s (Workroom Social) jeans kits aaaaages ago. Welt pockets were also essential and I used one of my husband’s white shirts that was heading for recycling for the pocket bags.

I opted to only create welts for the bottom pockets as I felt there would be too much bulk over me boobs if I did the top ones. Well, really I couldn’t face FOUR welt pockets. So the top ones are just flaps.
I sewed the back band into the back seams and created the vents and then got creative with the topstitching to keep the vents in place.

The only place I used materials other than that from the repurposed garments was the snaps, fusible interfacing on the pockets and collar, and the bias binding for the armholes of the jacket.
Then I got kind of stuck. I was intending to use the original collar stand as the mandarin collar, but for some unfathomable reason, it wasn’t long enough. For the life of me I can’t figure out how this neckline, which is very close fitting around my not extravagantly thick neck, could be larger than that on a giant men’s shirt. But there it was.

So I needed to draft a collar. That’s fine, no biggy. Except I just couldn’t figure out how I attach the mandarin collar whilst not attaching it to the top of the placket. See that gap between the edges of the collar - how is that done???? And I couldn’t cut it out until I’d figured out how to stitch it as I didn’t have enough fabric to cut two if the first one, that would be shorter, didn’t go to plan.
So whilst I avoided that issue for a while I got on with the skirt.

Although here I also spent significant time procrastinating as it felt like I just didn’t have enough fabric to create the ruffles, a ruffle, any kind of ruffle.
That said, in the end the skirt was pretty simple.
Firstly, I cut off the top of the dress at the waist to make it skirt length. Then I sewed up and cut off the pockets as they just gaped. I took in the side seams so that the fit was more snug around my waist and hips. Before doing that I turned the dress around so that the back vent was now at the front. The dress actually had a centre front seam which I could have used to create the split for the ruffle, but why recreate when it’s already there and the joy of a stretch fabric is that the shaping front and back is pretty identical so it made no odds which was the front and back.

I then had to figure out how to get the ruffle out of the very small amount of fabric left. I unpicked the centre front seam of the bodice and having already removed the zip at the back, I was then left with two identical flat pieces. They really didn’t look big enough to achieve anything, but in for a penny …

Using the front ruffle pattern piece from Butterick 6554 I just put as much of the pattern piece as I could fit onto the pieces of fabric and cut two. Miraculously, with a bit of adjustment as to the height at which the ruffle would hit the CF seam (previously known as the back vent), I got it to fit!
The finishing on the skirt is very patchy. I left the hem of the ruffle raw to keep length and movement and have hacked off excess fabric without serging the seam allowances. I’ve also left the waist unfinished. I had next to no fabric left and certainly not enough to make a waistband. I was going to use some black elastic and fold the top of the skirt over it, but to be honest it stays up perfectly well by itself and creates a smoother line, so I just left it as it is. I may have to revisit that if I decide to wear it with anything other than this jacket.
Honestly, I don’t love the skirt, the shape and ruffle reminds me too much of those awful mermaid swimsuits for kids that were everywhere last summer. That said, I’m pleased I managed to get close to what I was aiming for with the fabric I had to work with. Although I suppose it has been spoilt for me now I know what the original actually looked like.

With the skirt sorted, it was back to that pesky collar. Some lateral googling provided the answer. This involved unpicking the topstitching on the front placket, opening out the placket facing, turning that back on itself so right sides were together and sandwiching the now drafted and prepped collar between that and the jacket body at the point I wanted the collar to start. Abundantly clear right ….?

Anyway it worked and I managed to resurrect the topstitching without having to unpick the whole lot.

It was then just a matter of setting 14 snaps (uggggghhhhhh), each one being a hold your breath until it’s walloped moment to see if it would reveal I’d bashed it too hard so that the two parts won’t snap together. Only lost a few and thankfully had bought extra so they all work. That is a WIN. Then it was just a serge and fold a simple hem. DONE!

This has been such a satisfying project. a combination of quick and dirty fudging it (skirt) and detailed pattern drafting and construction (jacket), which in my limited experience seems to pretty much sum up refashioning. Along with a lot of “we’ll see if this works and keep our fingers crossed” along the way.

Neither item is perfect: the jacket could really do with a lining as all the snap reinforcement, pockets, turned back placket etc, make the insides really unattractive; the outline of the front patch pockets from the original shirt are still pretty visible; I might have mixed up my pocket pieces so that one of them is only about an inch and a half deep; and the top pocket flaps aren’t level with each other … but I’m really pleased with how the jacket turned out and do like the skirt when combined with the jacket.
I feel it’s a pretty faithful rendition of the original inspiration and I really had fun. Thank you Portia for prompting me to step out of my comfort zone and attempt a refashion and for including me with such a wonderful group of stitchers.
The only other thing to note is that there is a paint / bleach / unidentified stain on the jacket right in the front, which I hadn’t noticed until I was cutting out the front pieces.
Surely that’s refashioning 101 - before purchasing check the garment for stains and holes ….

See you soon x


