My favourite trouser patterns
I haven’t done something like this before, but I thought I’d do a little review of some of the pants patterns I’ve made over the last couple of years. Those I most enjoyed making and wearing.
Pants aren’t necessarily the easiest garments to make, but also not the hardest. In fact the trickiest part is getting the fit right. That can be a long iterative process but even with trousers I’ve made where the fit has not been great I have got significant wear out of them. Each has informed the subsequent pairs I’ve made, so I’ve gradually come to understand the standard adjustments I need to make before I look at other considerations for a particular design.
I make a muslin for nearly every pair, even when I’m repeating a pattern. This is often because I also make adjustments on the fly after I’ve cut the fabric and I always forget to take notes of those so I have to start over.
Before I make a muslin I make my standard adjustments; these include grading up at least one size between waist and hip, adding a half inch to the back crotch seam /rise, and usually adding an inch or two to the leg length.
I lengthen the back rise by slashing from around the mid point of the back crotch seam straight across to the side seam, perpendicular to the grainline, leaving a tiny hinge. I then spread the pattern by half an inch, ensuring it tapers to nothing at the front side seam and then tape extra paper in place.
More detail to follow on this process, but the pics below might give some idea of what I’m talking about.
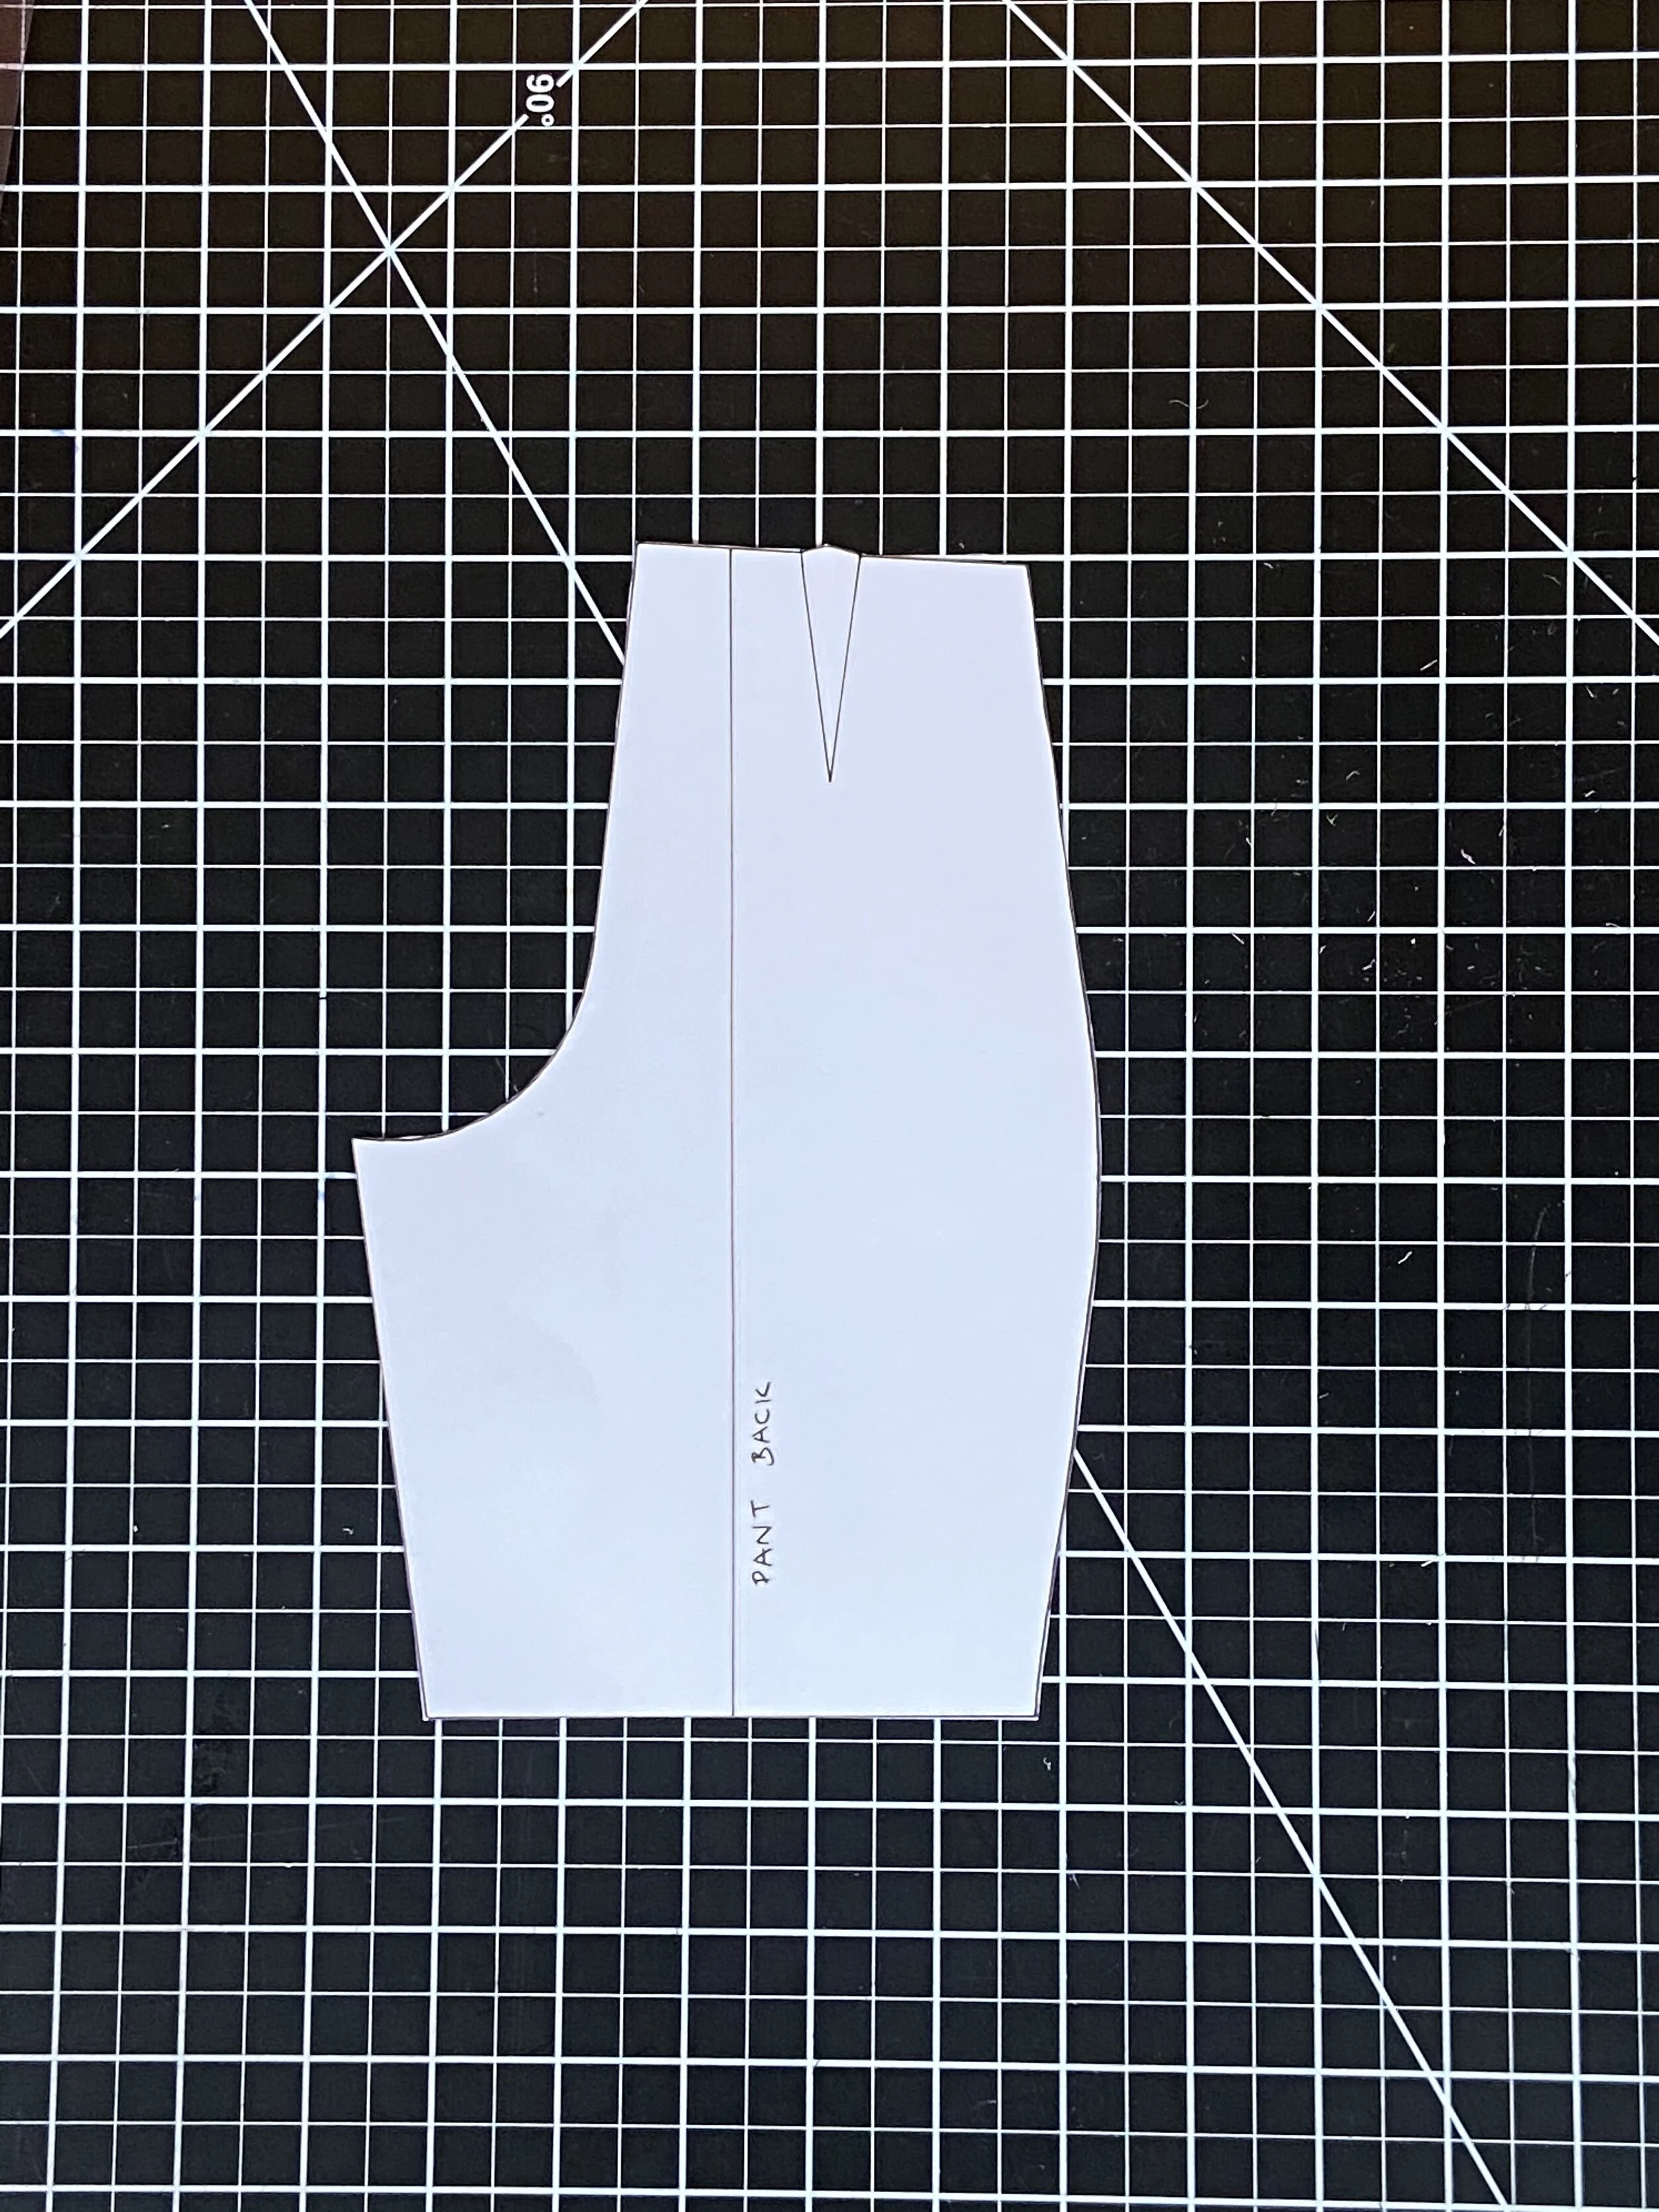
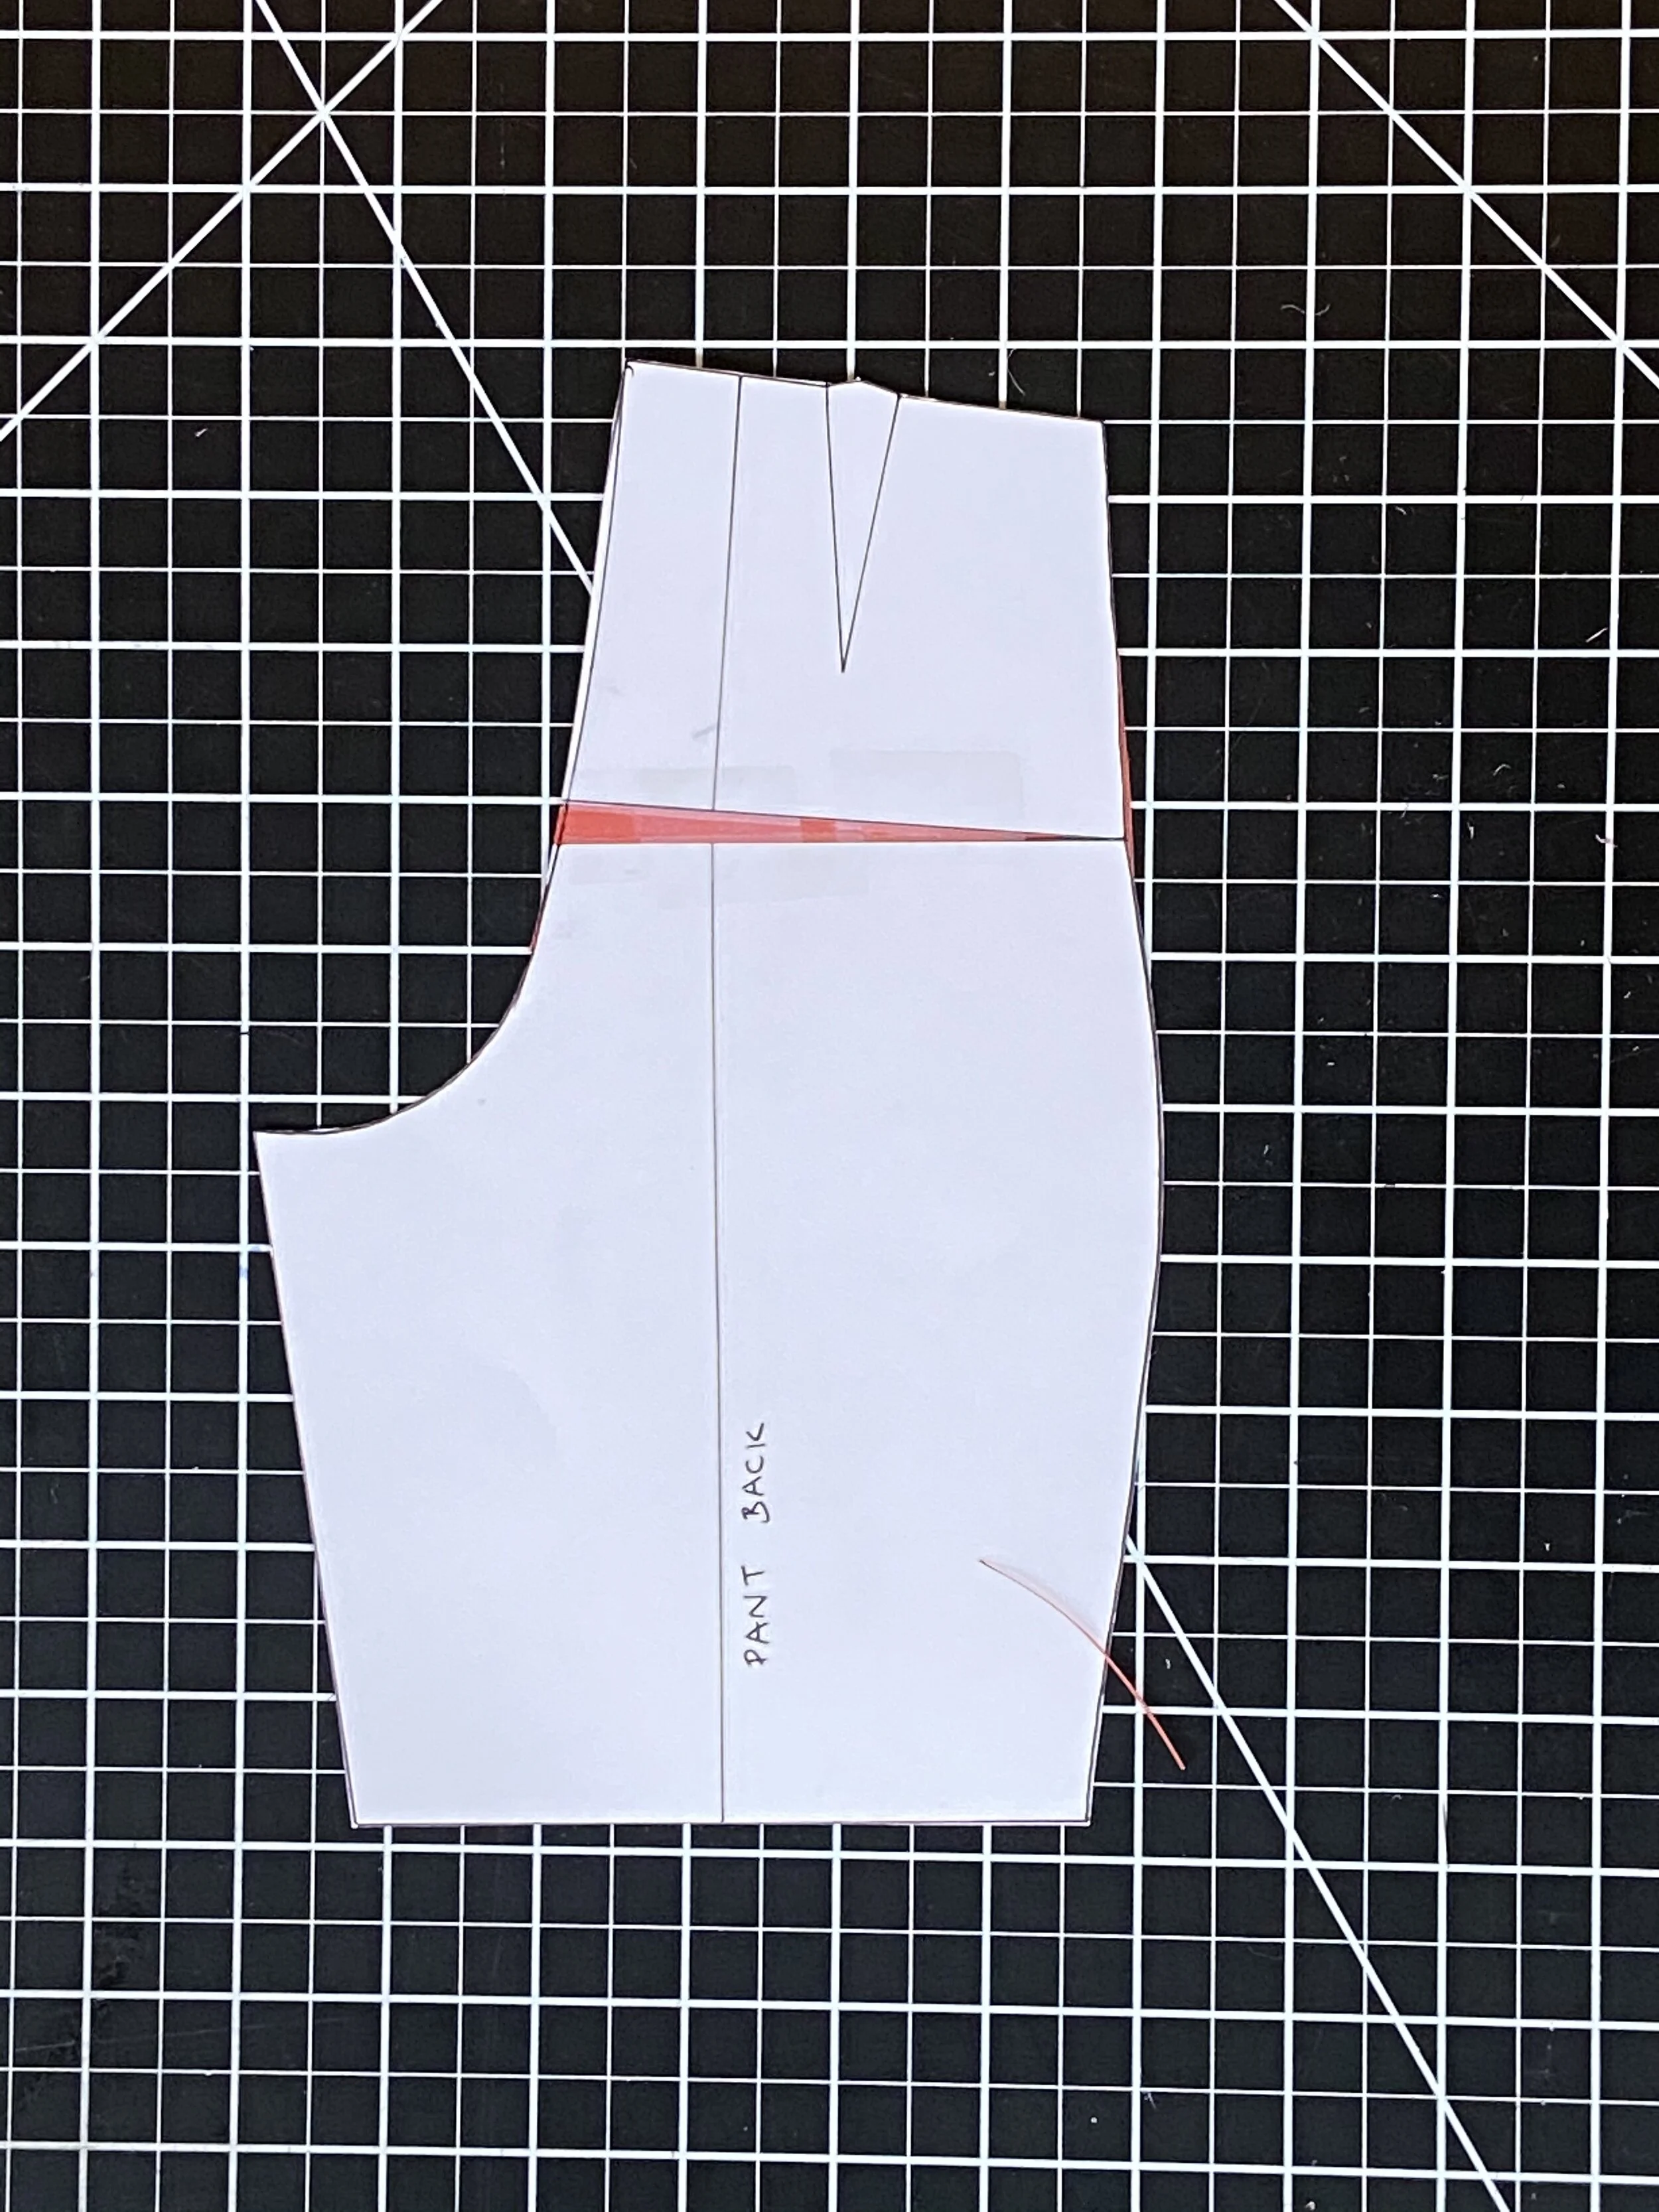
I omitted to straighten the grainline on the top section to carry on from the bottom section. It clearly shouldn’t be at an angle!
Conversely, I’ve learnt that sometimes I need to shorten the front crotch and add a little more to the back. This makes little sense as I’m essentially ending up with the same crotch length but it has weirdly yet definitely improved the fit. I imagine this is because it changes the overall shape of the crotch and pushes more fabric to the back which is definitely where my fairly prestigious booty requires it! I’m also learning that a sway back adjustment may be in my future.
The wearing and design ease in pants varies so much - even within patterns from the same designer. So for me, it has to be thought through each time. I have tried in the past to use my trouser block to compare with all pants patterns, but this was fraught with problems and ended up seeming to cause so many alterations that it was overwhelming. And not really successful.
The trouser fitting that I have done over the past 7 or 8 years has taken me on quite the journey. From the pair of floral palazzo pants where I didn’t understand small incremental adjustments were a thing and added so much to the crotch length (I think 2 inches front and back?!?!) that it basically came down to around mid thigh; to the hours and hours and hours I spent on fitting my first pair of jeans - Gingers - where I completely over-fit them and the waistband is way too tight and the calf and hem so narrow I can barely get my heel through the opening. But the rise and hip fit were perfect!
At the time I was absolutely thrilled with them and they got worn a lot until I moved on from skinny jeans*.
In terms of construction, other than the closure, you basically have 4 seams; inseams and side seams plus hem and a waistband. Oh and pockets. I LOVE sewing slash pockets on pants; pressing the edge after you flip the pocket bag to the inside is one of my favourite parts of sewing anything! However, I loathe sewing side seam pockets.
Honestly, if you have good instructions trousers are not at all hard to sew. Sewing a fly isn’t intuitive and I rarely get it perfect, but good instructions, concentration and slow stitching help. I actually find the instructions in McCalls patterns by far the best for inserting a zip fly.
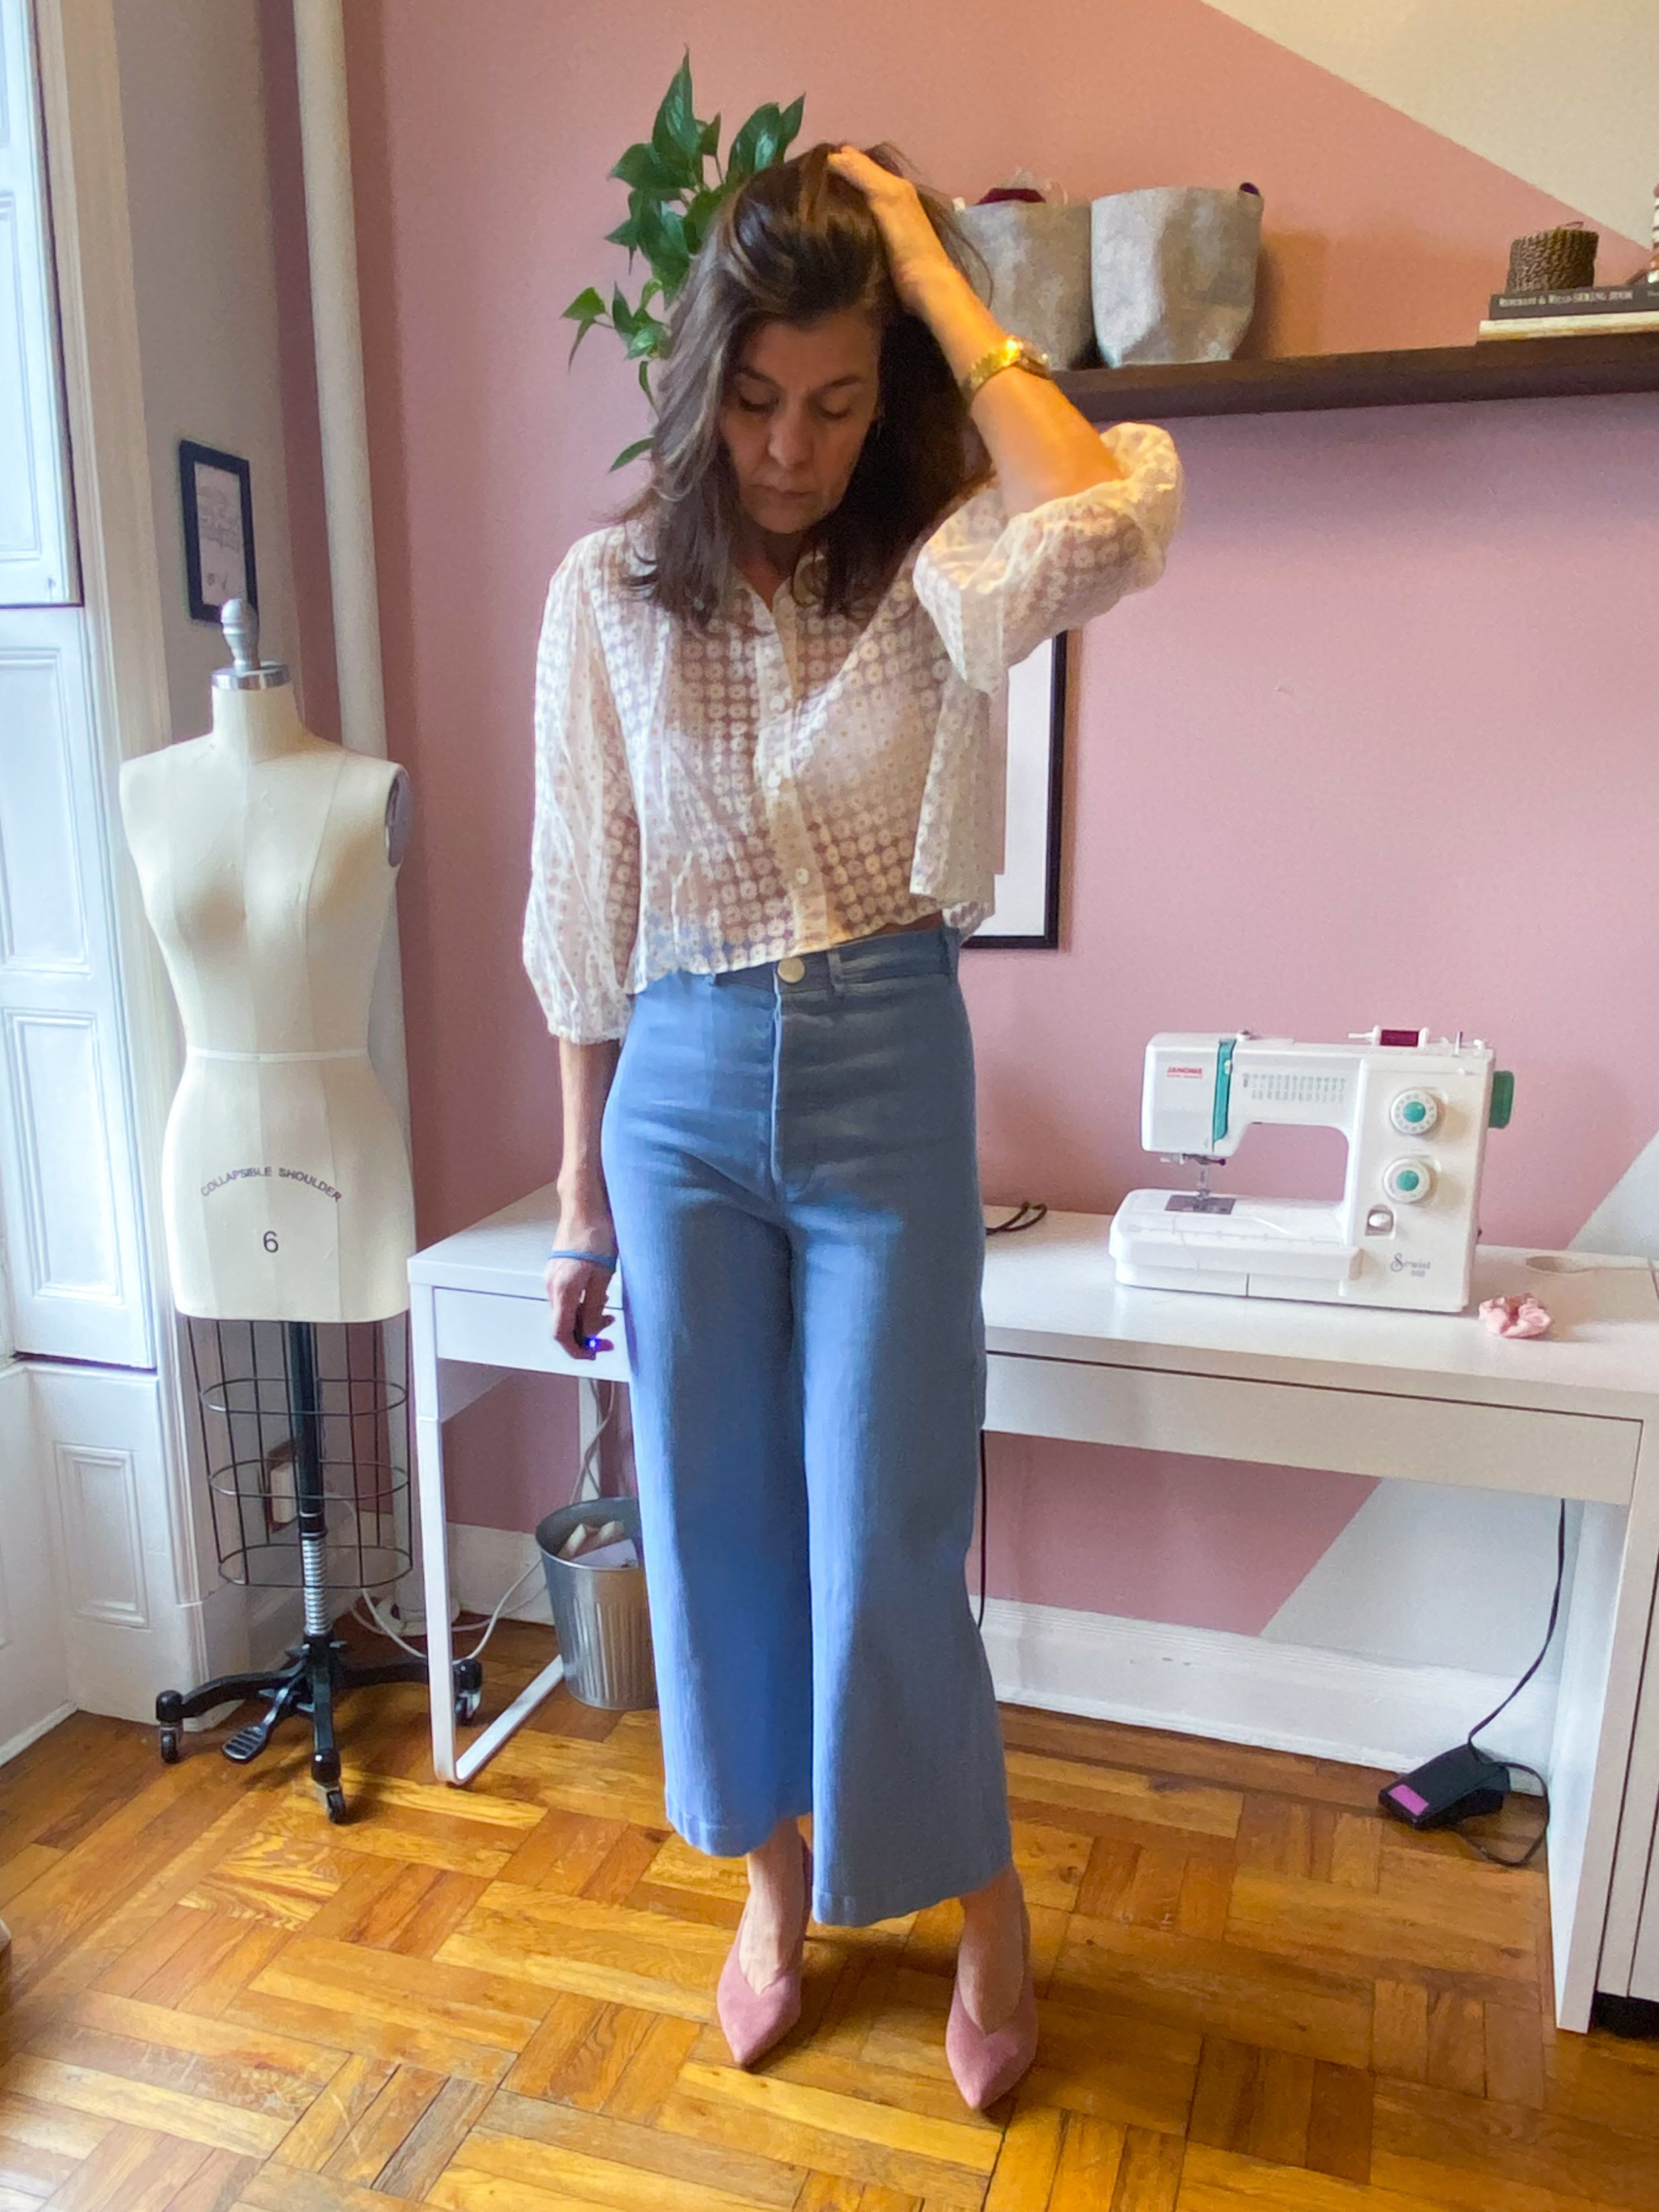
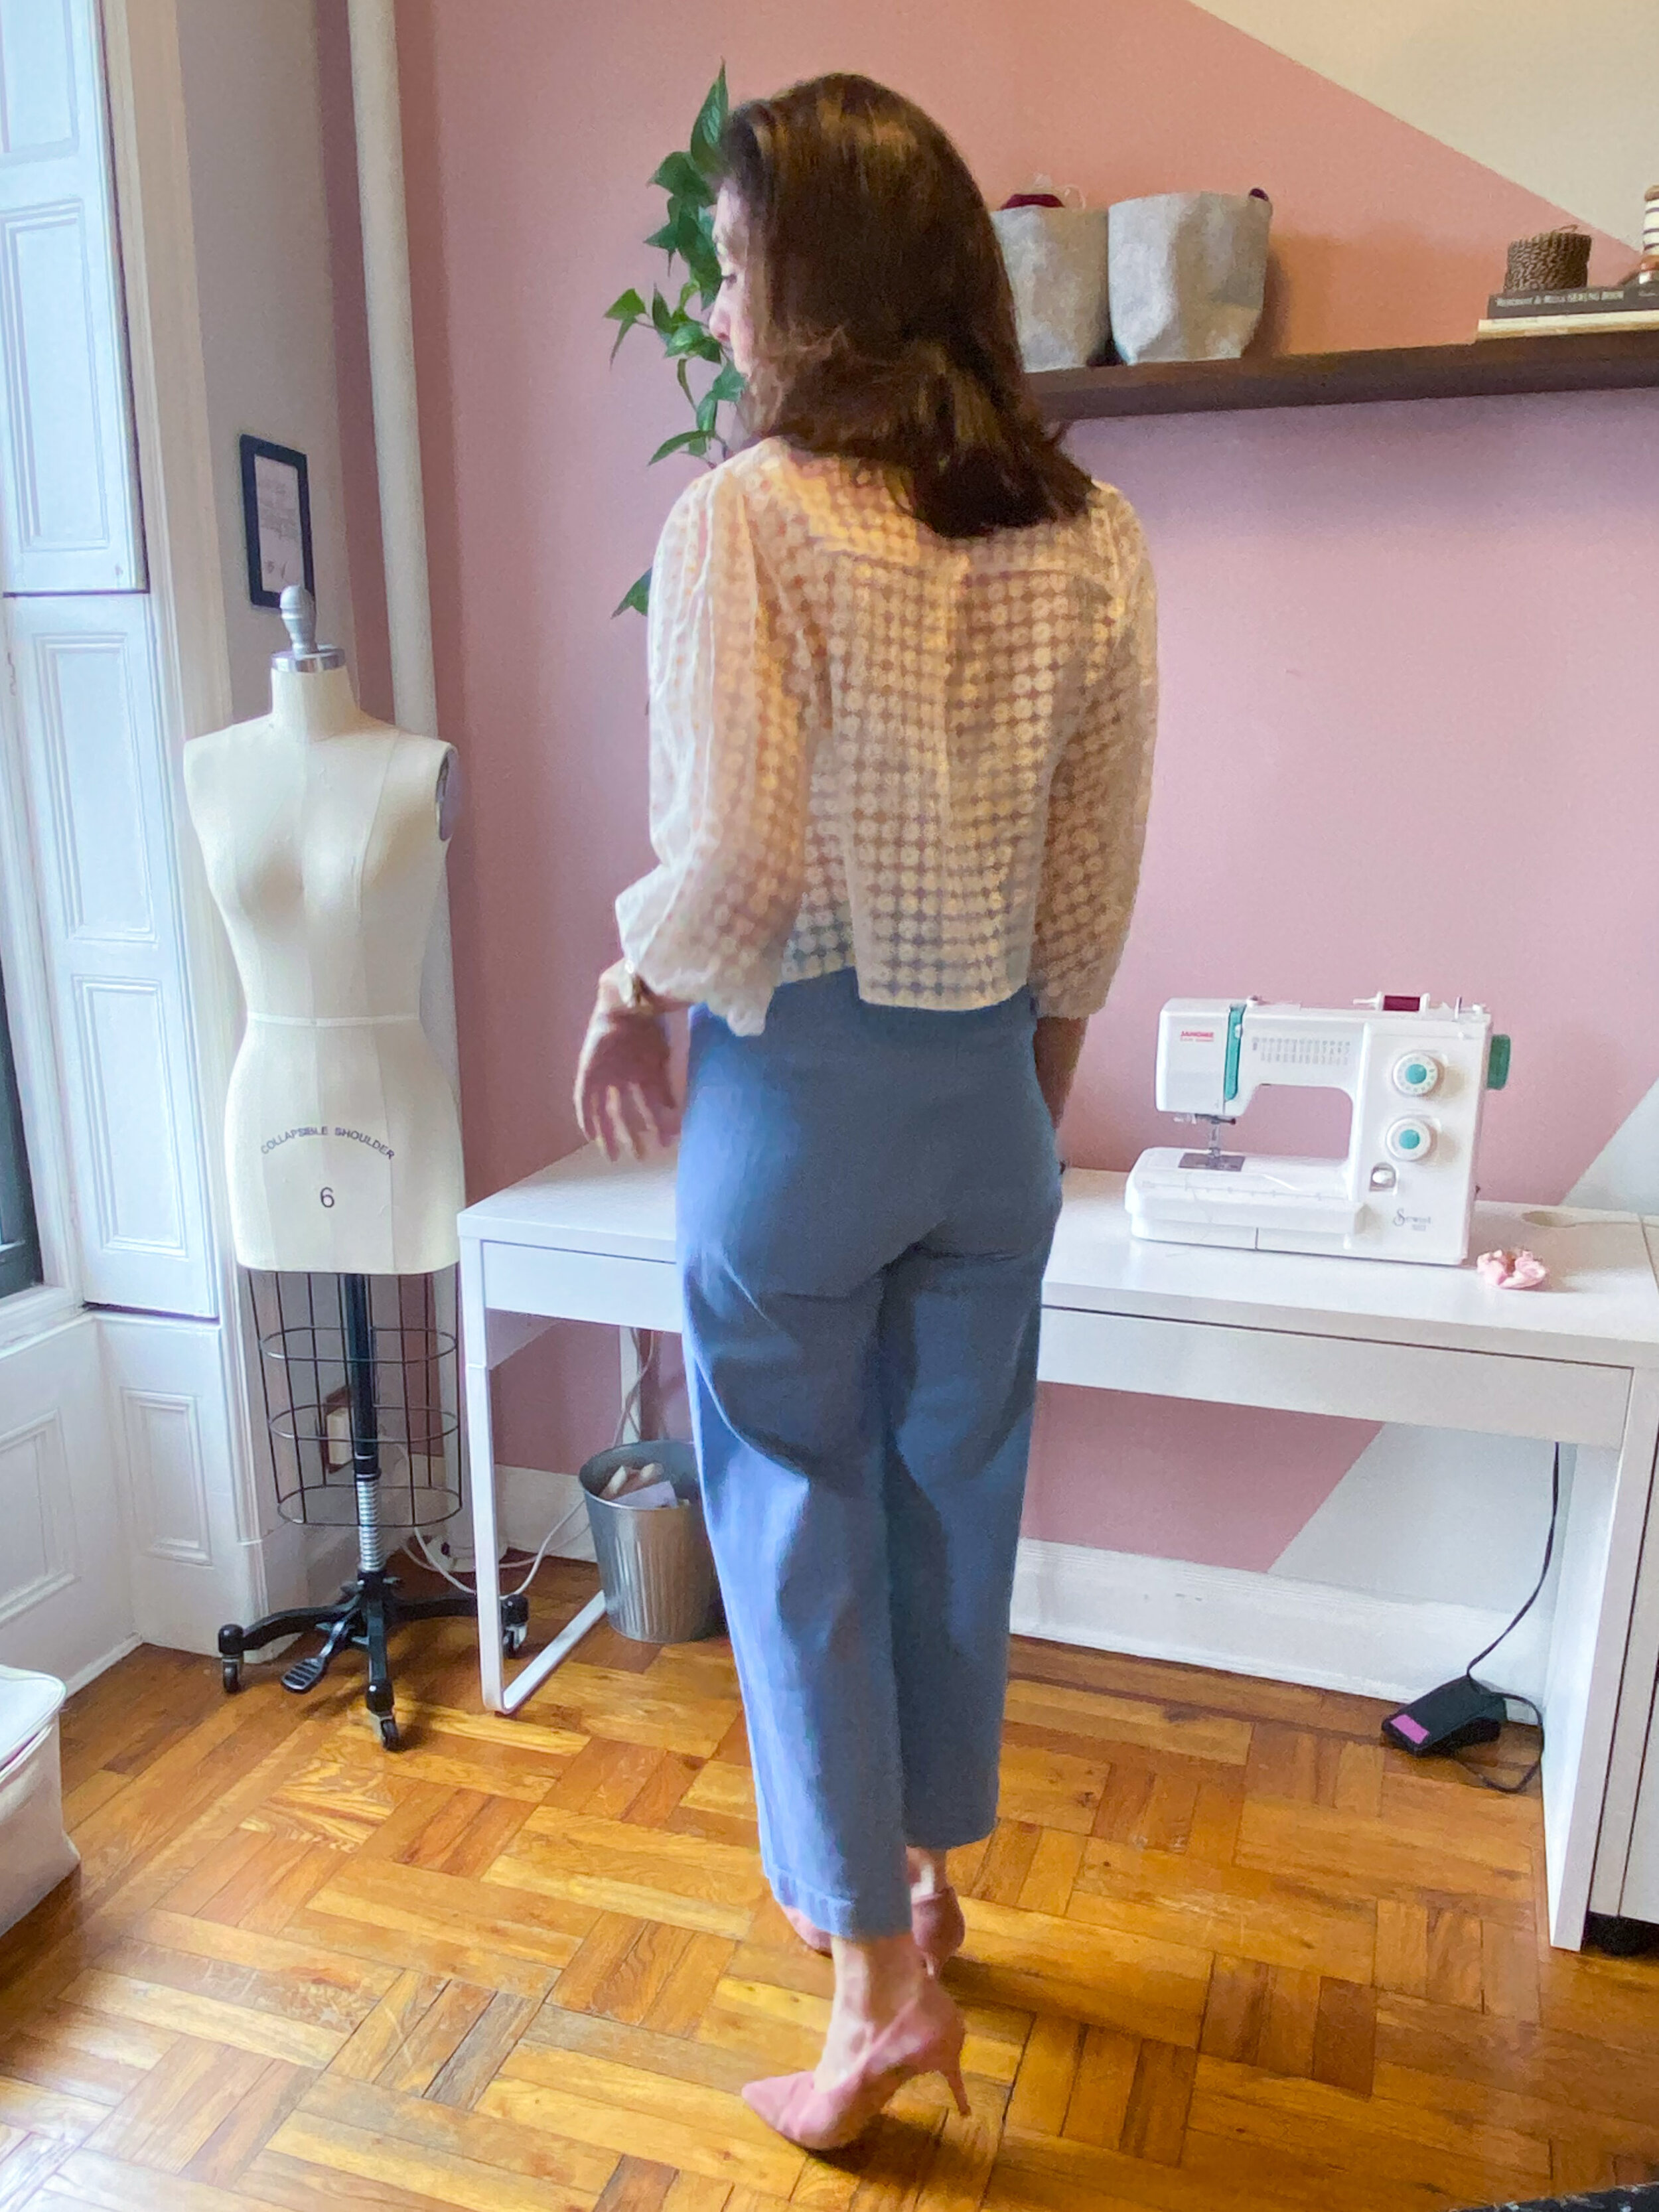
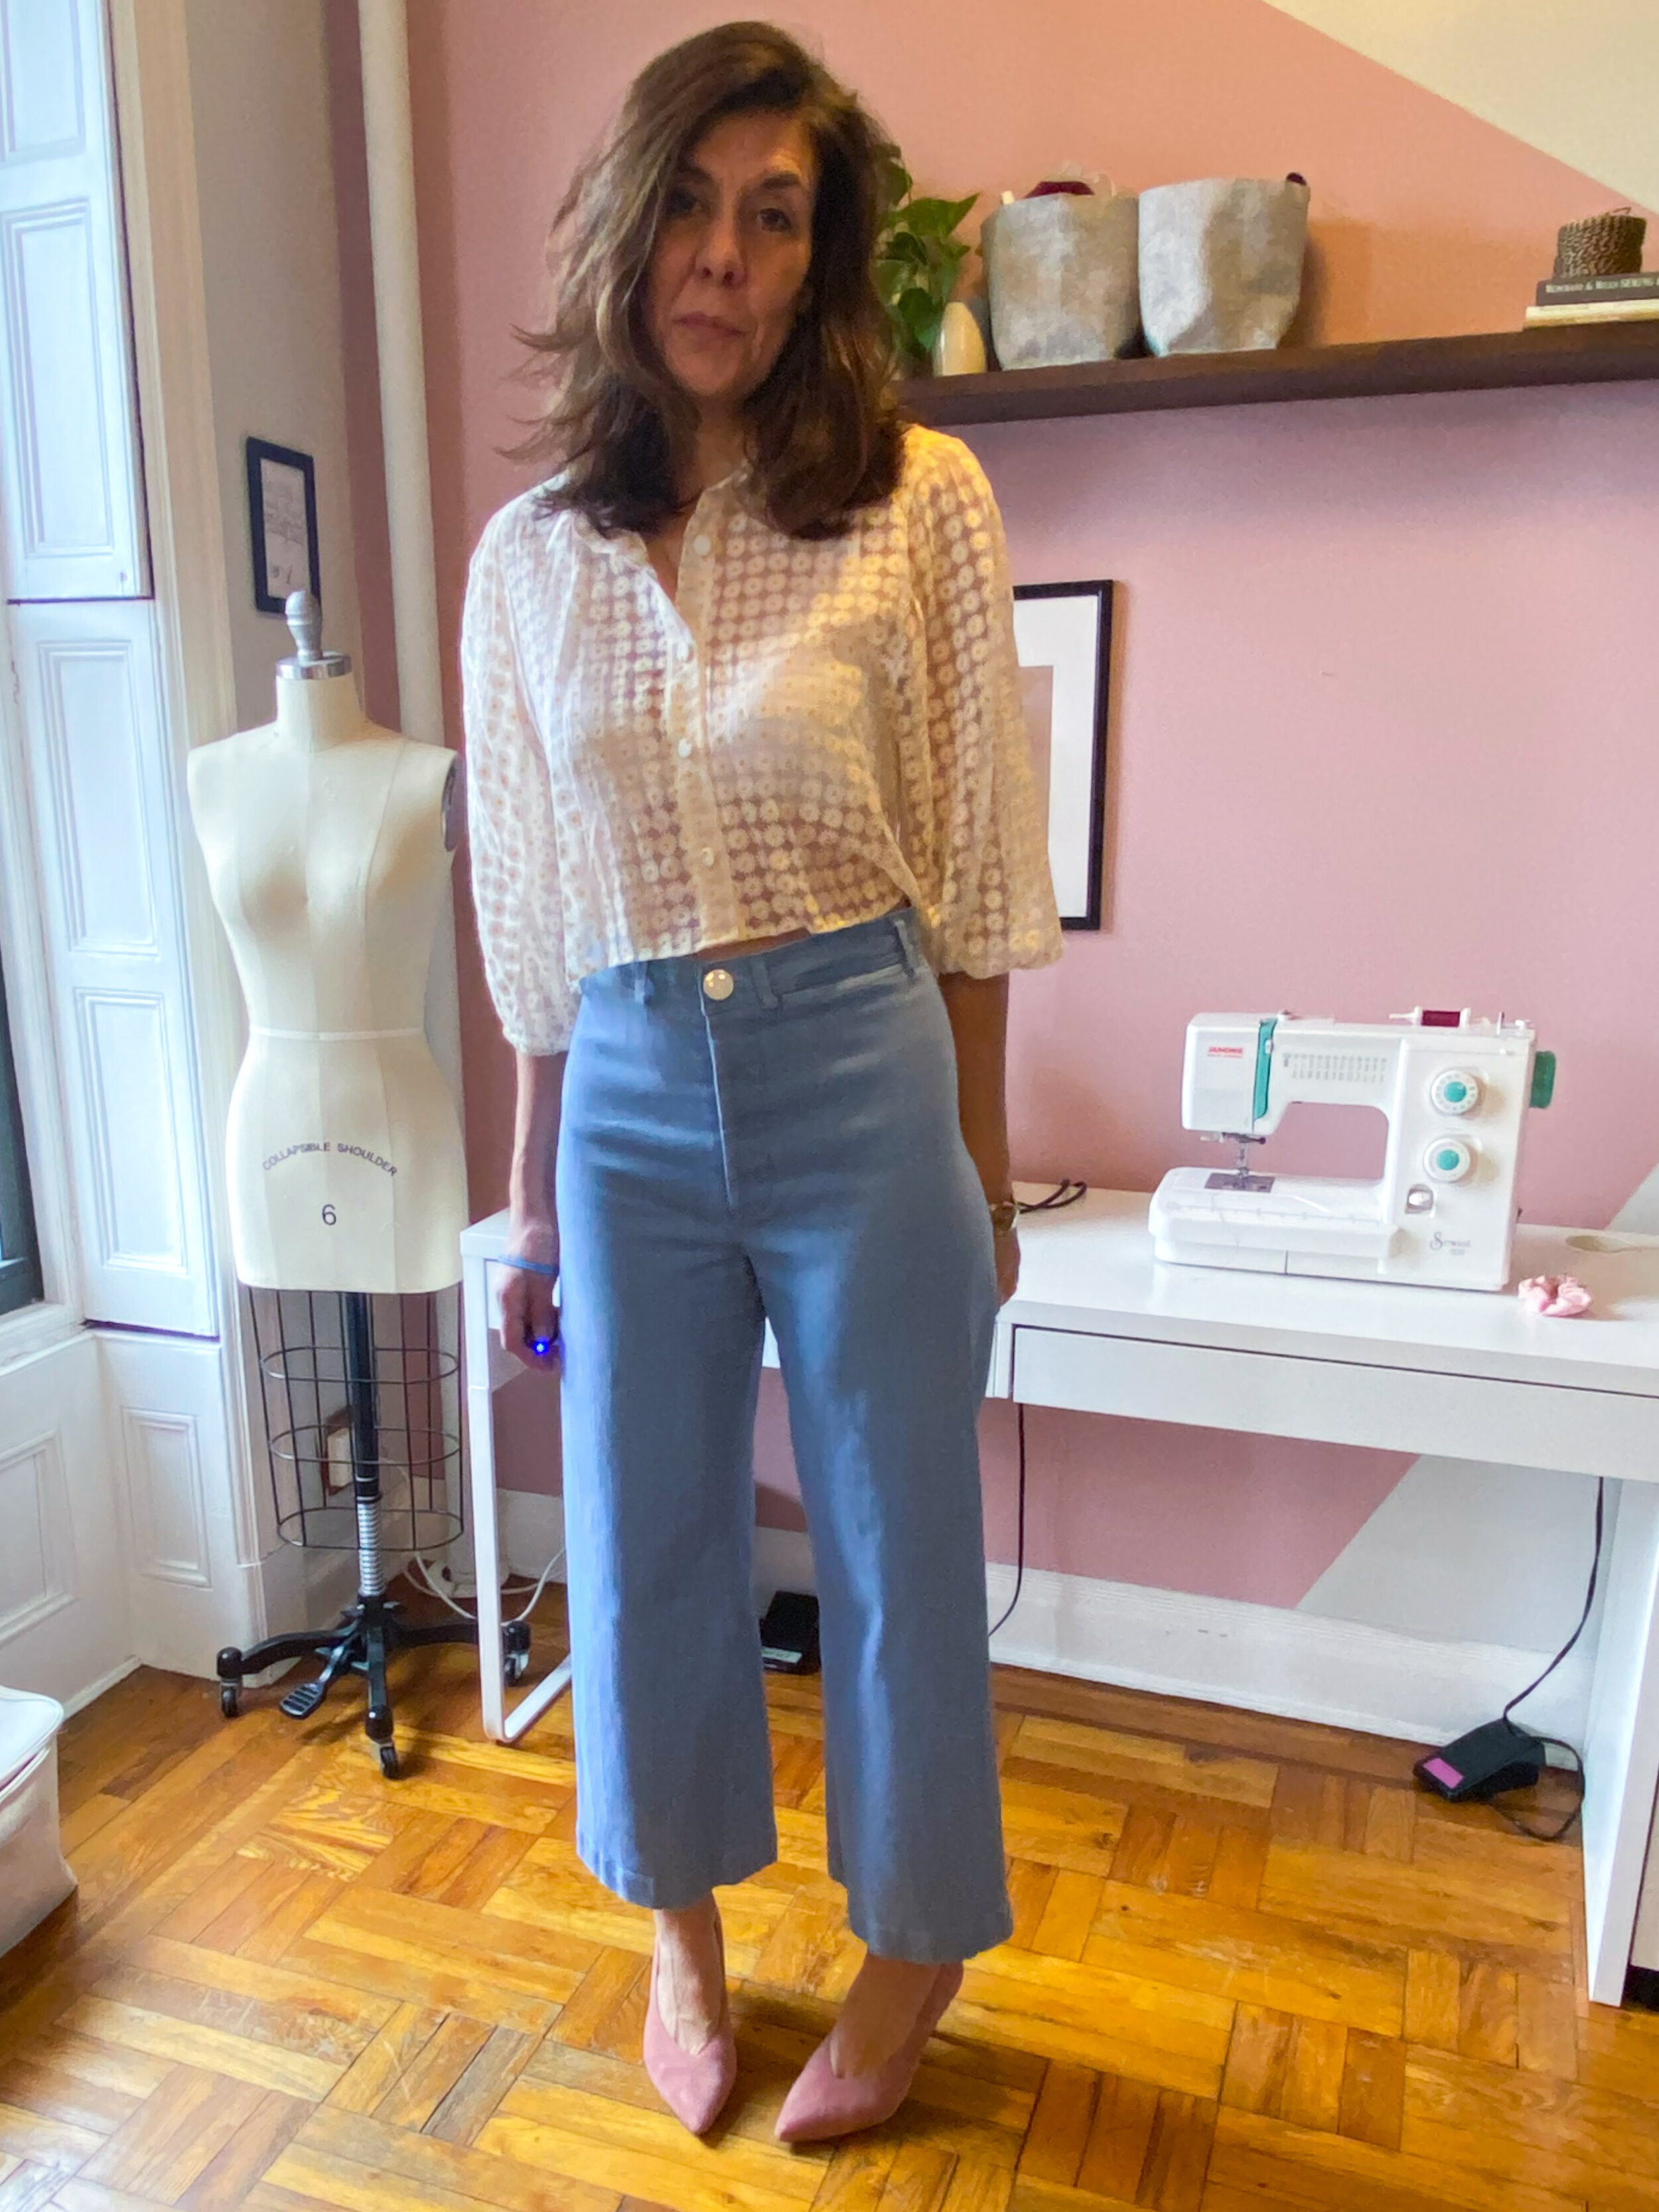
If you visit the bottoms section of this site, you can see the numerous pairs of pants I have made, but I’d like to give you a little review of three patterns that I have really enjoyed making. I wear these a lot and I’ve made more than one pair, which rarely happens.
At number 3:
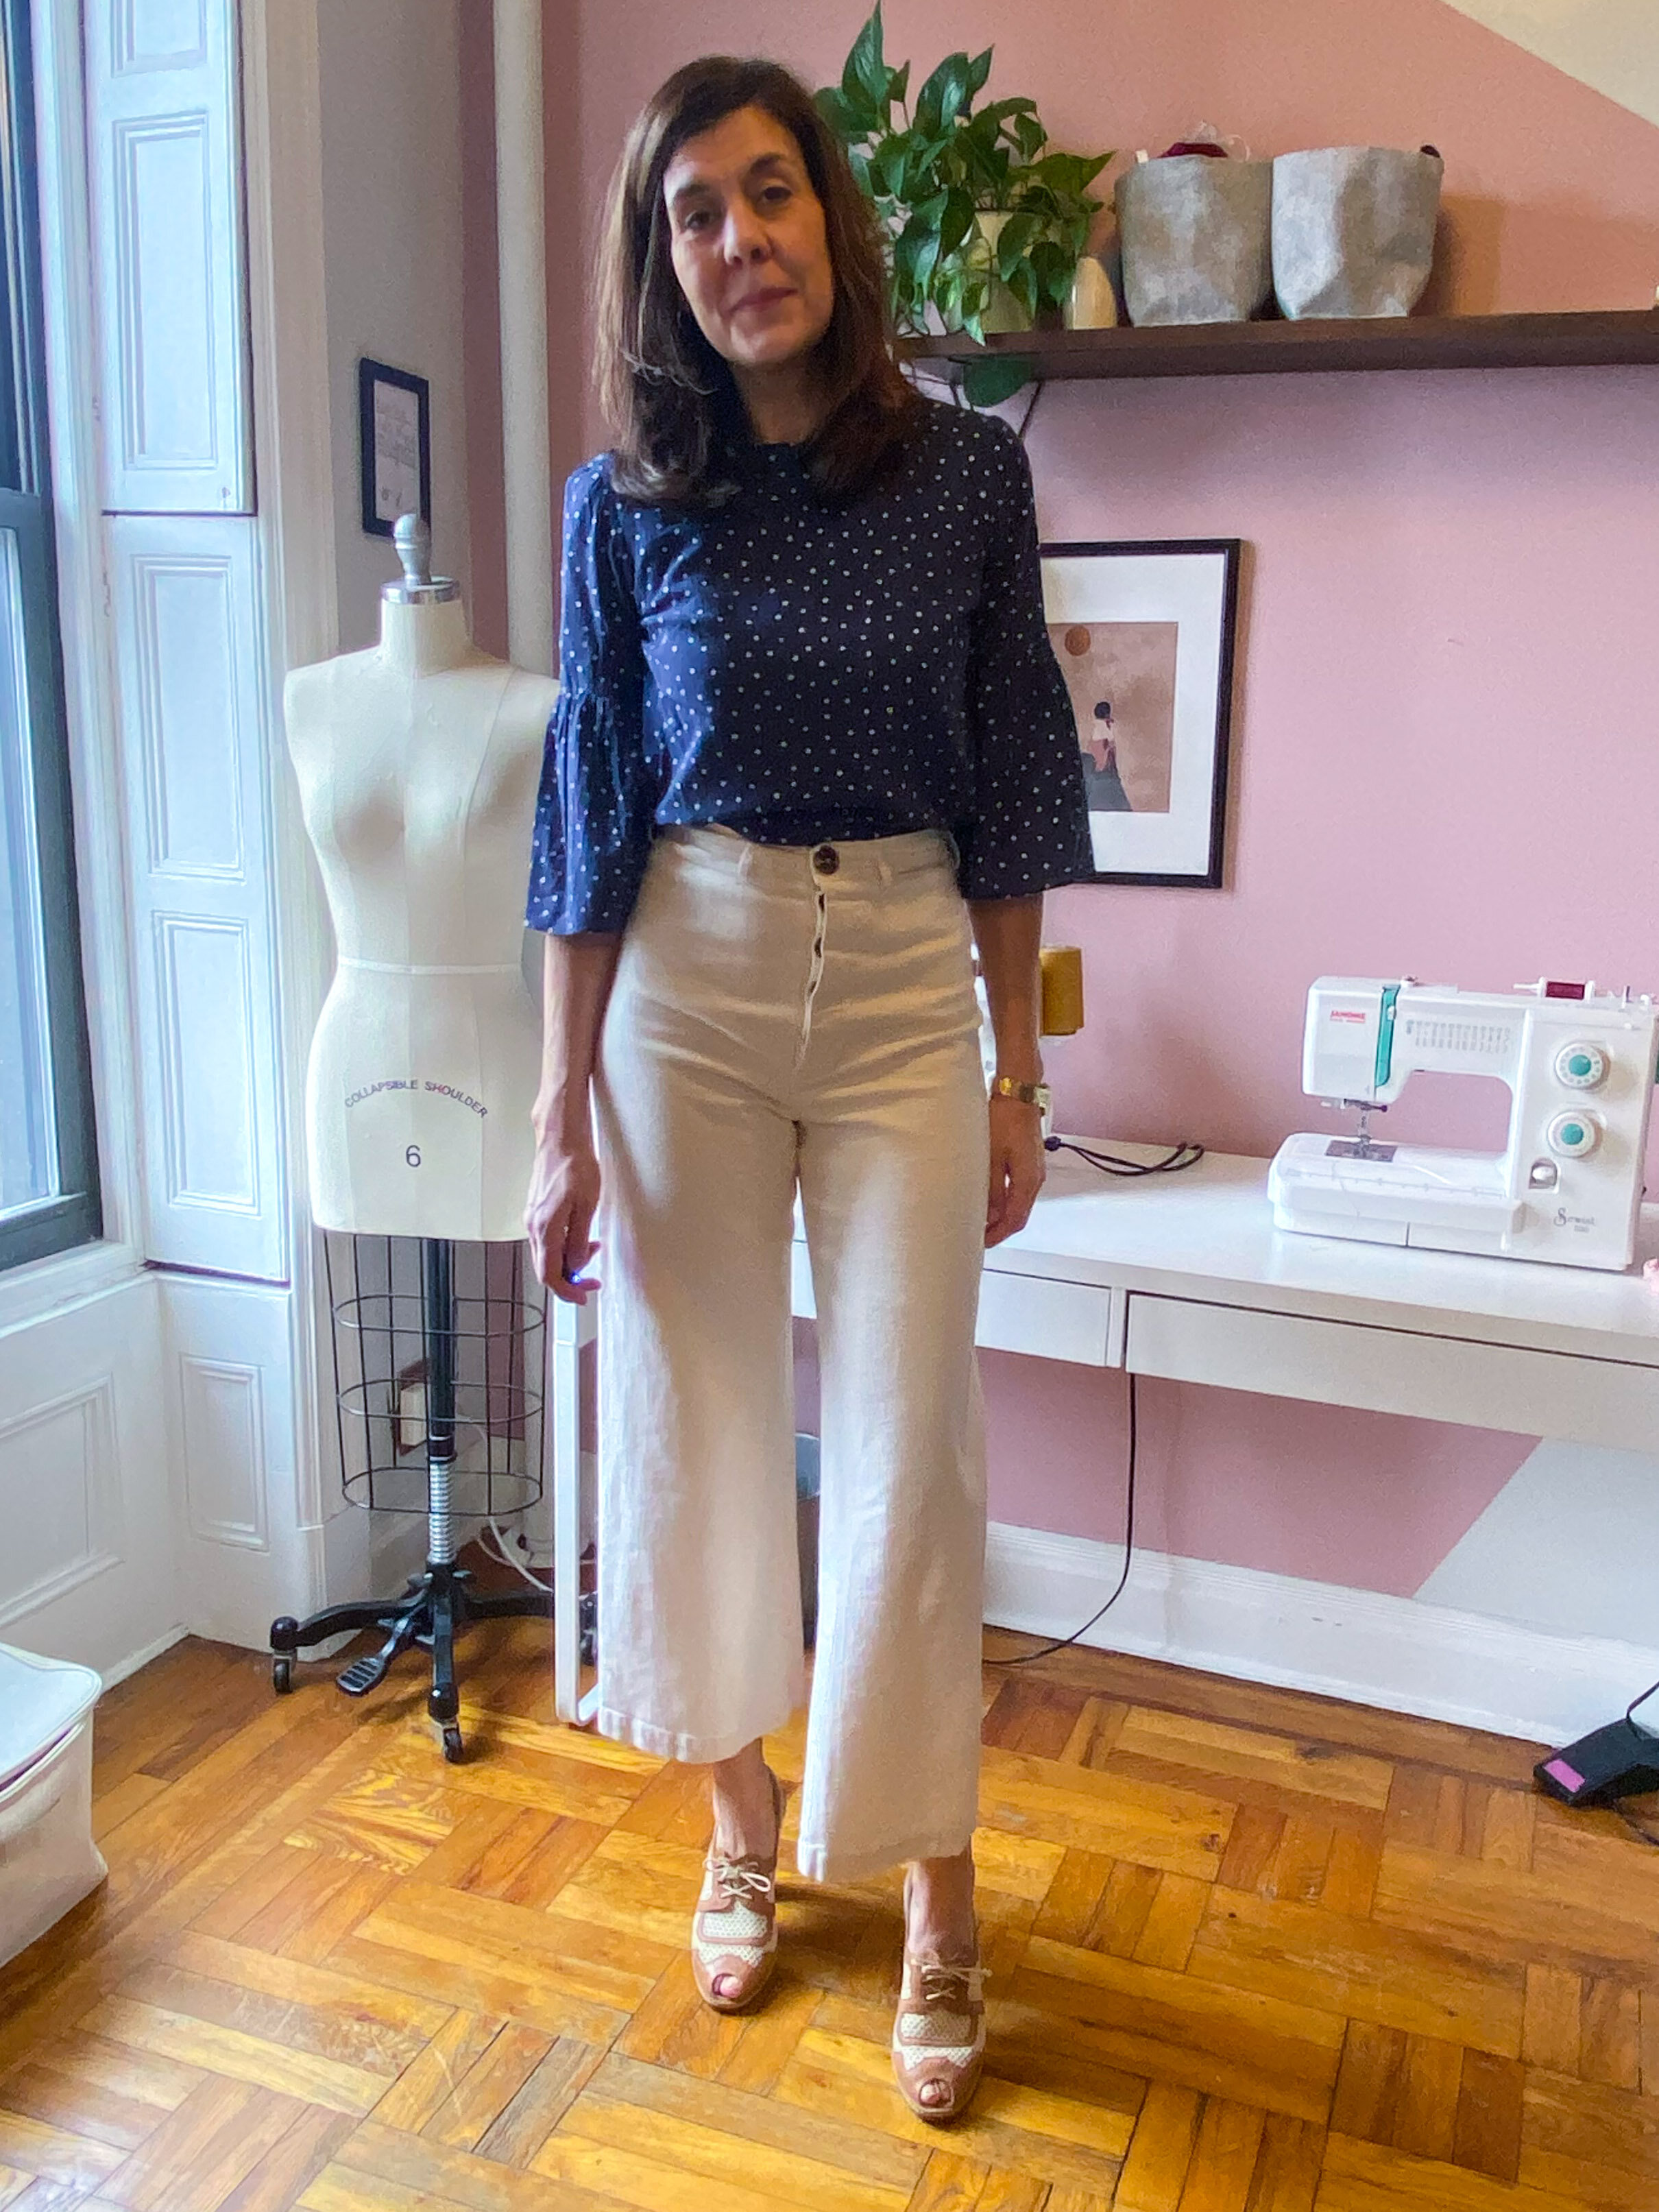
Cream - 10 oz Cone Mills S-gene stretch denim in natural from Threadbare Fabrics, (in 2018). Top, also from 2018 is Simplicity 8602 in a voile from Miss Matatabi. Shoes are bananas stacked heels from Hobbs UK a gajillion years ago.
Cornflower - 11oz Japanese selvedge denim in ‘cornflower’ also from Threadbare Fabrics. Sheer blouse from Zara. Too small but very cute shoes from And Other Stories. (All old).
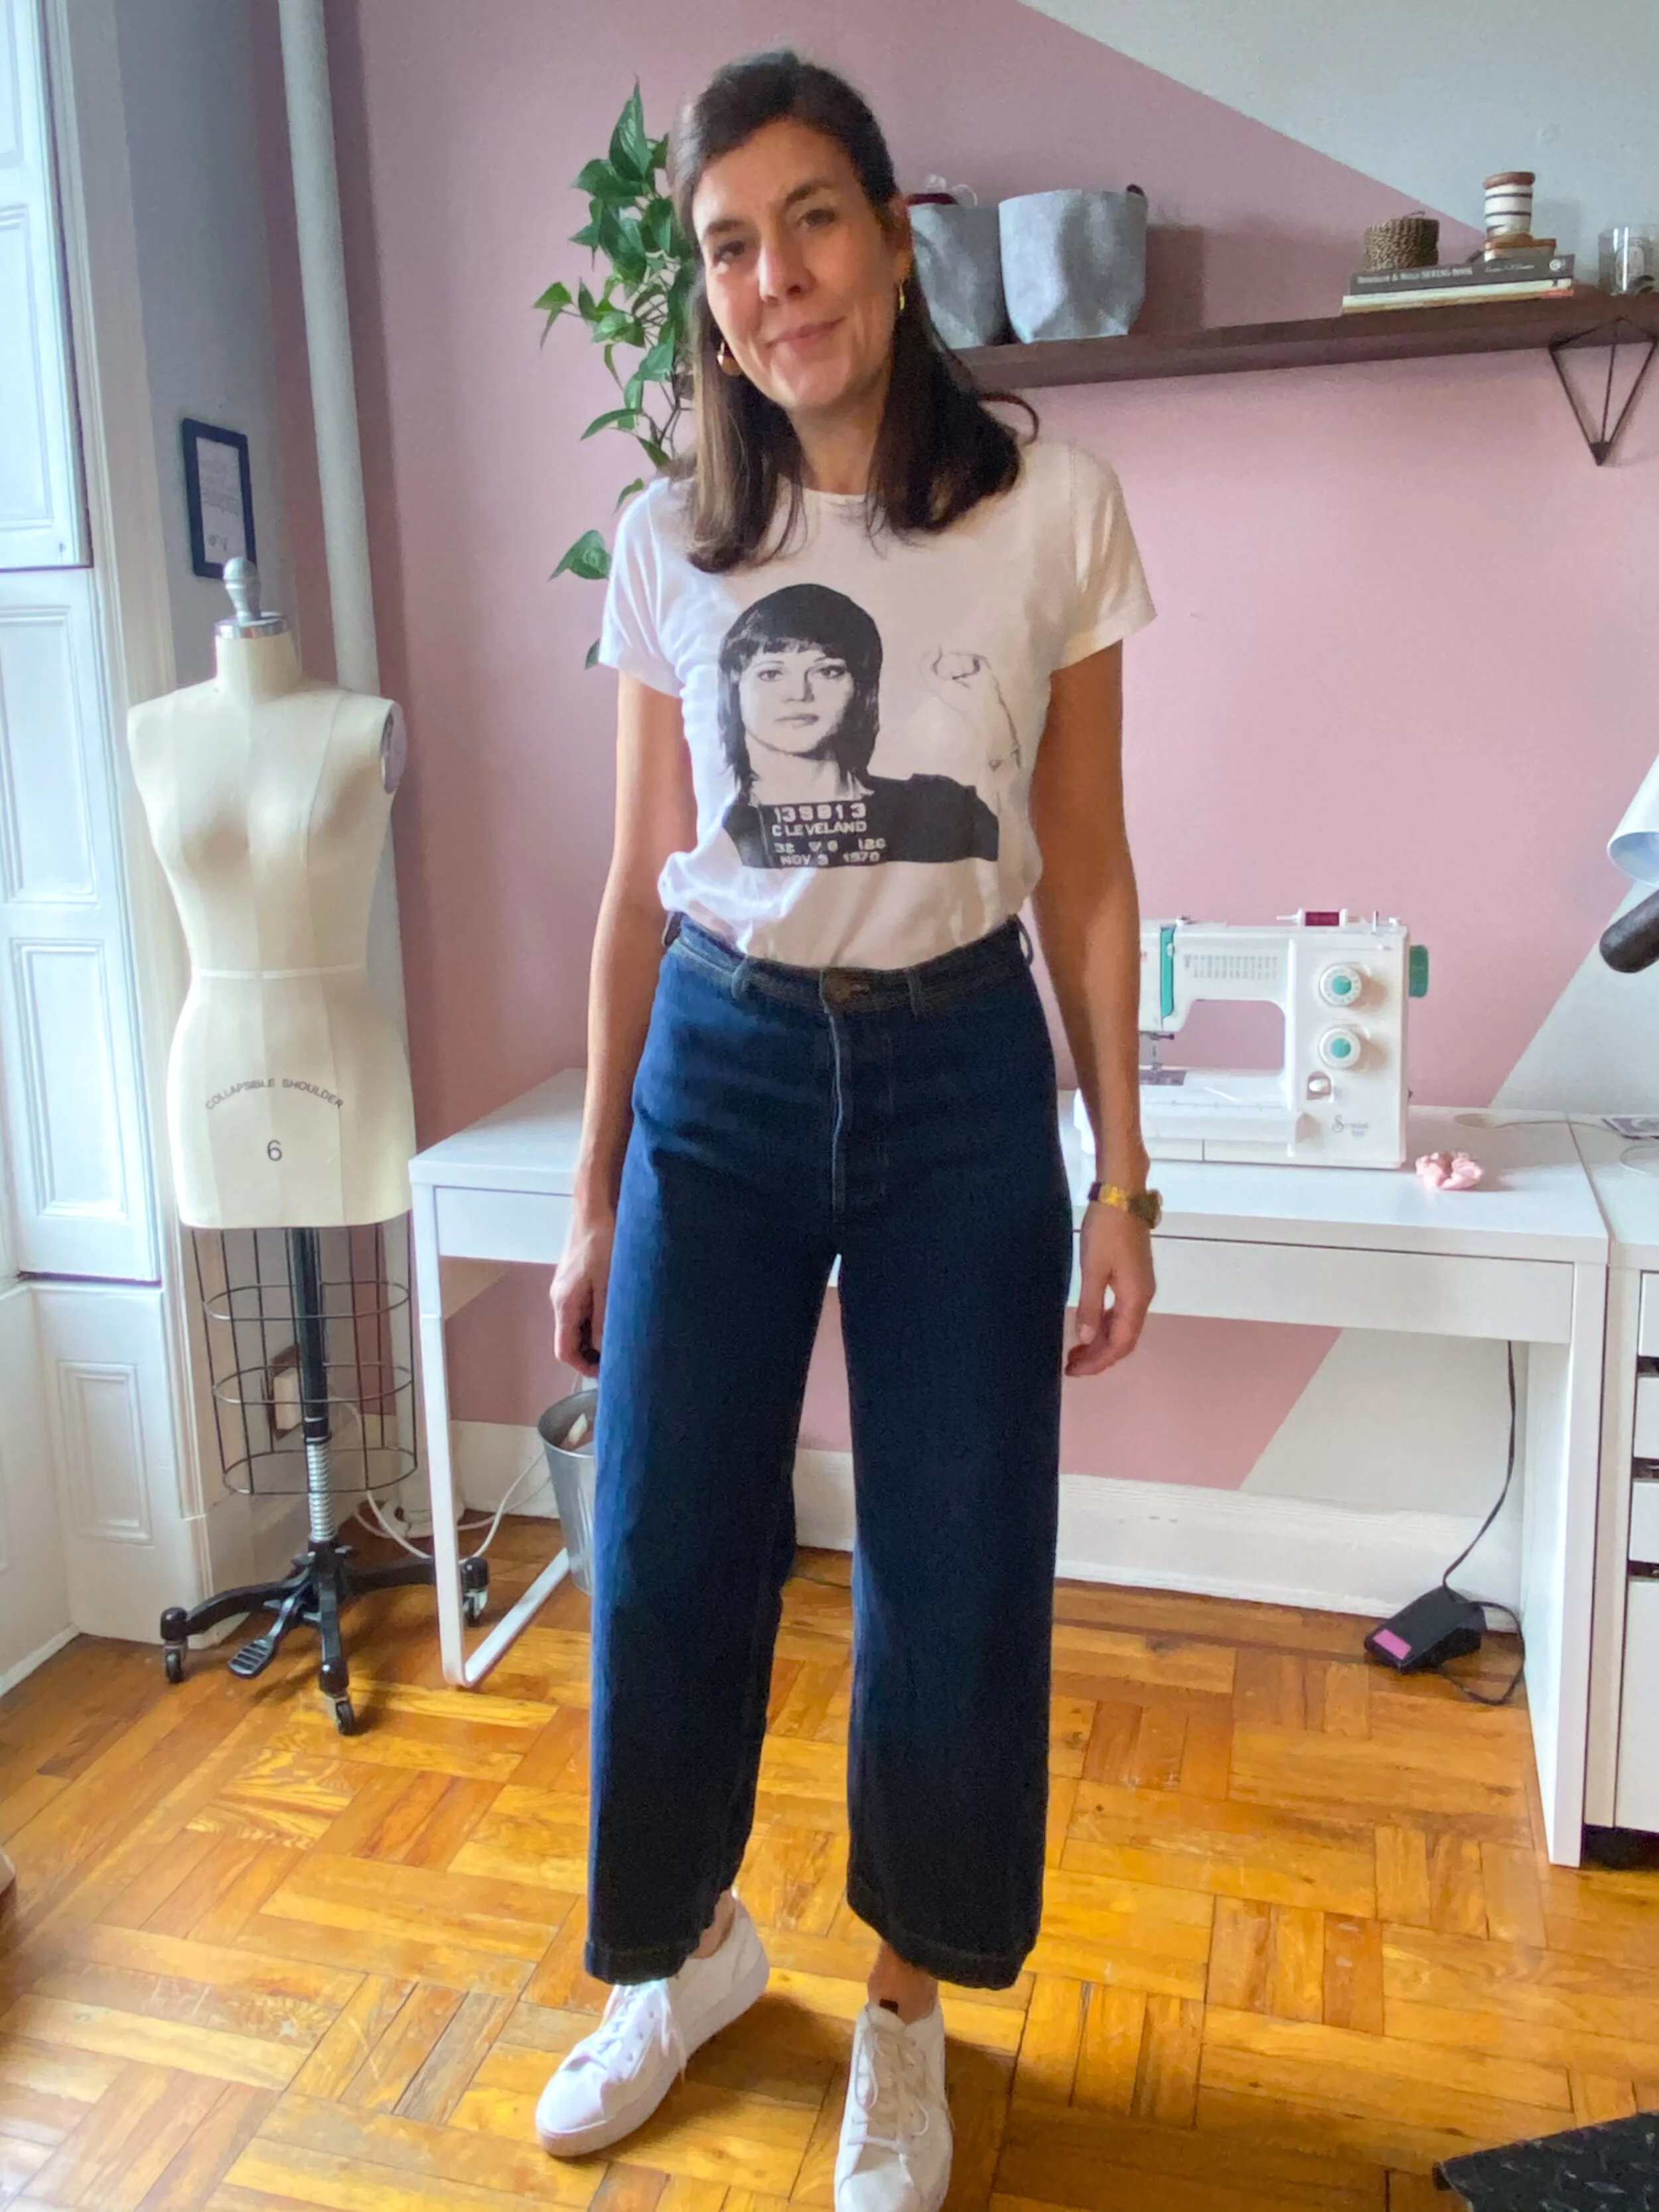
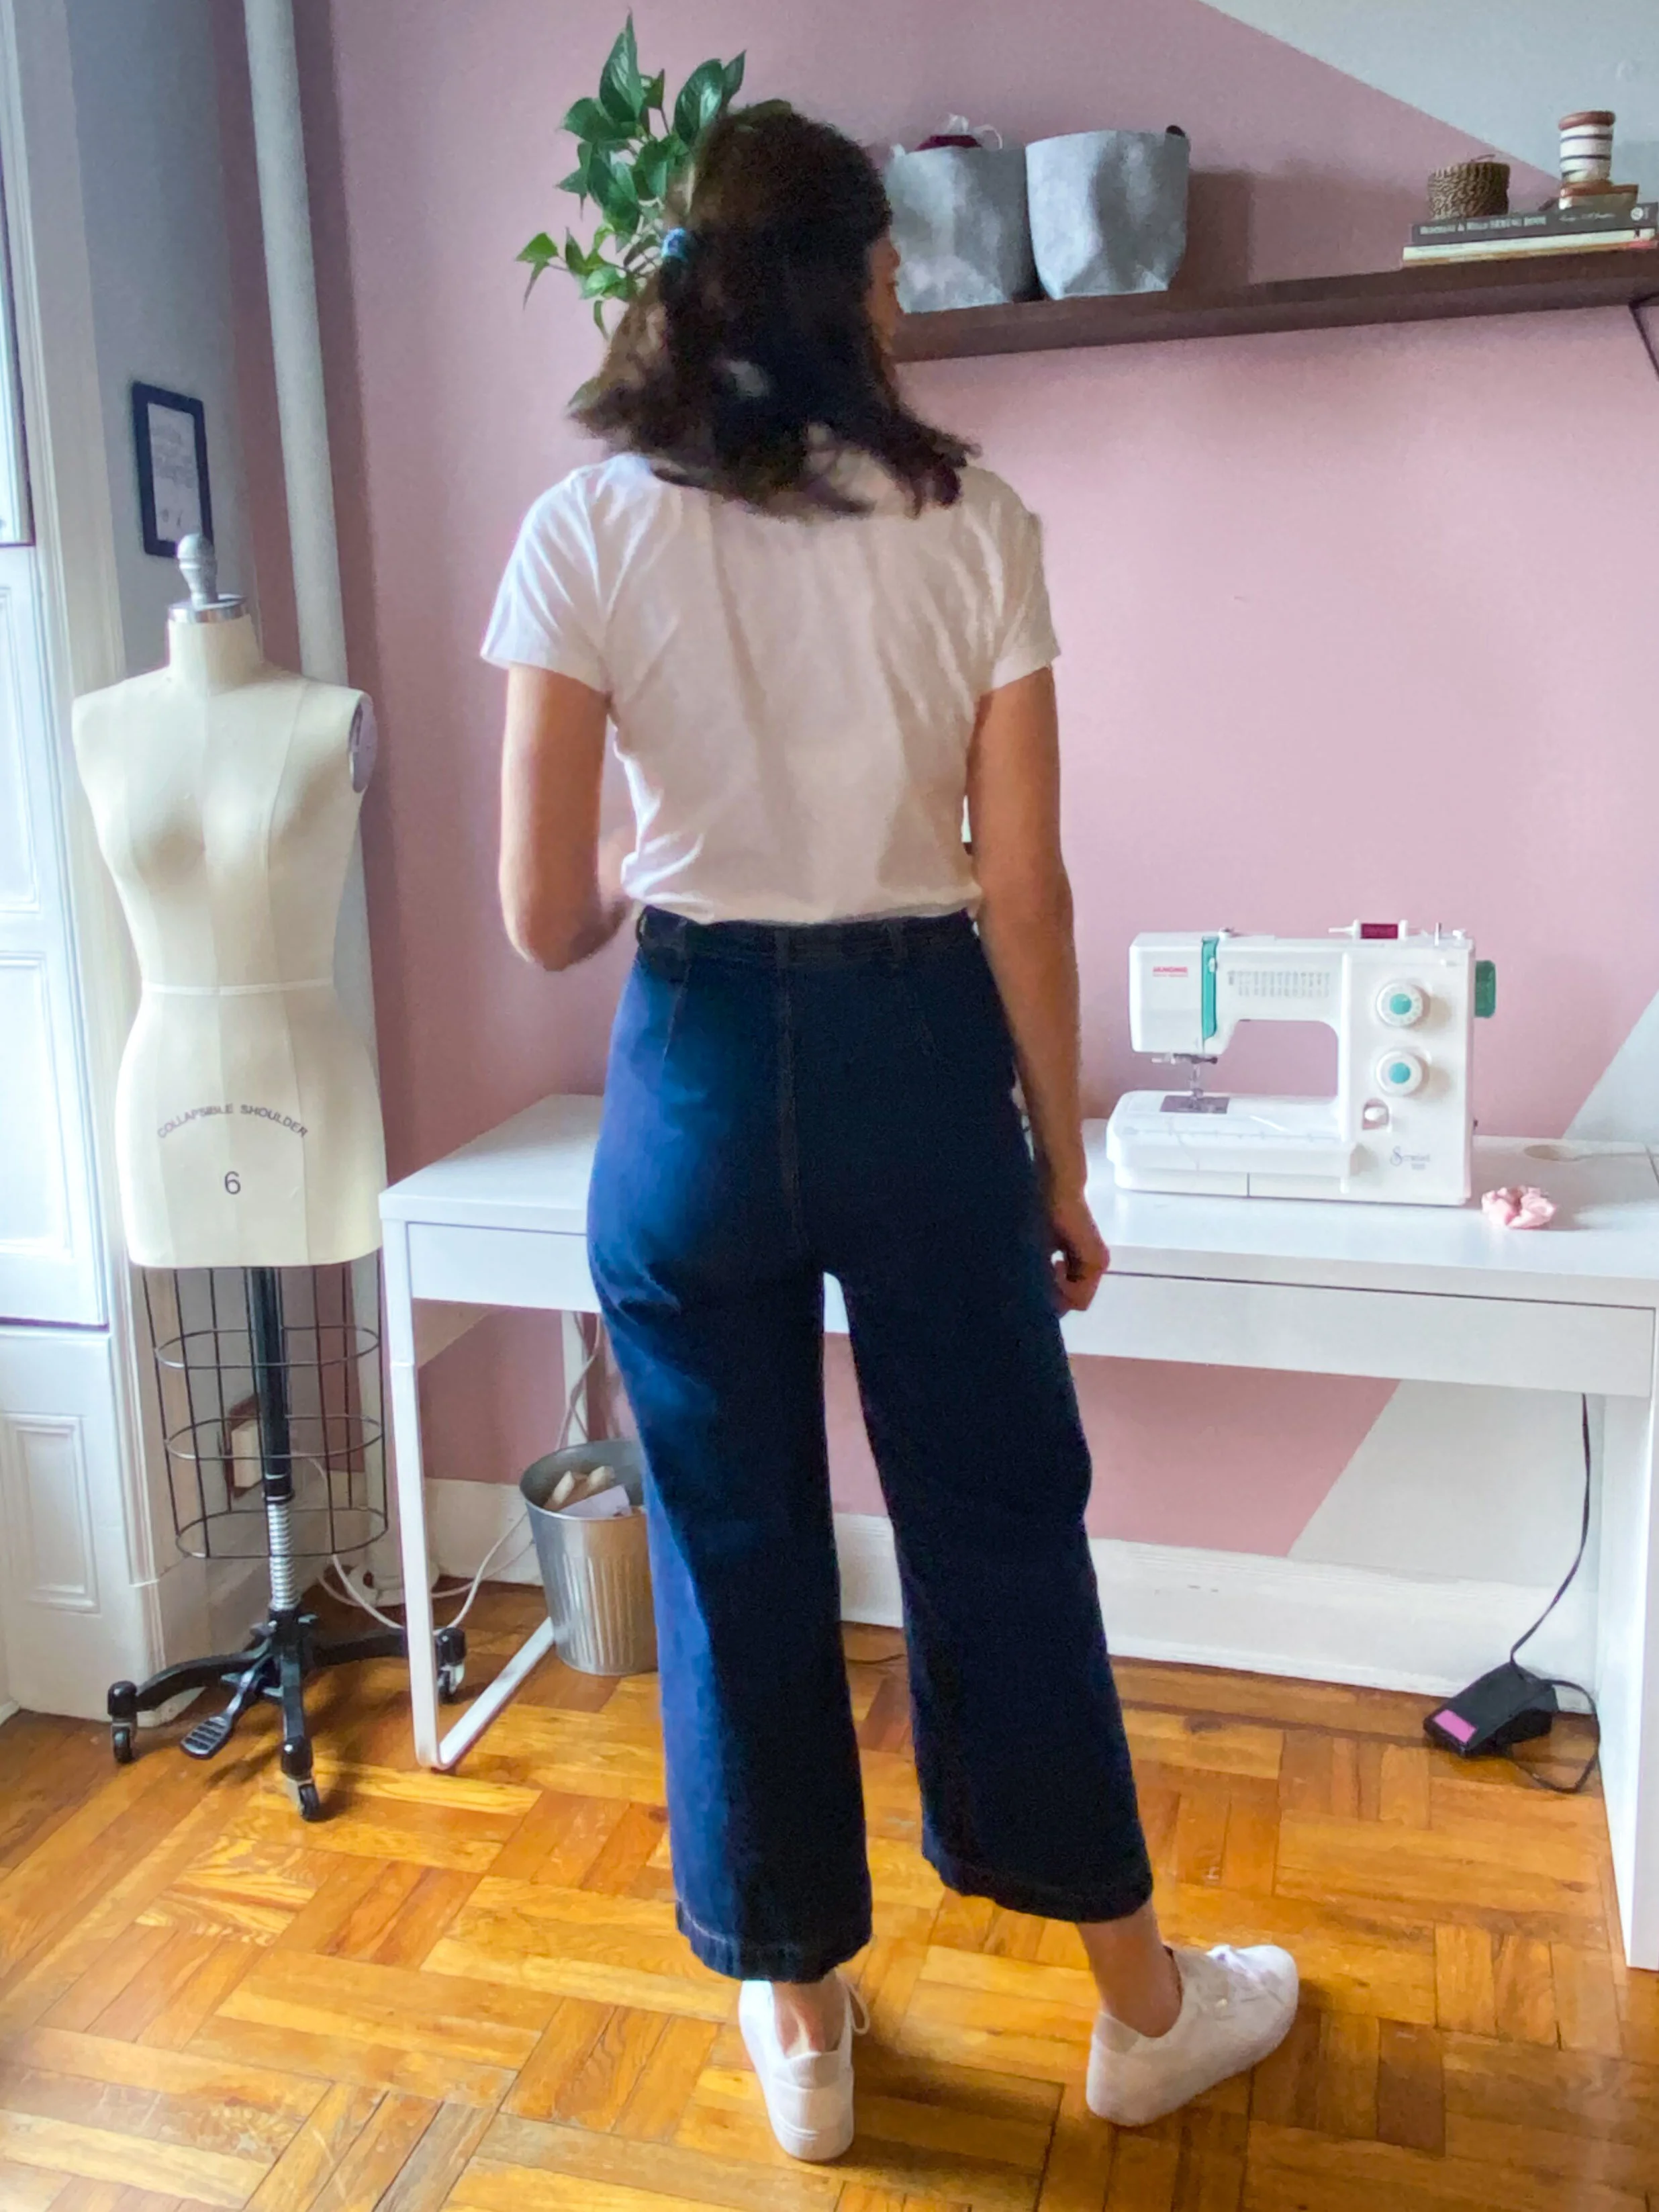
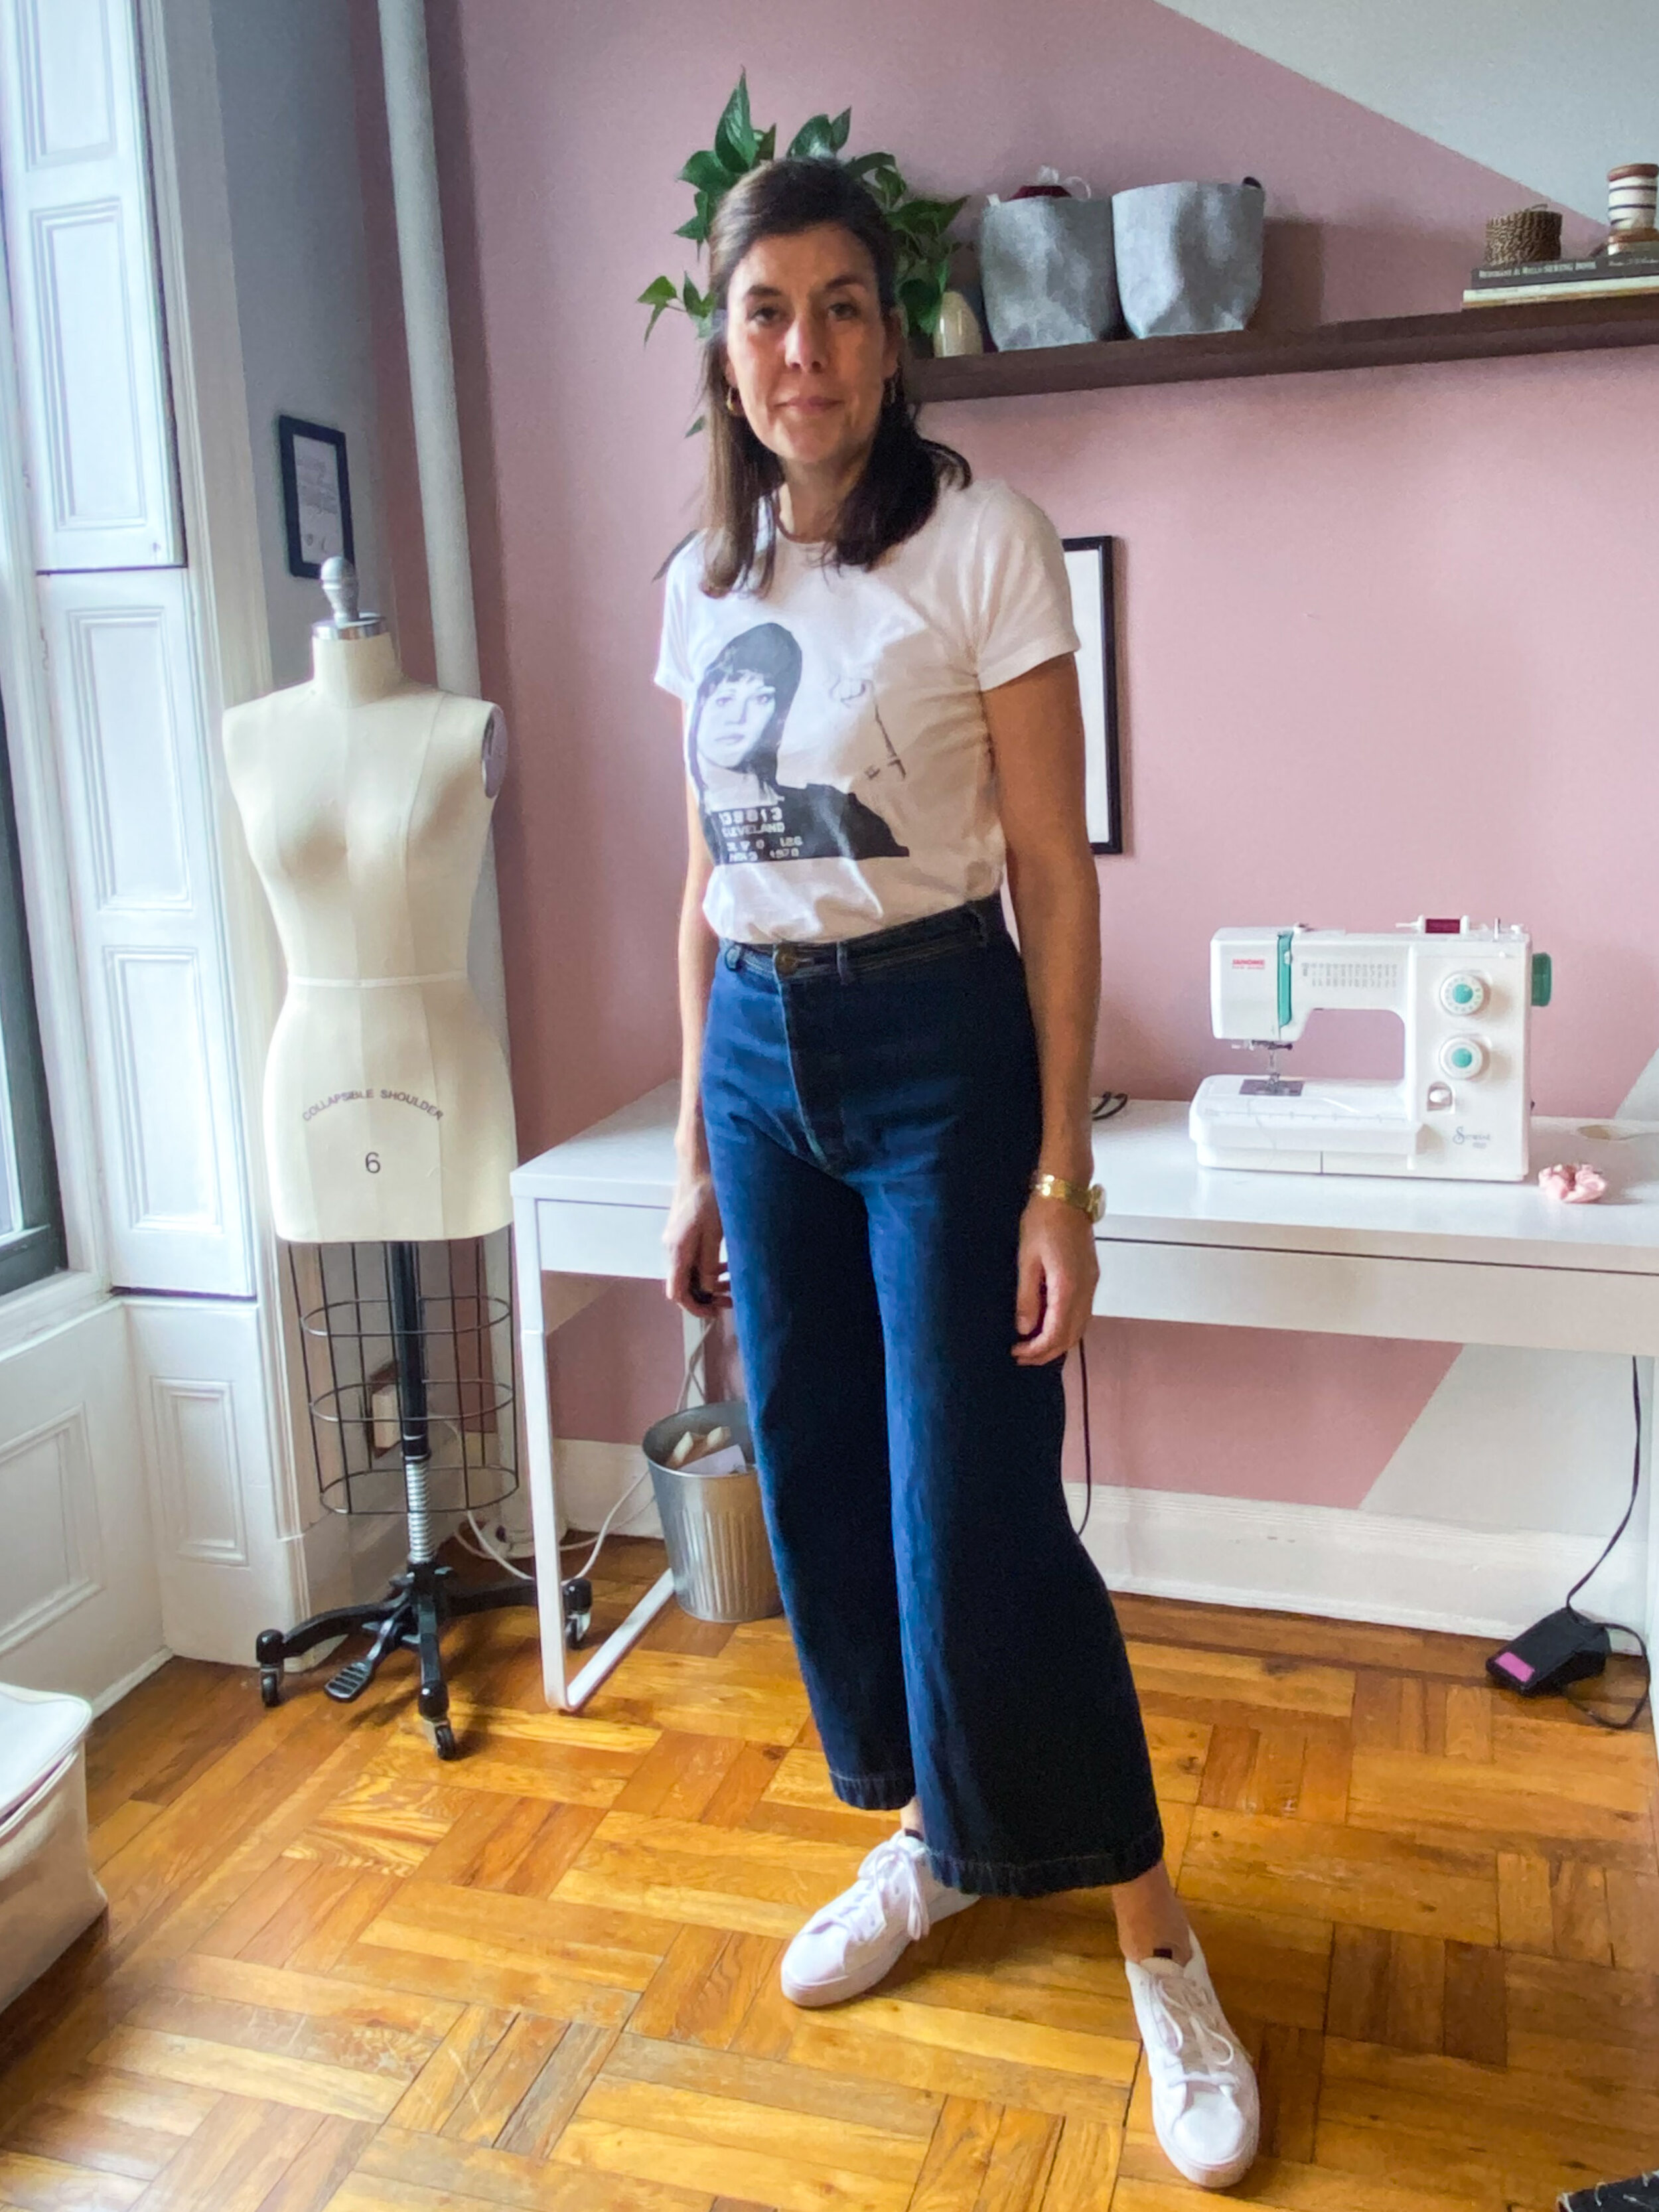
Indigo - 11oz Japanese selvedge denim from The Fabric Store, NZ (I think). Tee of awesome Jane Fonda from awesome Jane Fonda. Sneakers; Adidas Sleek.
I mean, who hasn’t heard of these? I spent a solid two years altering various pants patterns in a bid to replicate Jesse Kamm’s cult, and therefore insanely expensive, sailor pants, with minimal success (here and here for example). And then Anna releases the Persephone Pants pattern, the sewing community goes nuts, and I make a billion pairs.
Well 3.
The attention to detail in replicating the inspiration is amazing, particularly the lack of side seam - how she figured that out is crazy impressive. The pattern pieces look funky but they work and the instructions are superb.
You can read more detail on the first two versions I made here. I then made the indigo denim pair. I love the way the denim is softening and fading but contrary to the fabric recommendation I prefer the first two as they have a little stretch to them which prevents the seat bagging out.
I definitely needed to do a sway back adjustment for this pattern - you can see the tell-tale pooling of fabric below the waistband on the cream pair in particular. I actually thought I didn’t like what these pants do to my bottom - but turns out, according to these pics, it’s OK!
A year or two ago the Persephone Pants would definitely have been number one but I’m gravitating more towards tapered pants right now (I’m a fickle trouser wearer*), which is where the next two feature.
Coming in at number 2:
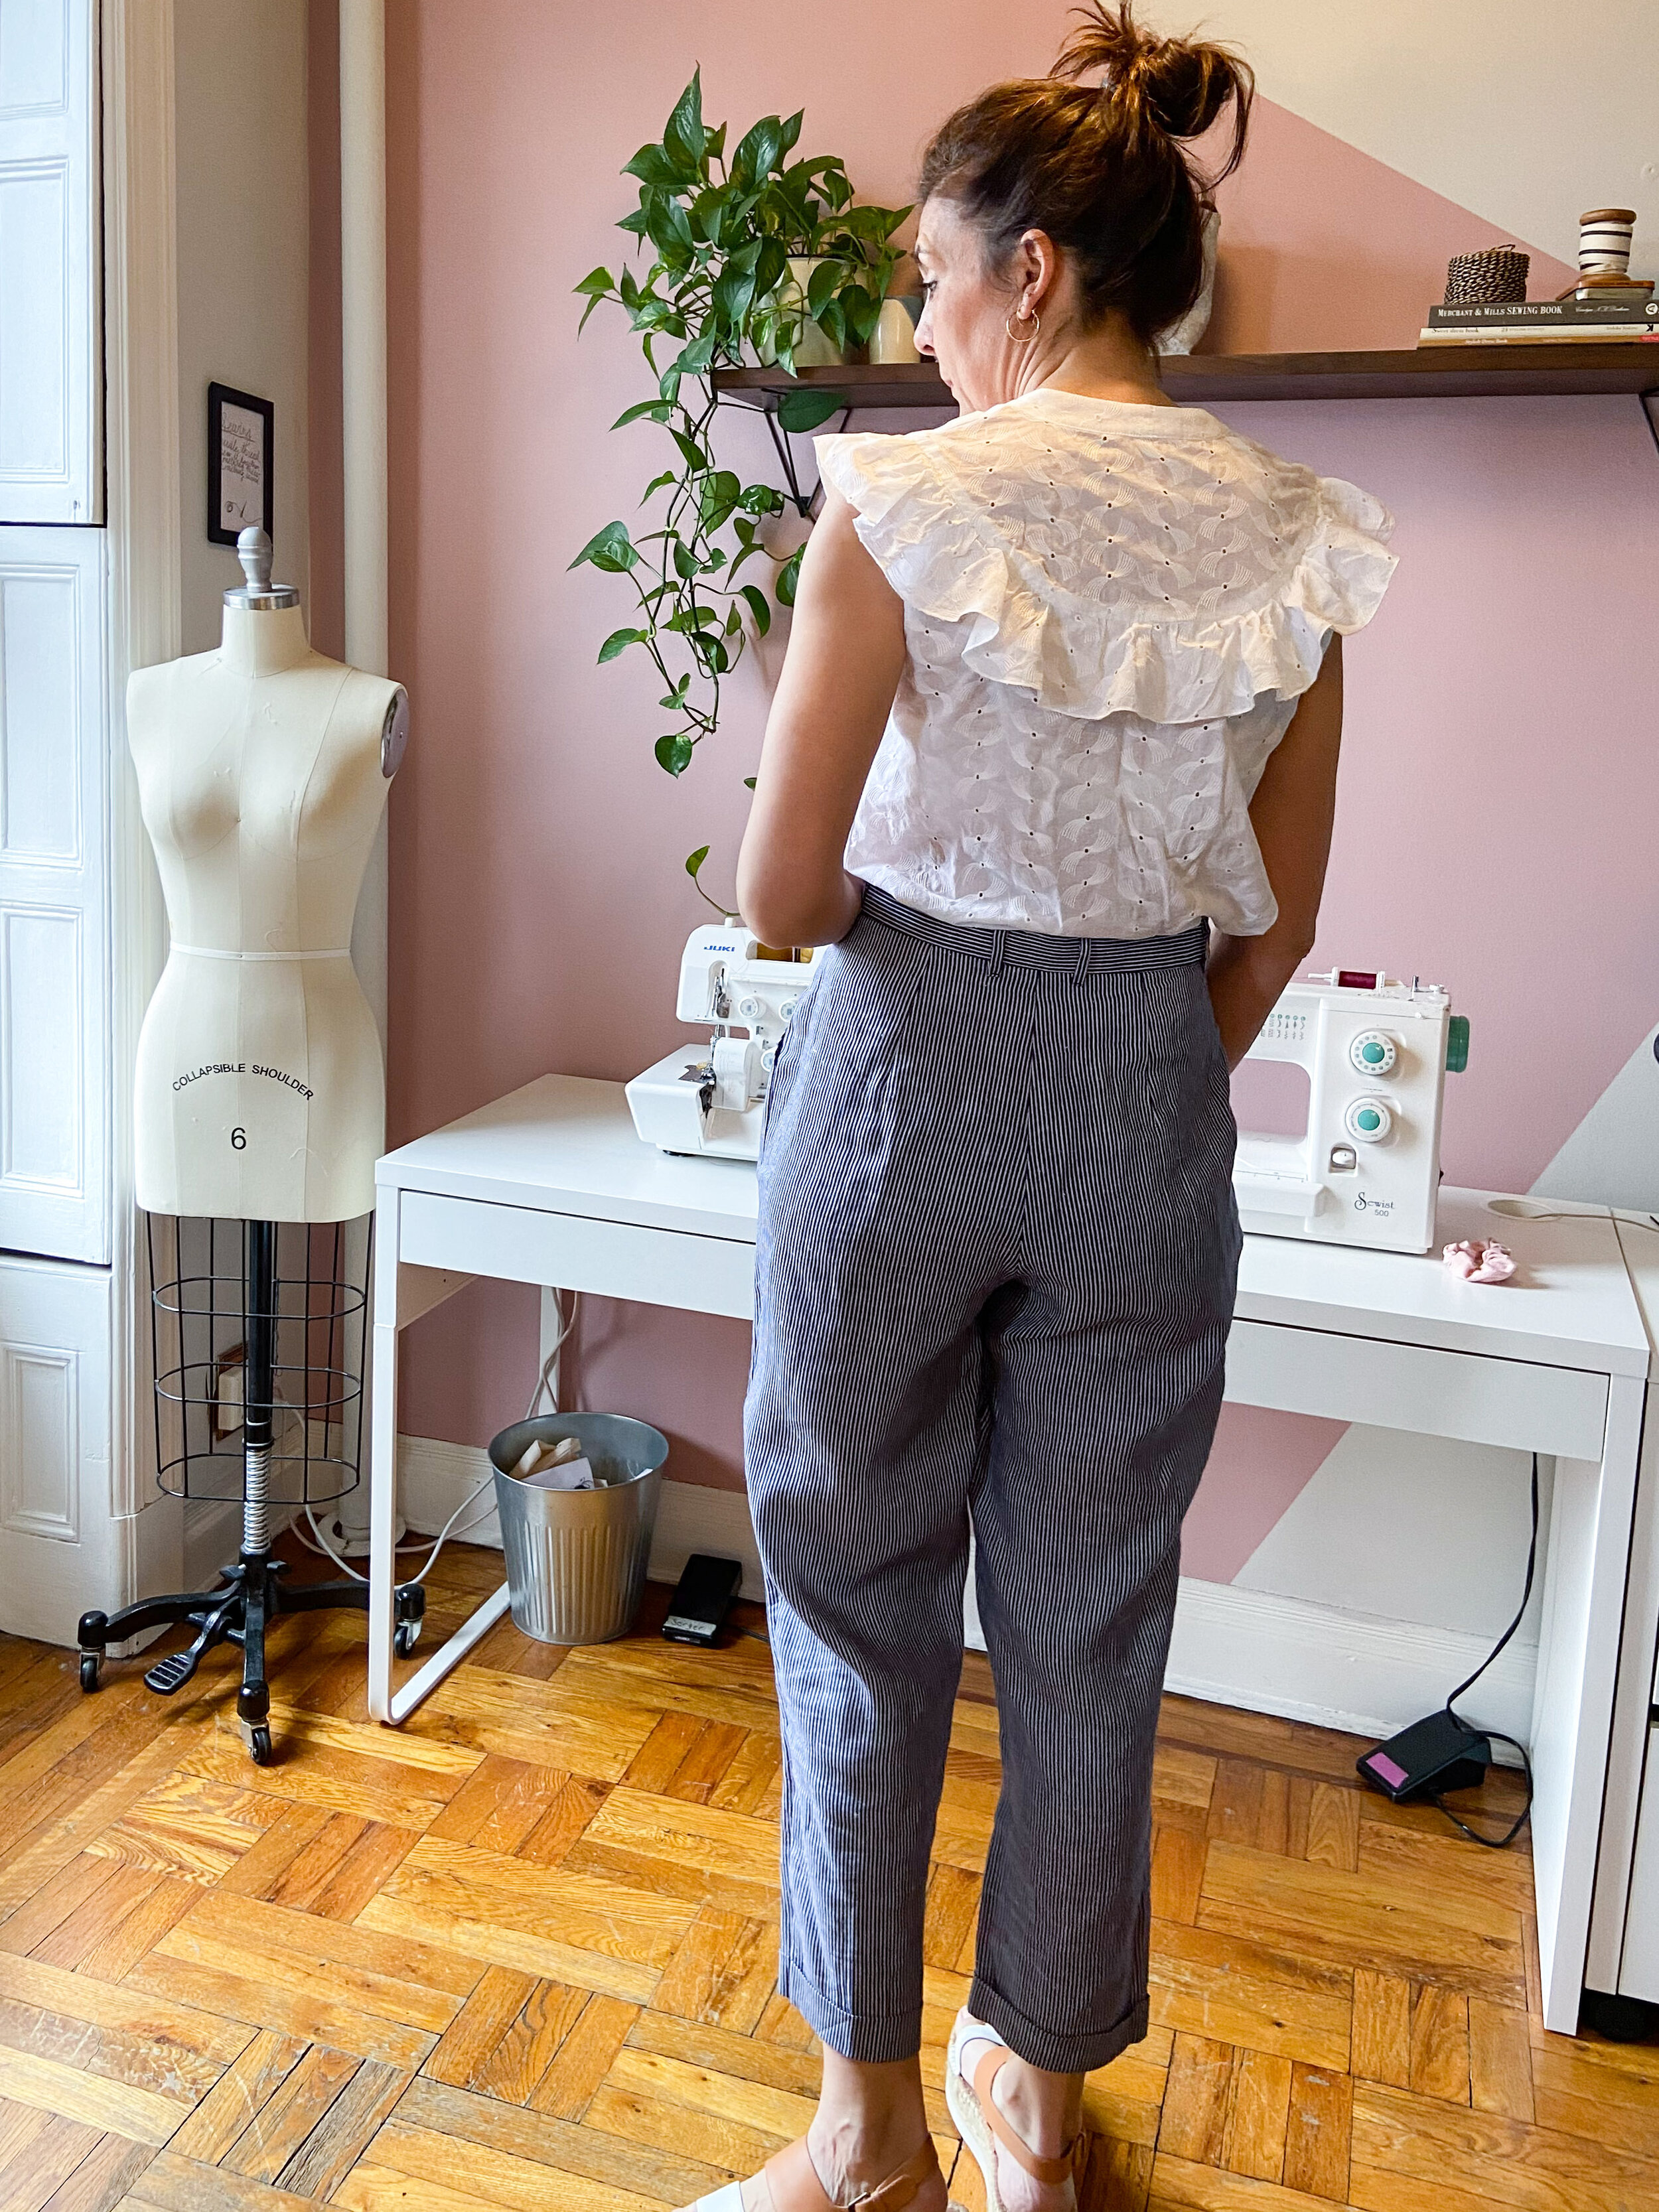
The Hall trousers by Studio Calicot (previously called Kommatia Patterns.)
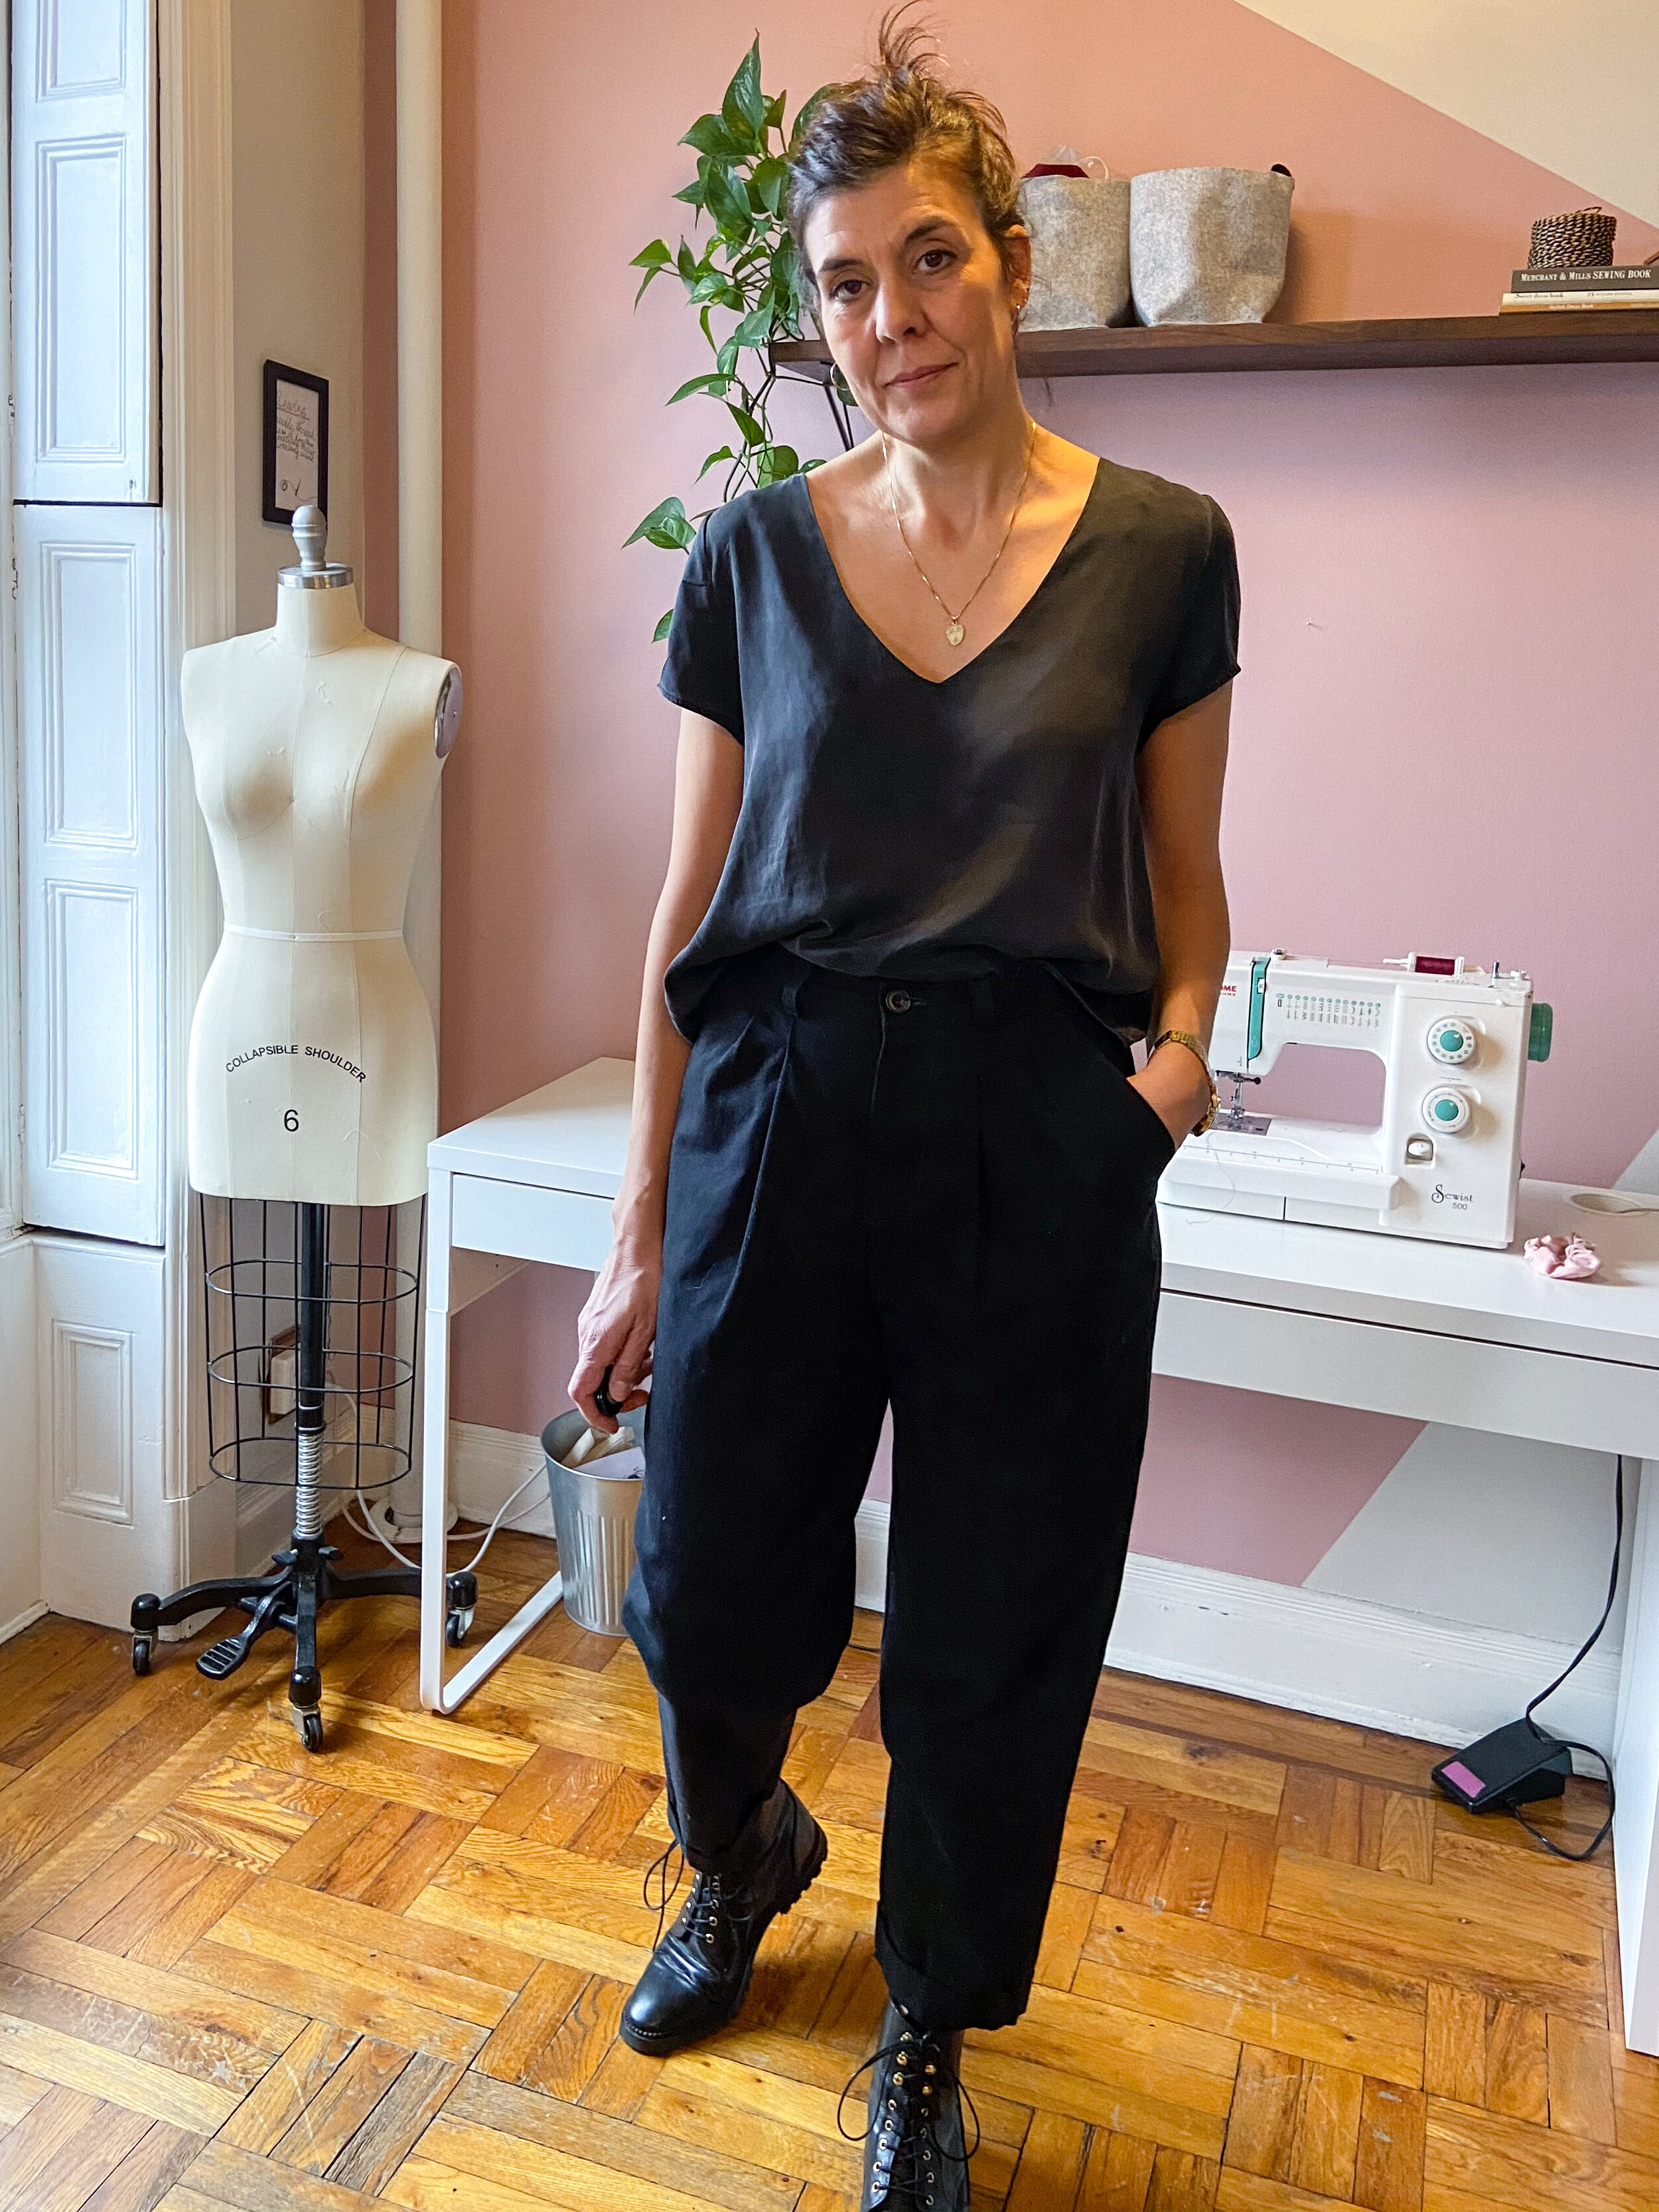
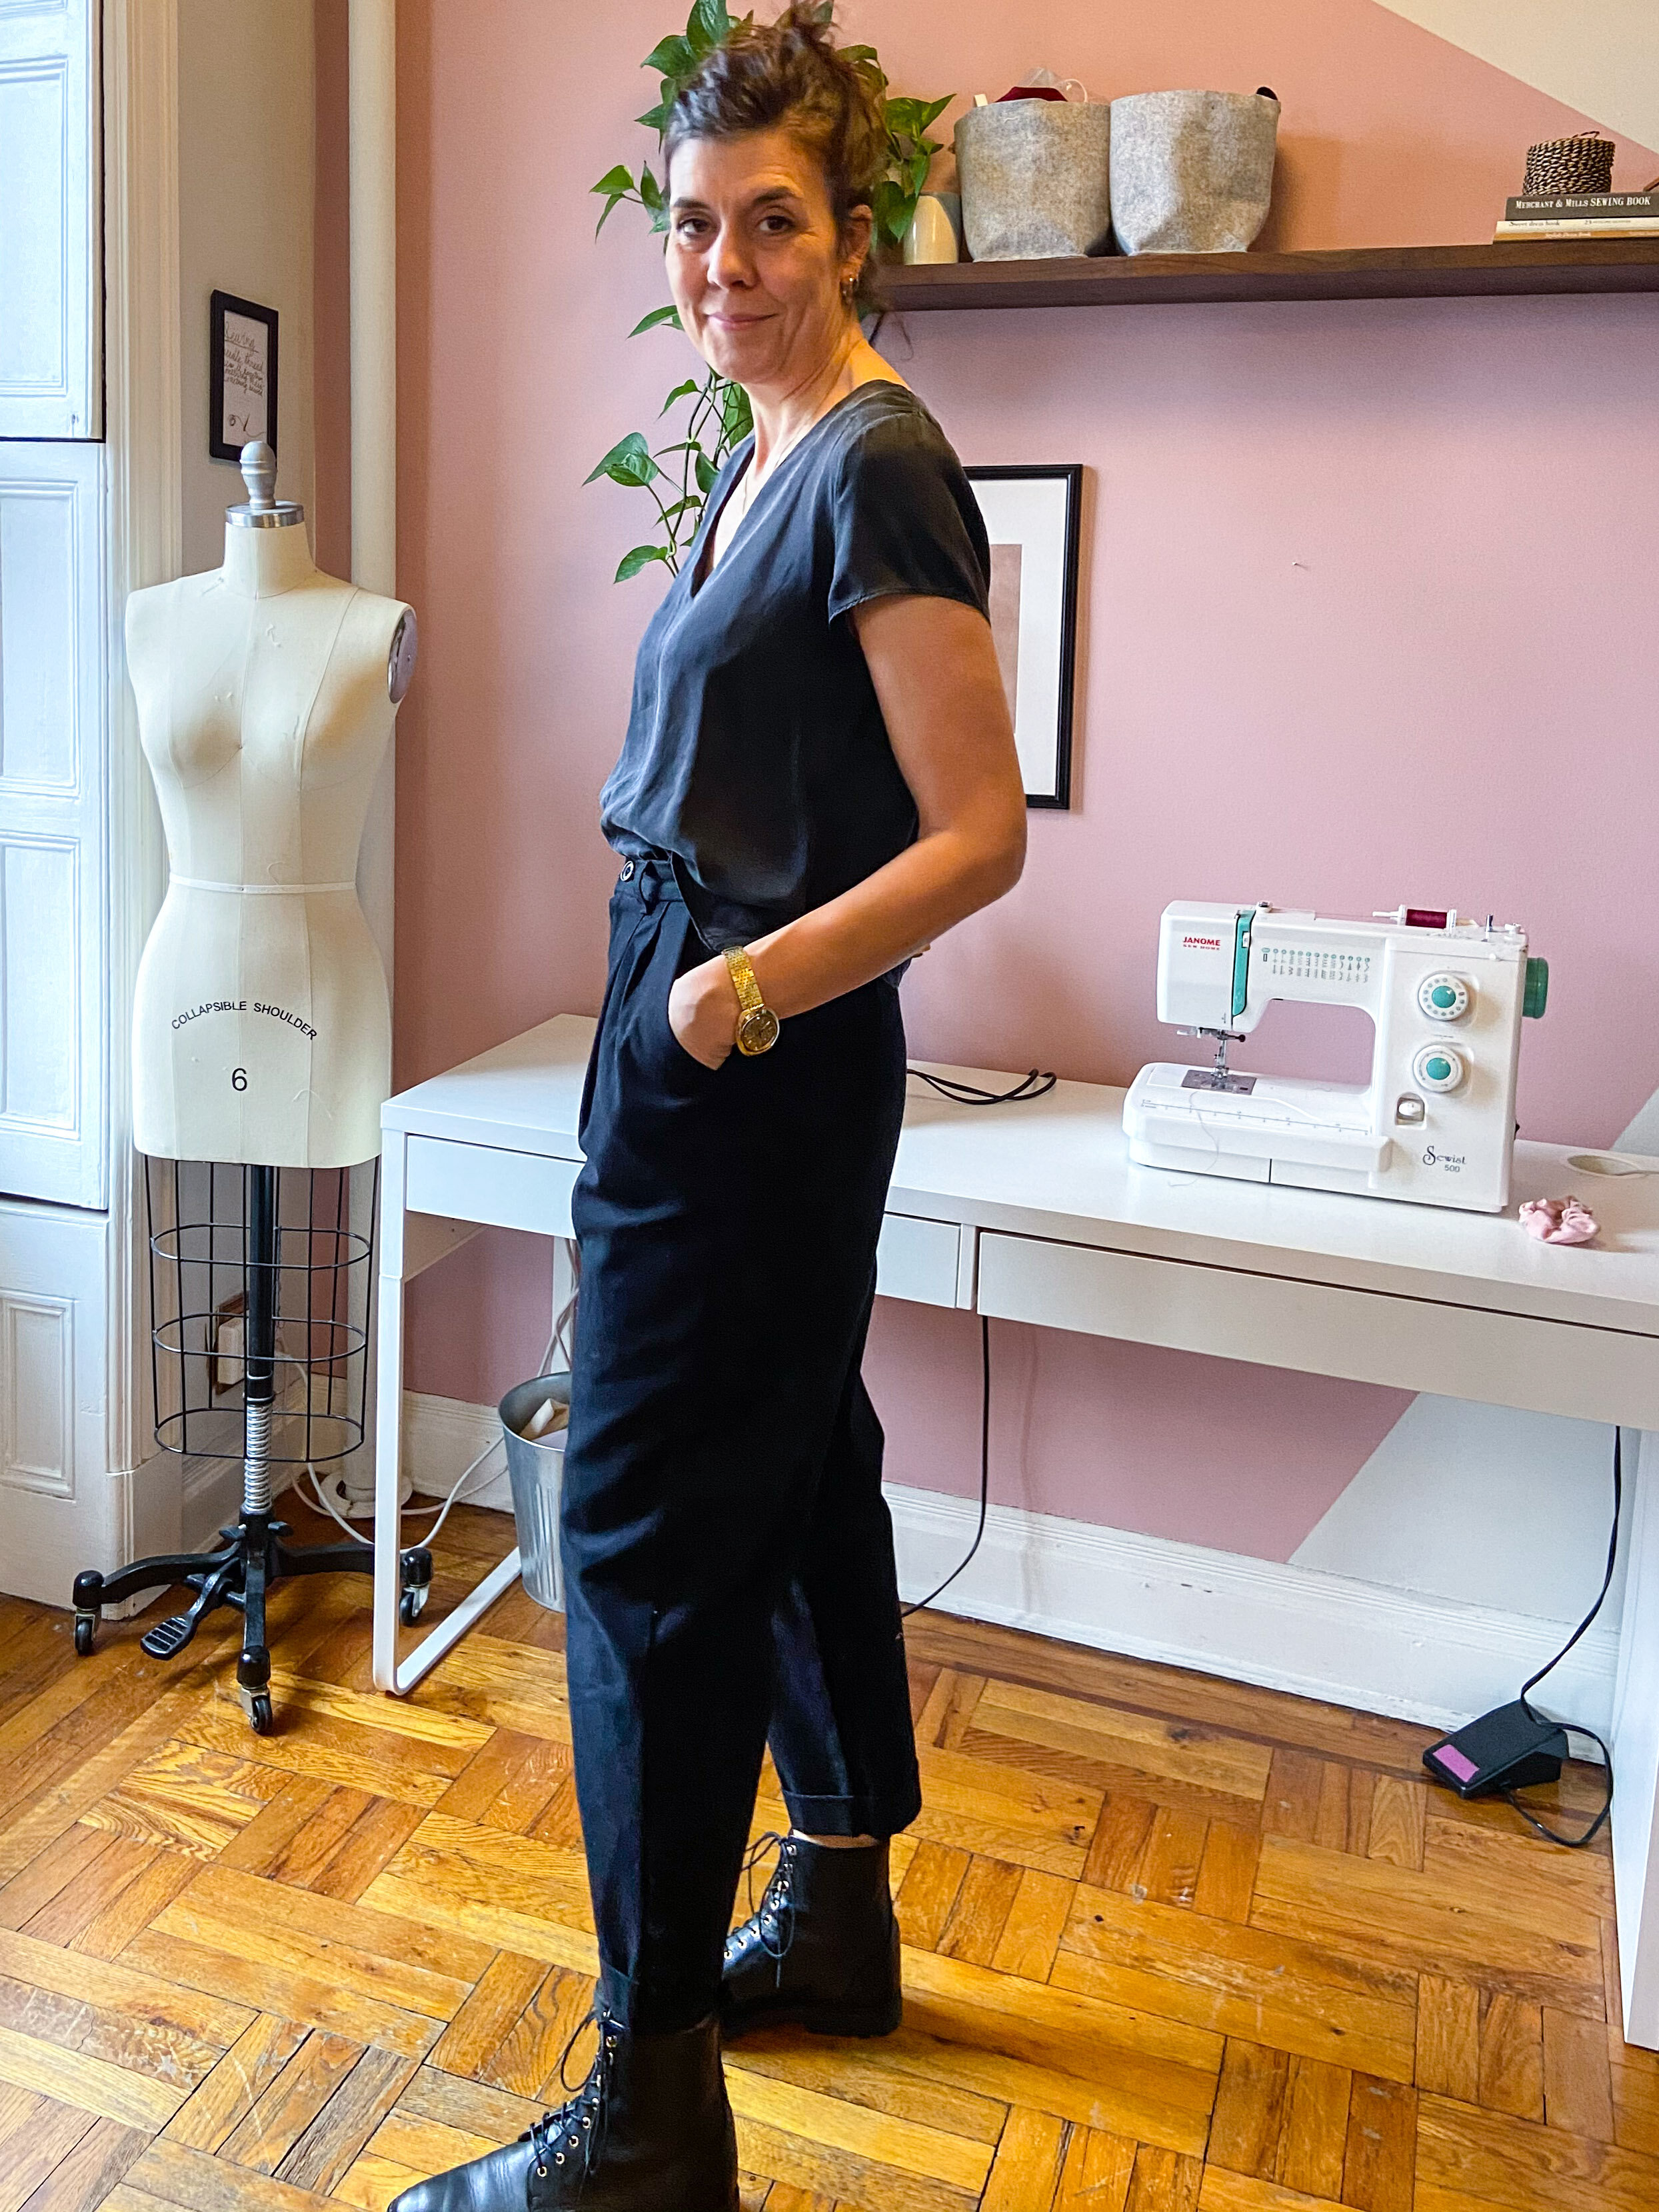


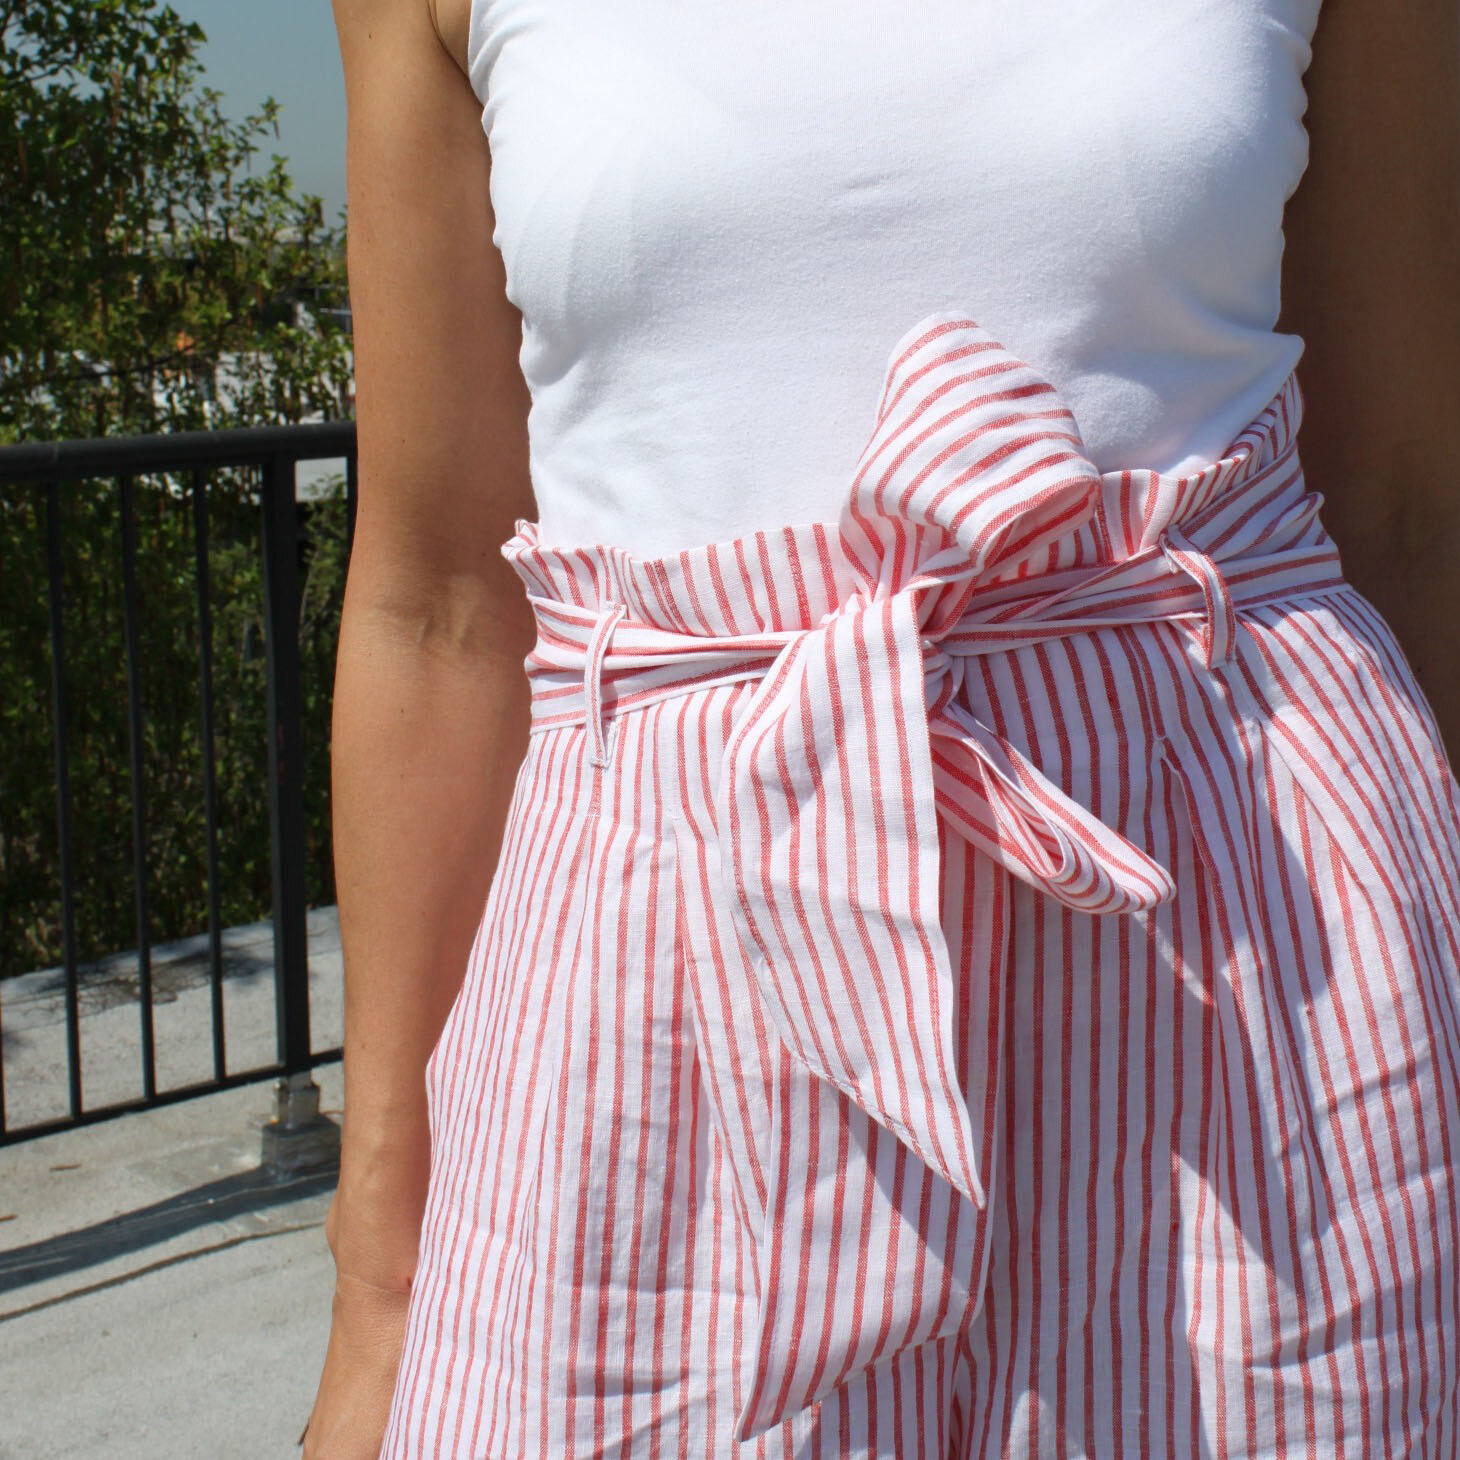
Black - 10 oz duck canvas from Blackbird Fabrics. Top; modified Named Clothing Inari Tee in silk charmeuse from Mood Fabrics. Boots; And Other Stories.
Striped - Navy and white striped linen from The Fabric Store, NZ. Blouse; Suzon Shirt by Republique du Chiffon in eyelet from Mood. Sandals; Soludos. Incidentally when COVID was completely destroying New York last spring, the Fabric Store sent me this and two other pieces of fabric as a gift to brighten the lockdown. It was such a kind thing to do.
I love the design of these. The tapered leg, plus high waist, plus pleats, plus turn up. Perfection. And everything I was looking for when I came across them. They’ve been around for a couple of years (at least) now, but I haven’t seen that many of them pop up on social media.
The fly instructions are very thorough and the almost 3 dimensional construction drawings - showing how notches have to line up for example, are inspired. The waistband instructions give a really neat finish, although I don’t love that the inside waistband is finished with an overlocker or binding. I always prefer to have it turned under. That said, the former method does definitely reduce bulk and makes for much more accurate ditch-stitching in that you catch the entire waistband length and don’t end up with bits where the stitching hasn’t caught it all. This happens to me more than I care to admit.
I love the turn-ups but don’t love their construction; you make the turn up on each separate pant piece before you sew the leg seams - which makes it very easy to end up with an uneven hem. Even if you get it lined up, you can kind of see the seam allowance poking out.
There are other ways to construct turn-ups after stitching the side seams. The Terra Pants by Pattern Fantastique has great instructions for this. I don’t know why I didn’t use that technique on these.
I made the first pair in a black canvas. They’re gorgeous and the only reason I haven’t worn them much is because they’re quite smart and well, damn COVID. They could have done with a longer zipper as there is some wiggle involved in getting them over my hips but when on they fit like a dream. The canvas is pretty rigid so they need some wearing to make them a bit more casual. I love the all black thing going on here!
I subsequently made them in the striped linen which was part of the gift. I’m not sure about those. I think because they bag so quickly and make me feel a bit middle-aged - which clearly I am but I don’t like dressing like I am!
Try them - it’s a great pattern and super (French) chic.
And at Number 1:

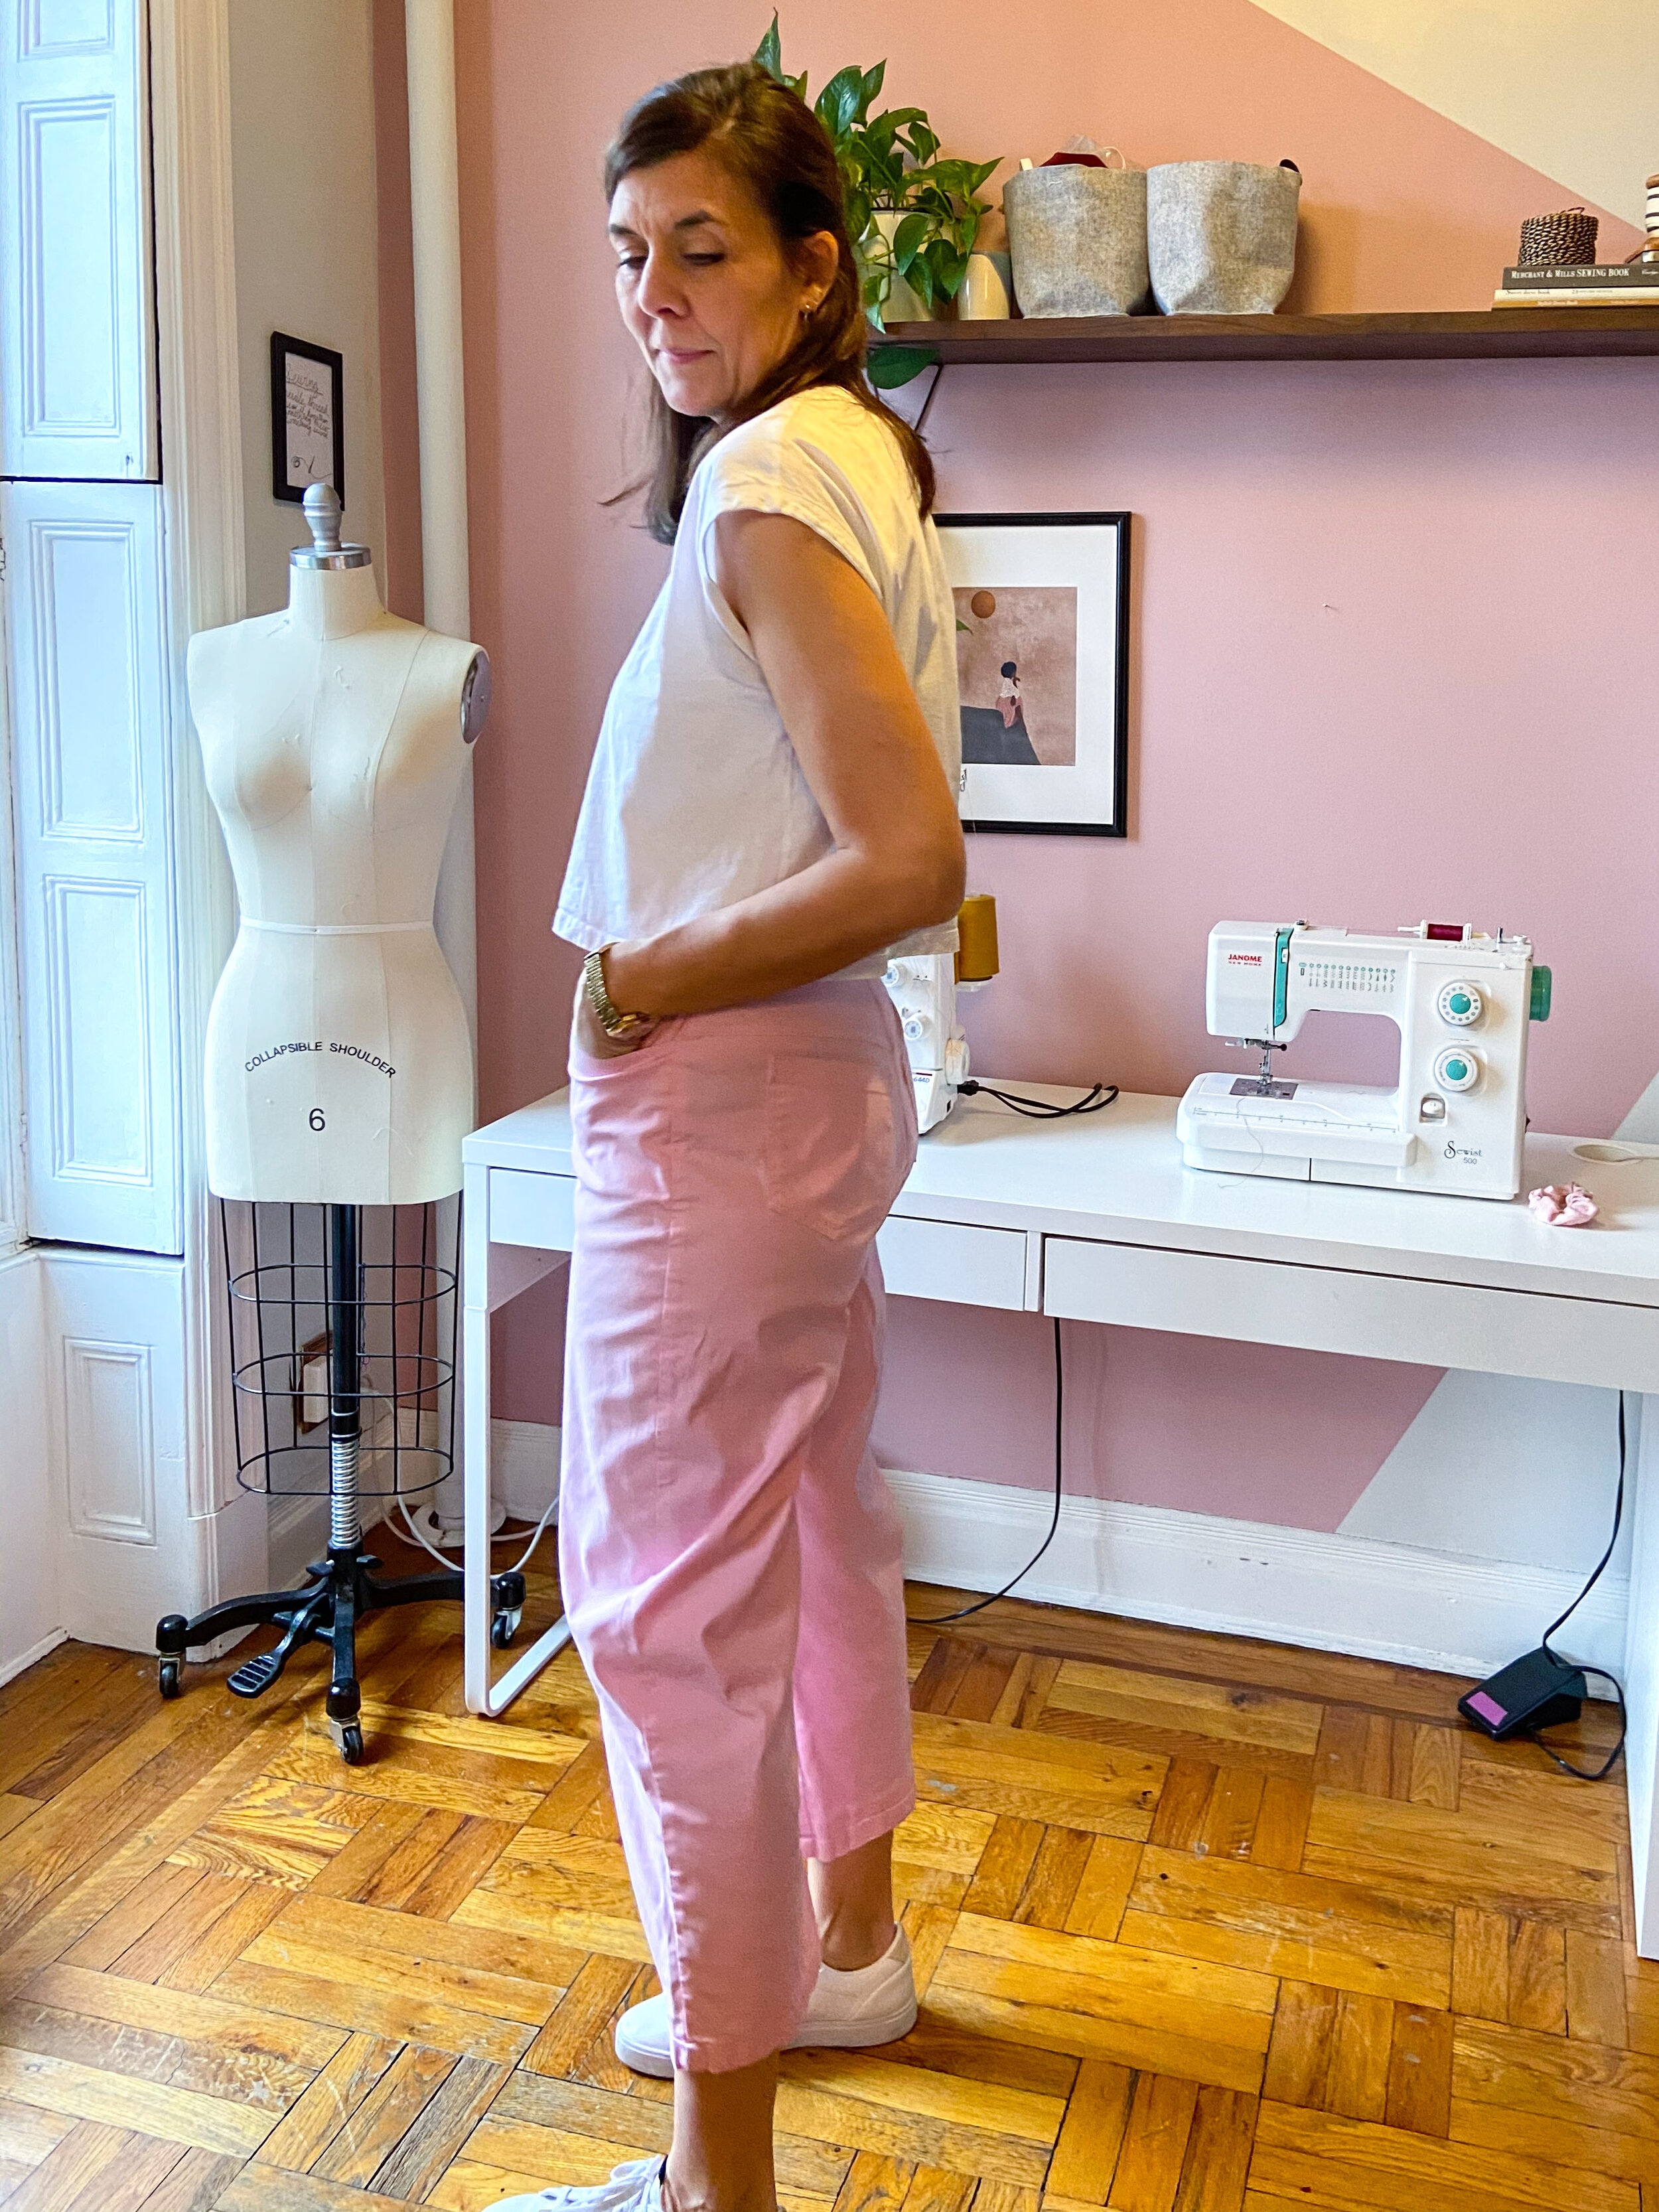
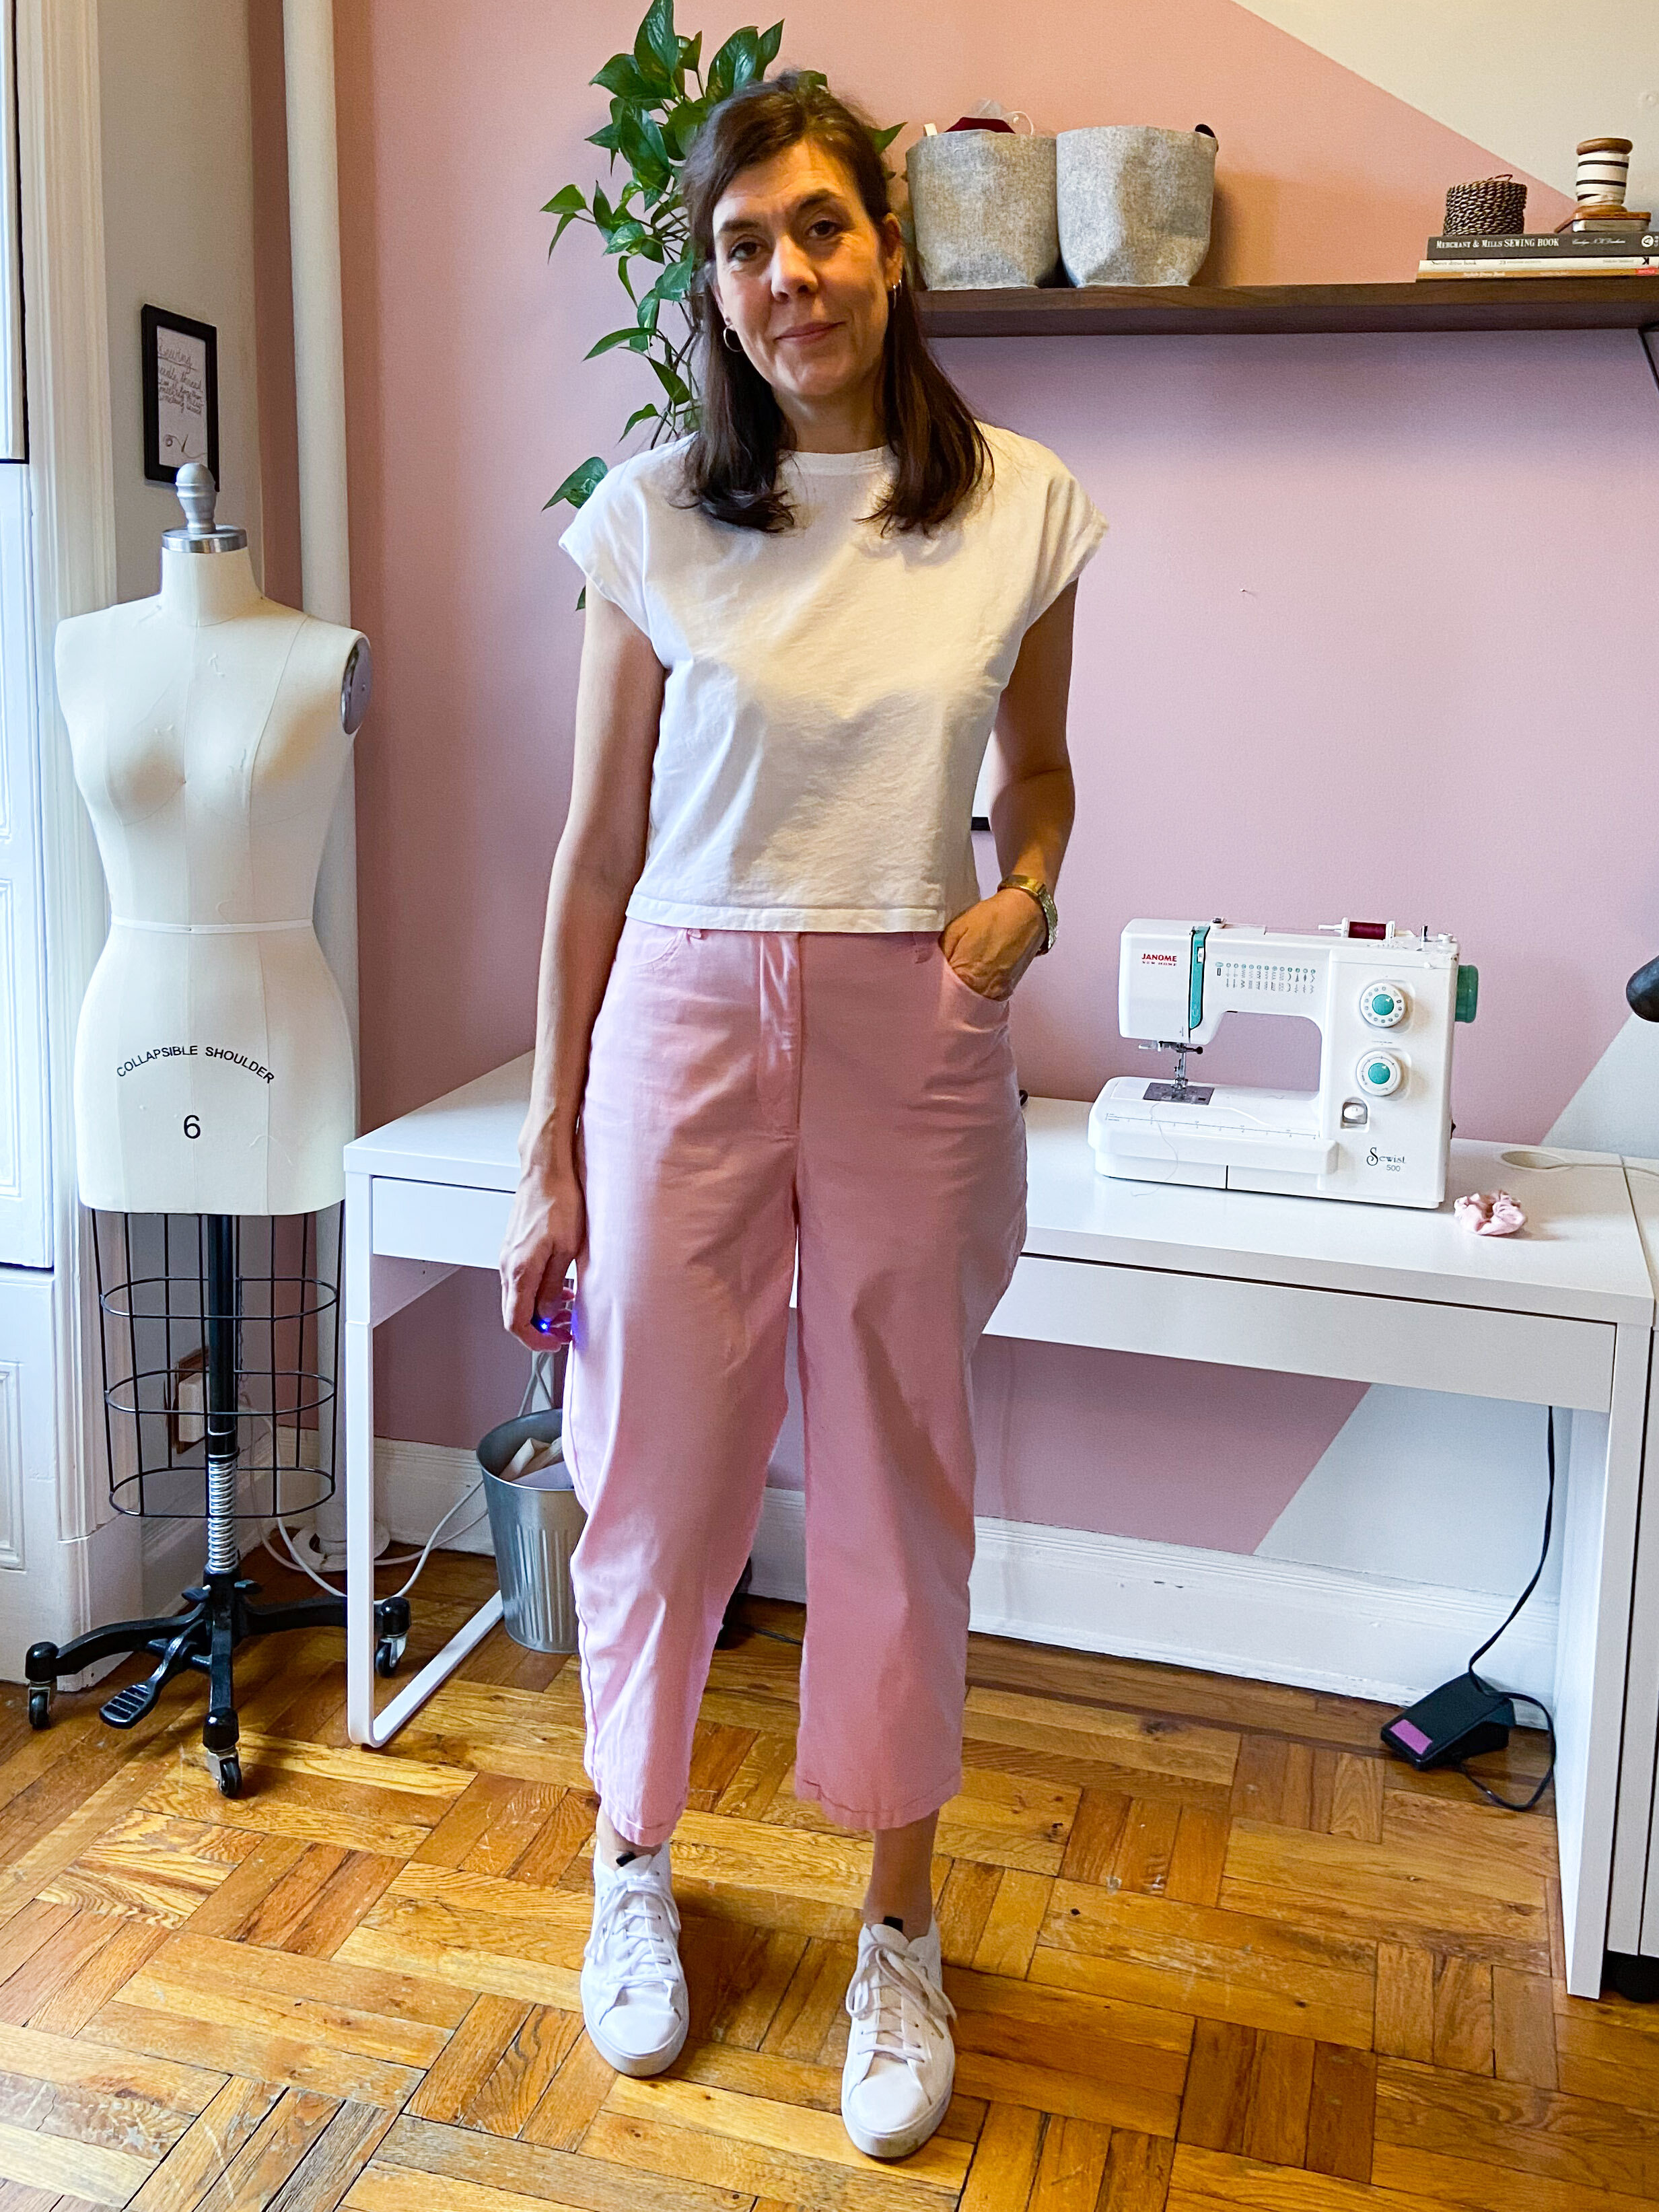
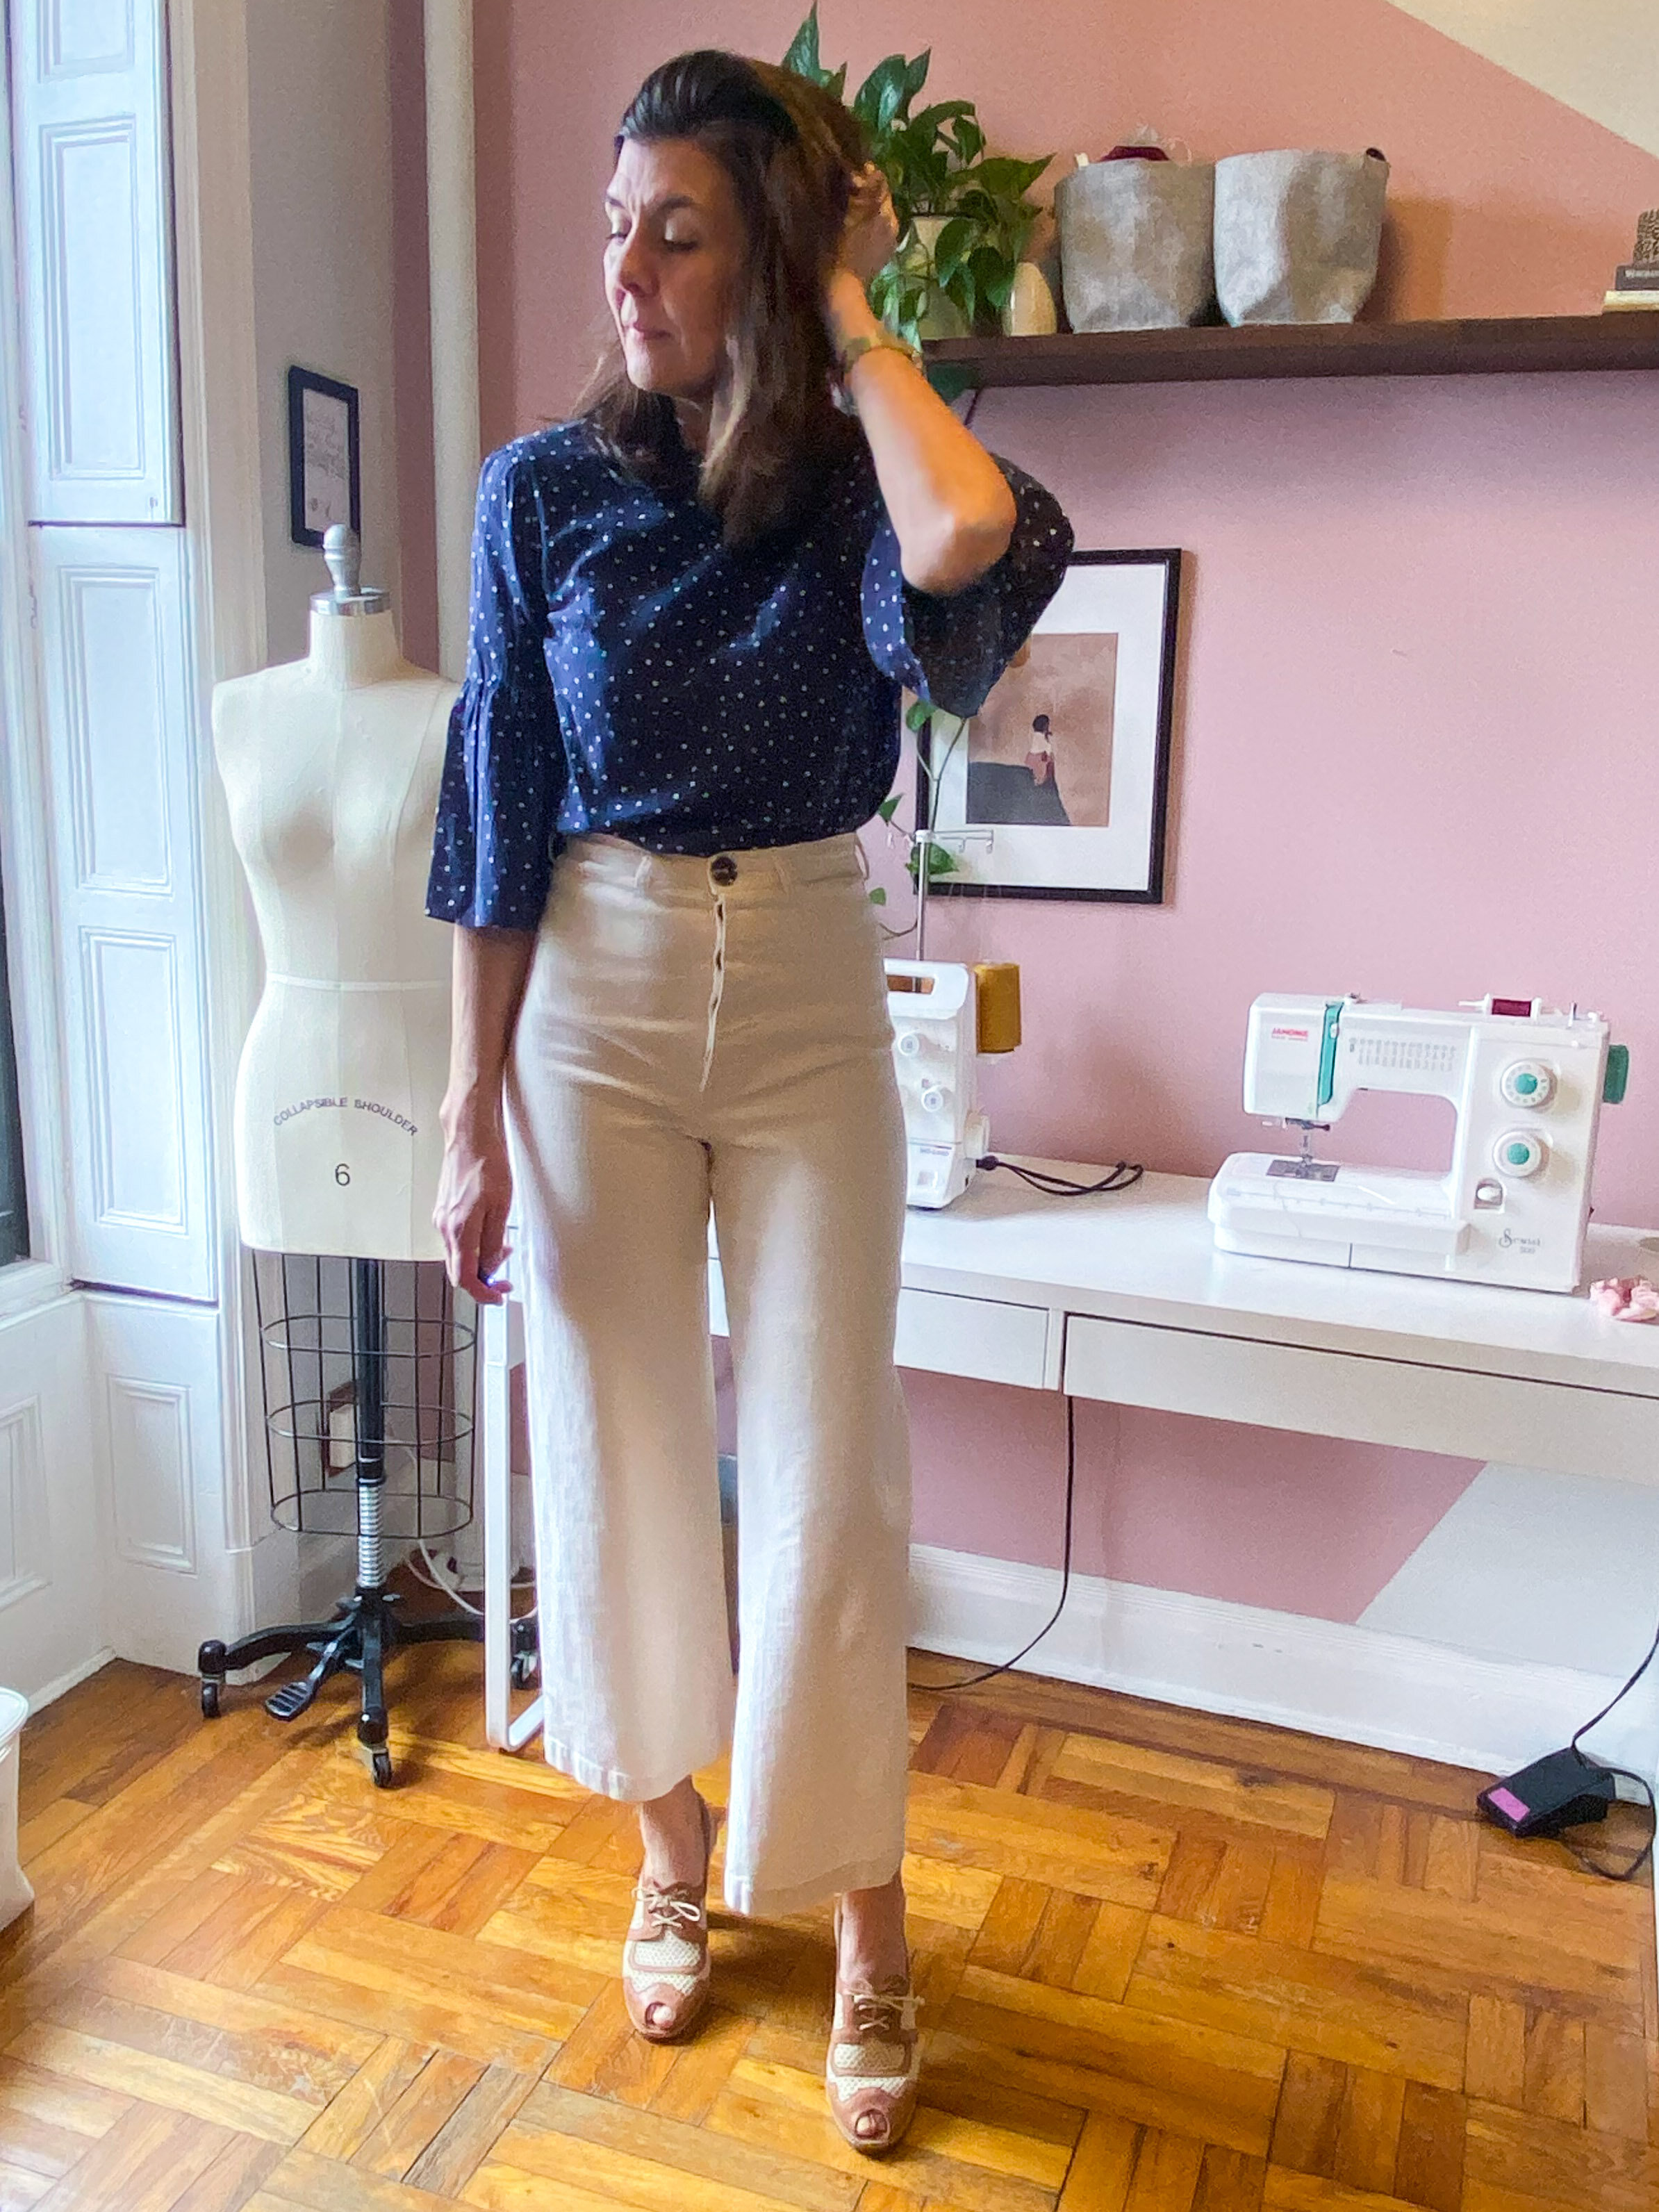
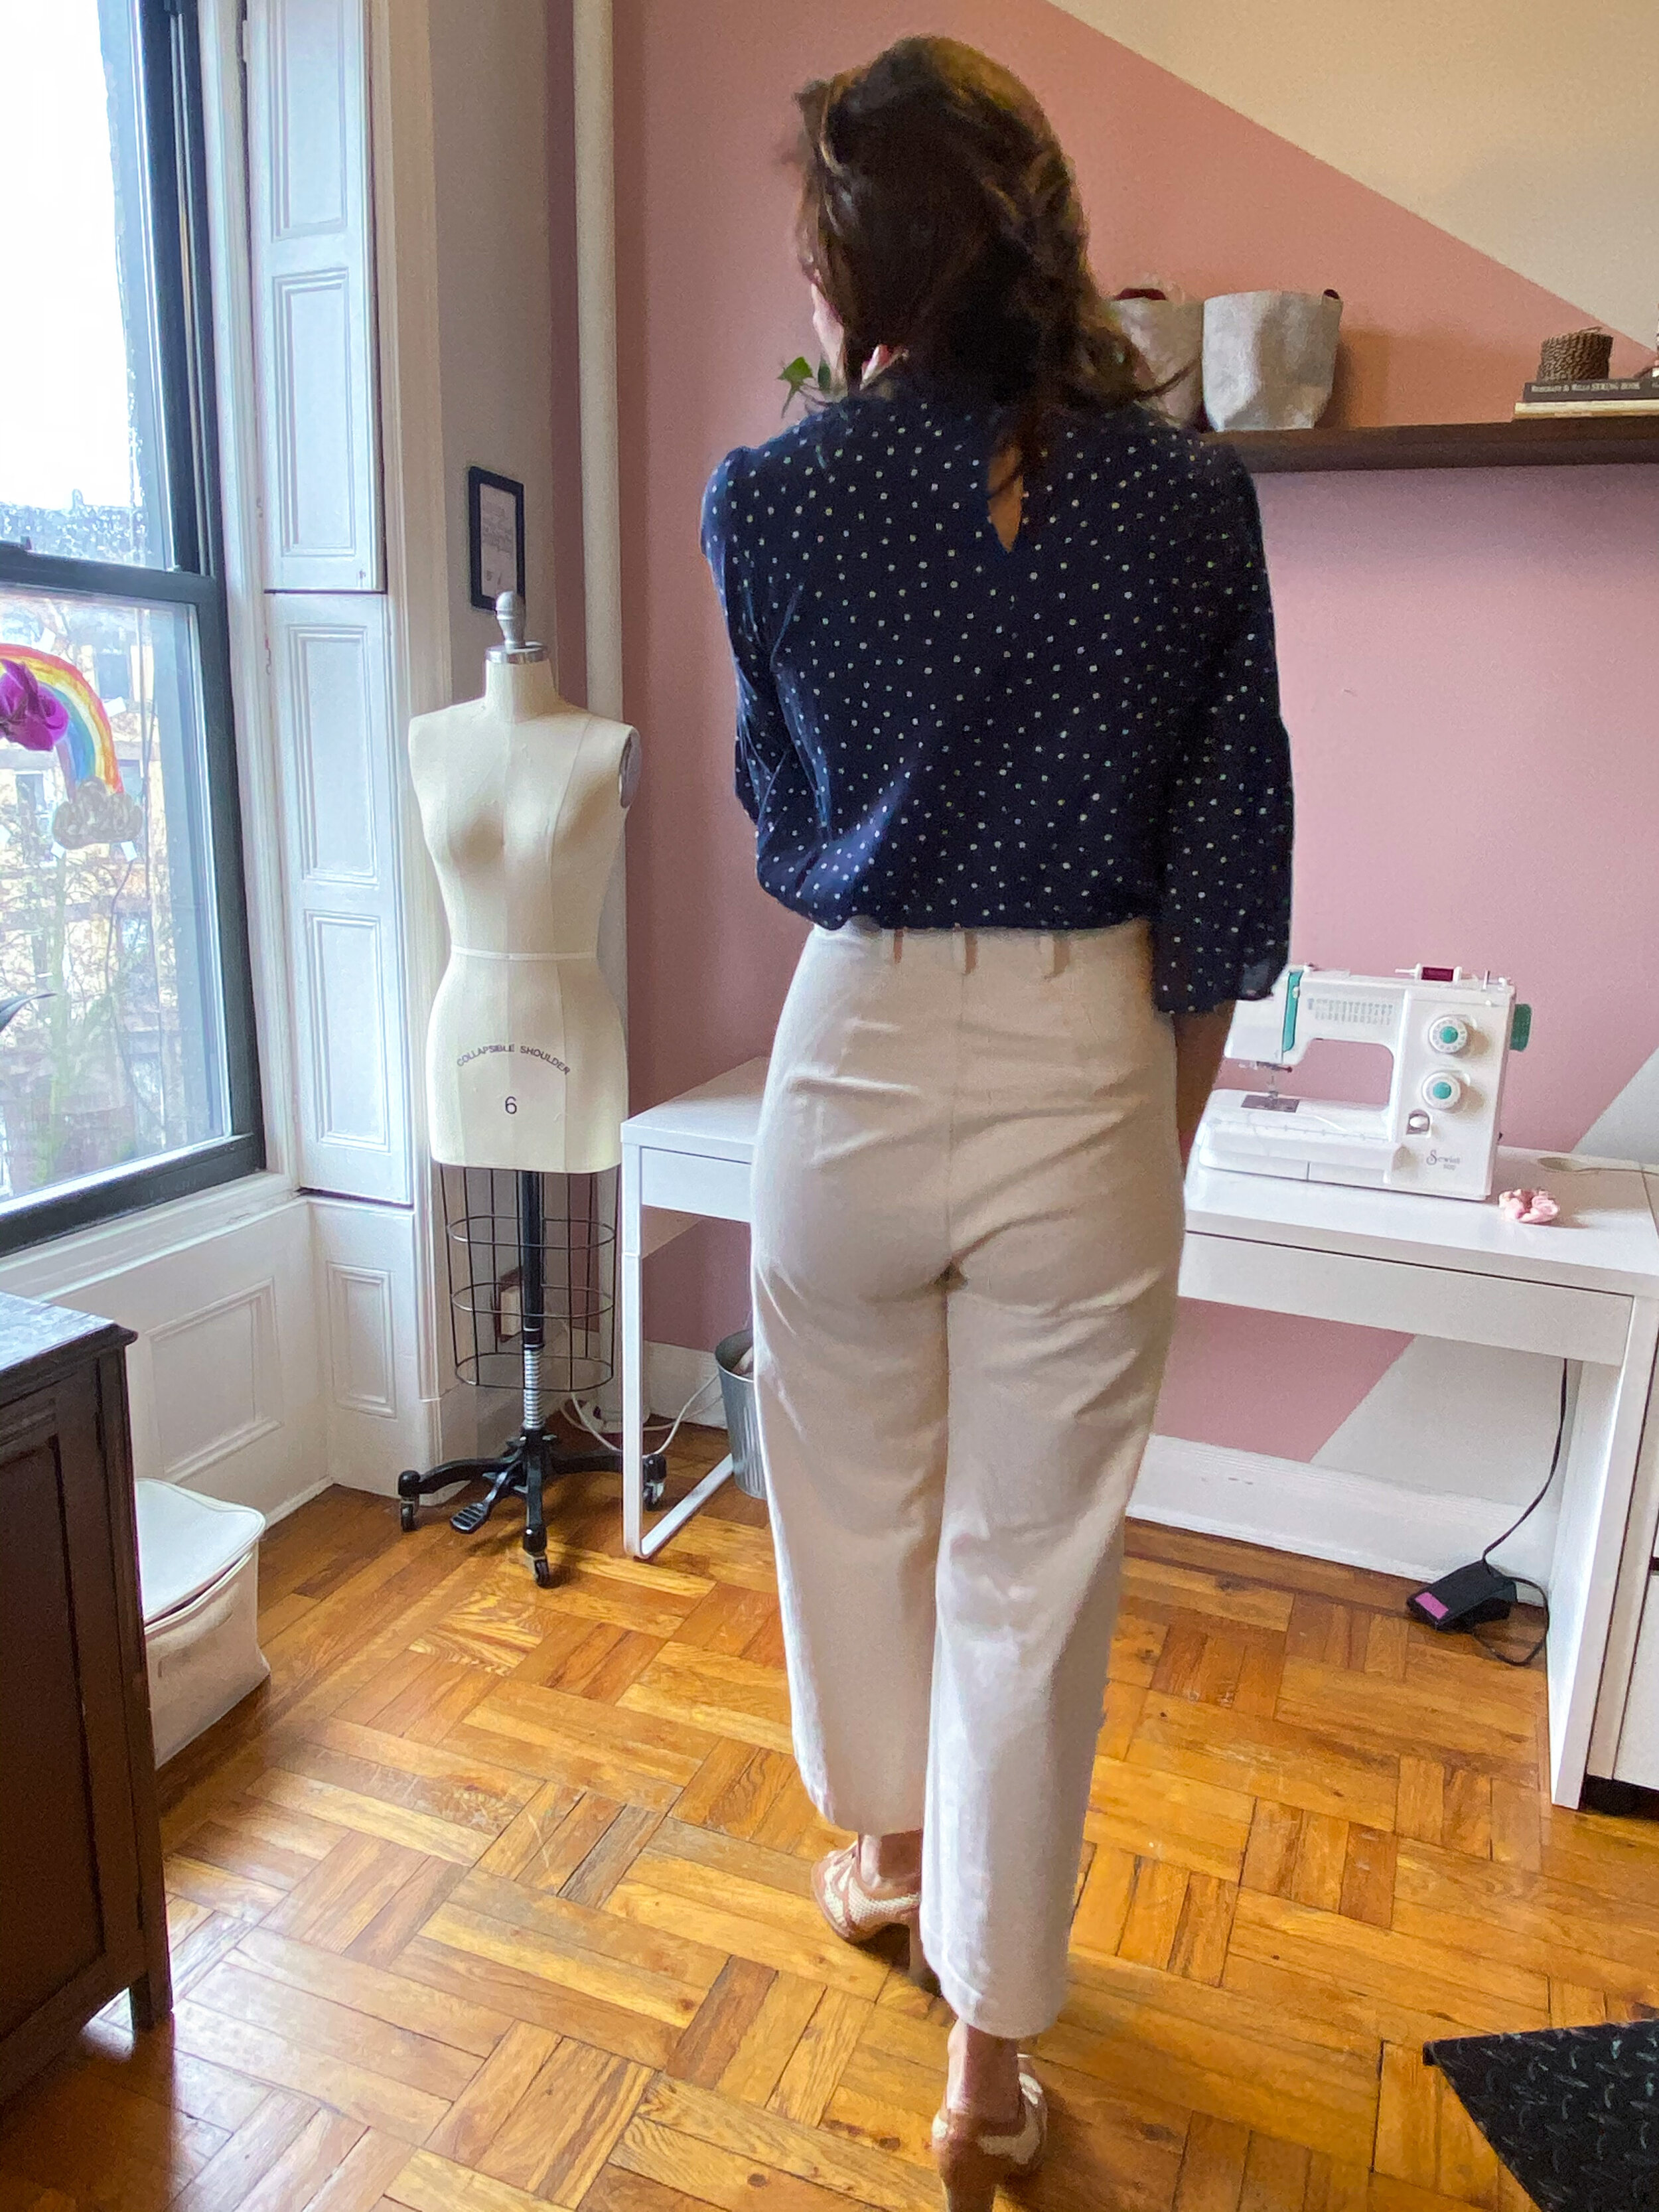
Pink - stretch cotton from not sure (also not sure why I bought it). Tee; Zara. Sneaks; Adidas Sleek (I’m on a temporary hiatus from my beloved Stan Smith’s)
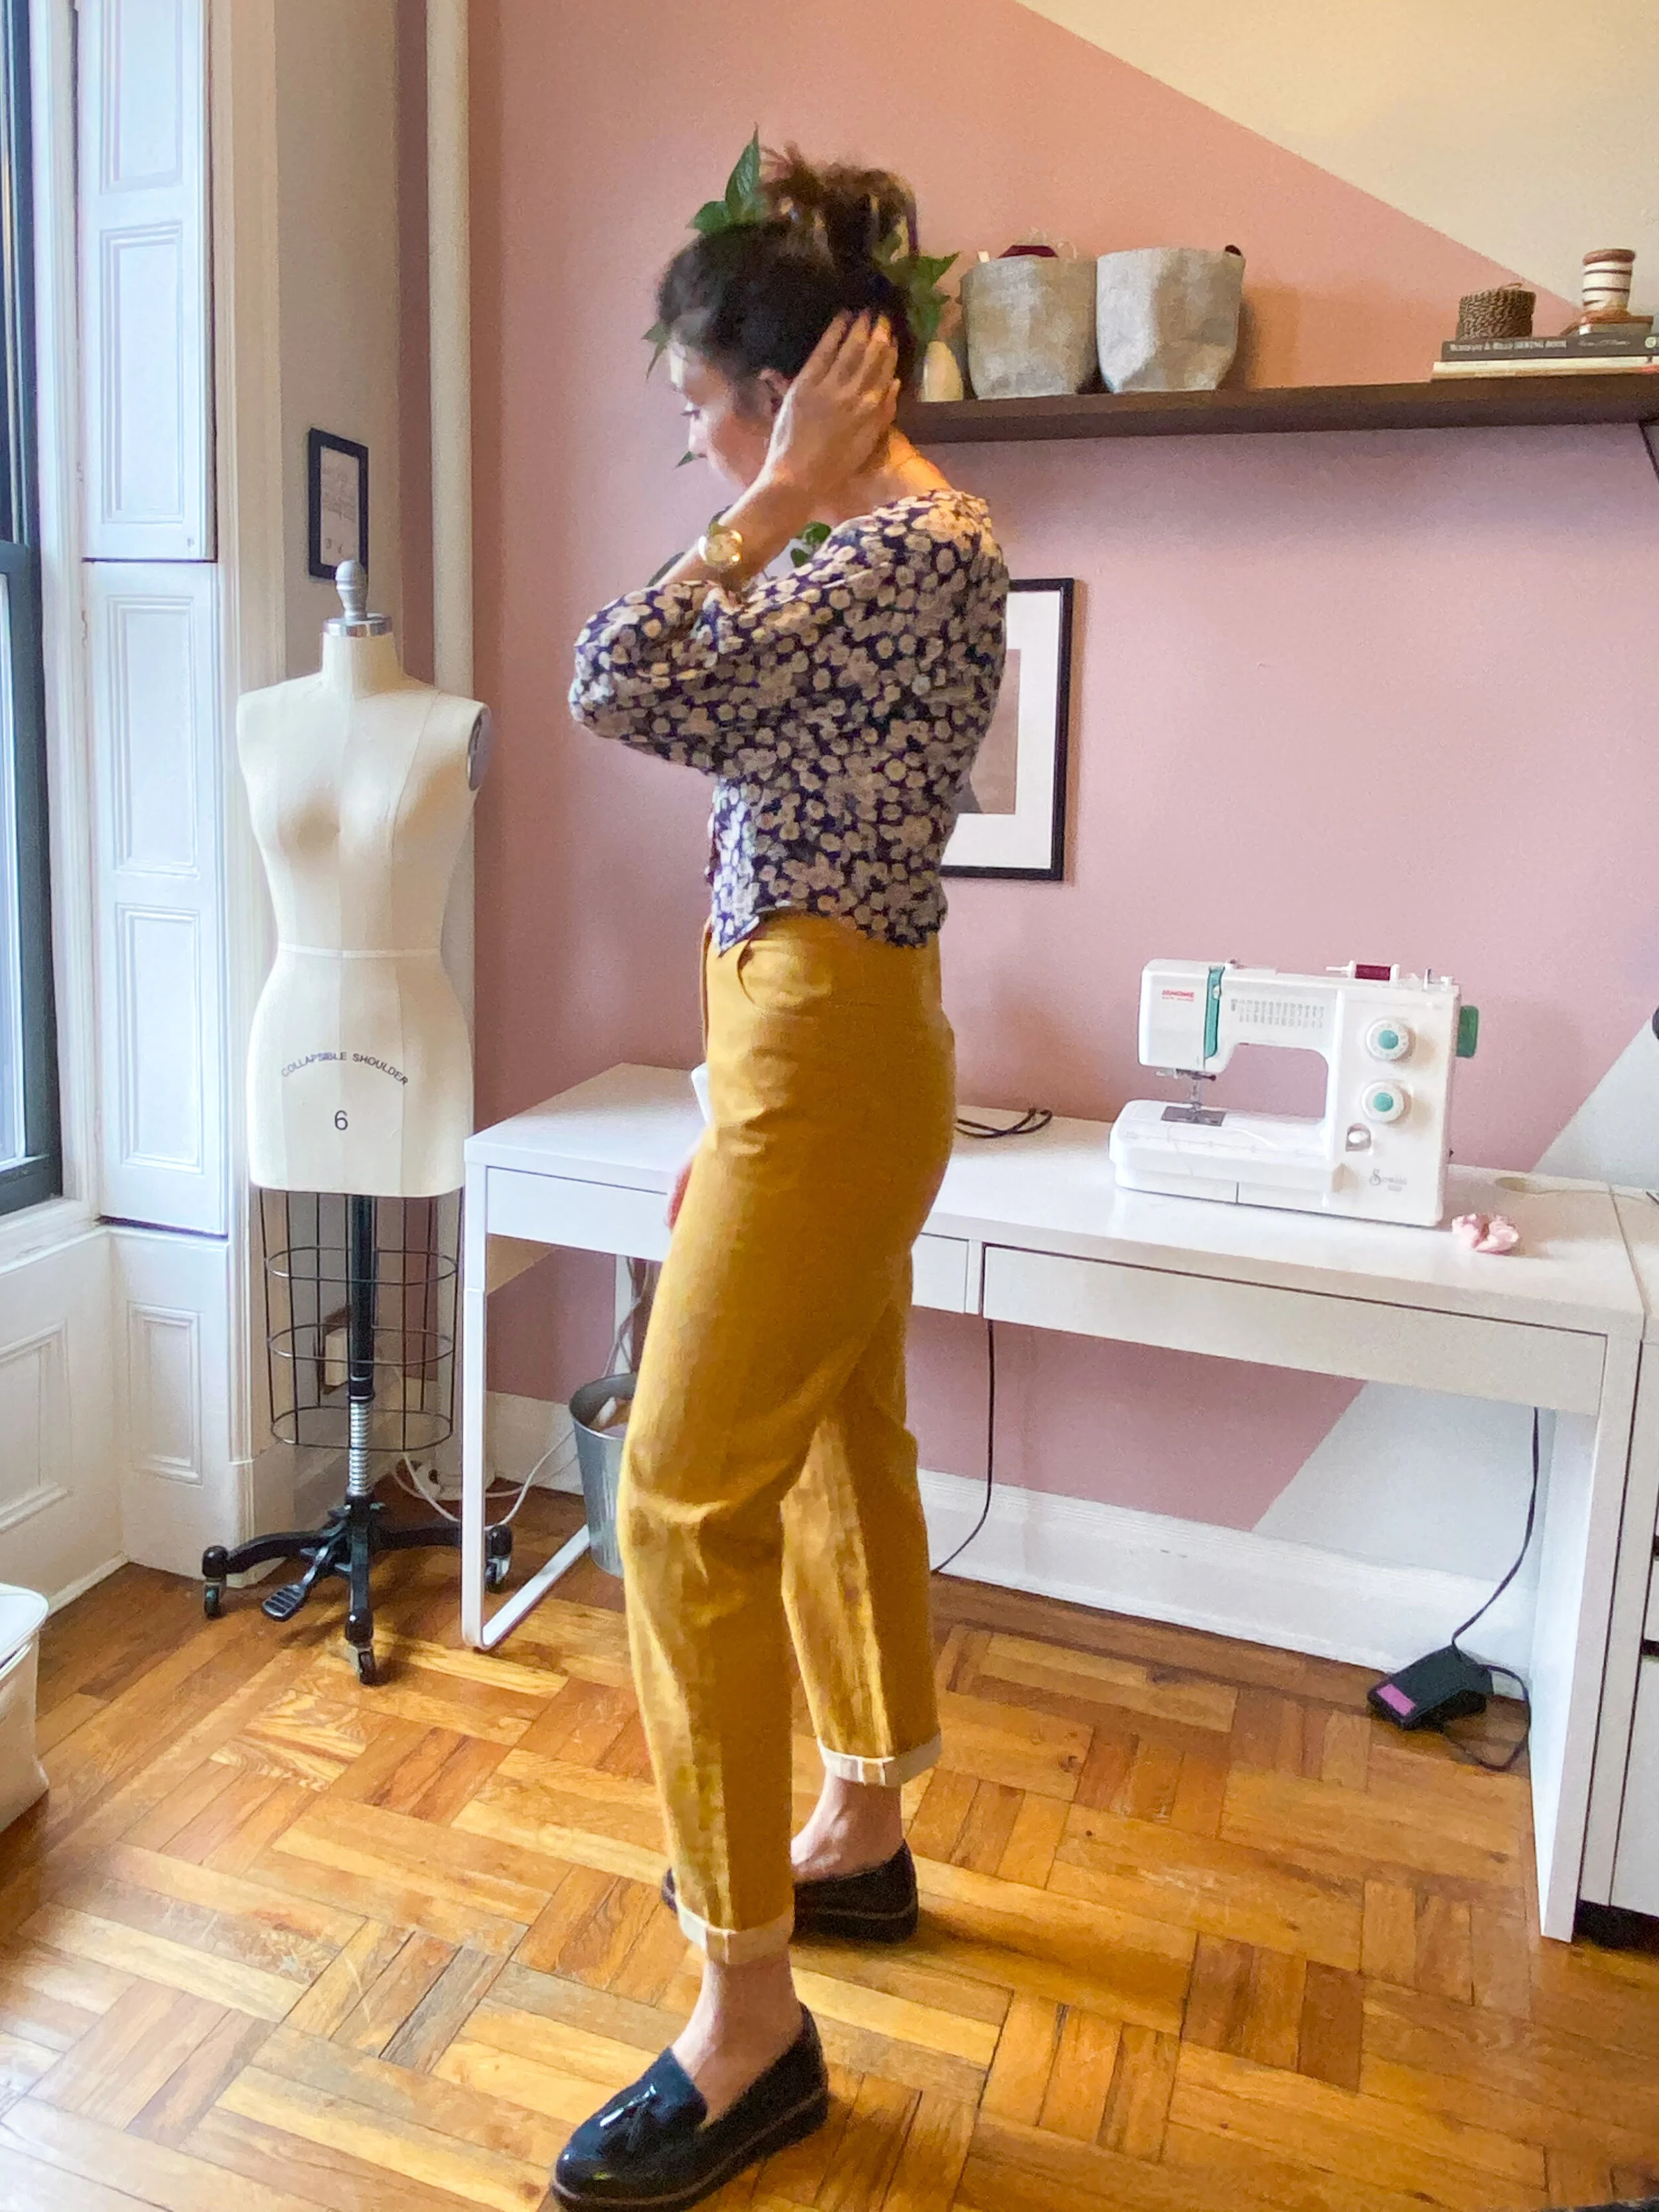
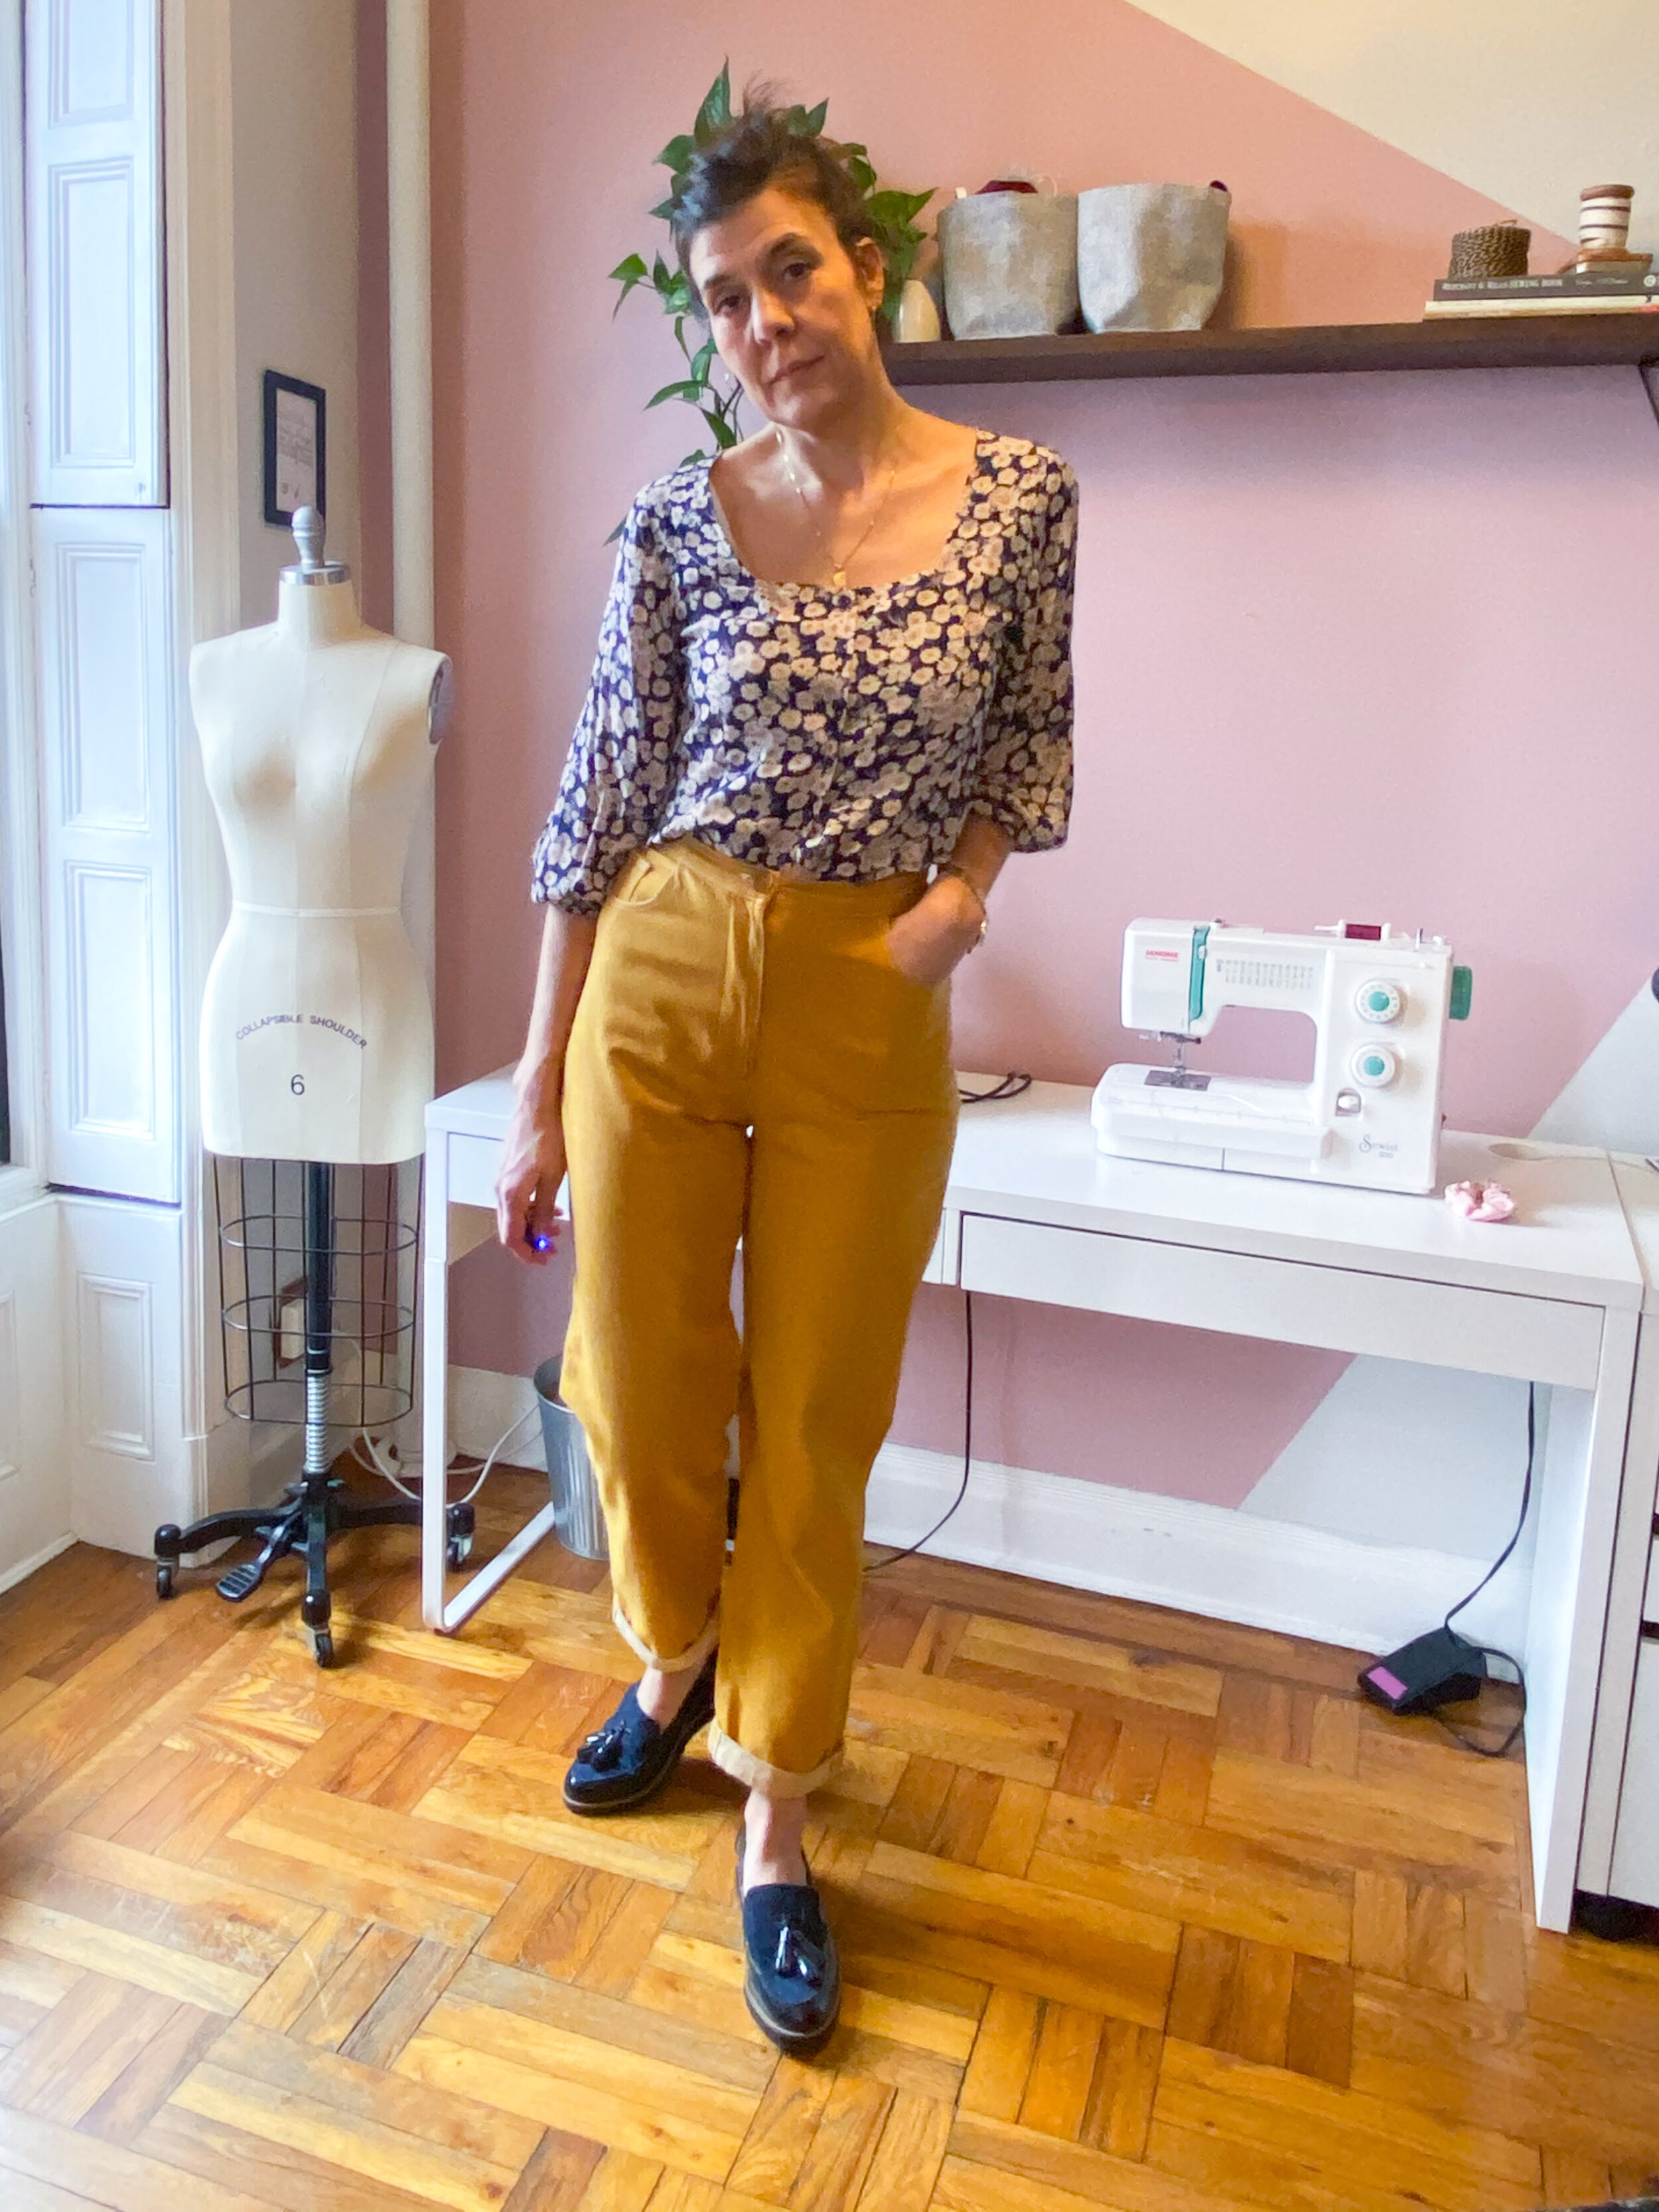
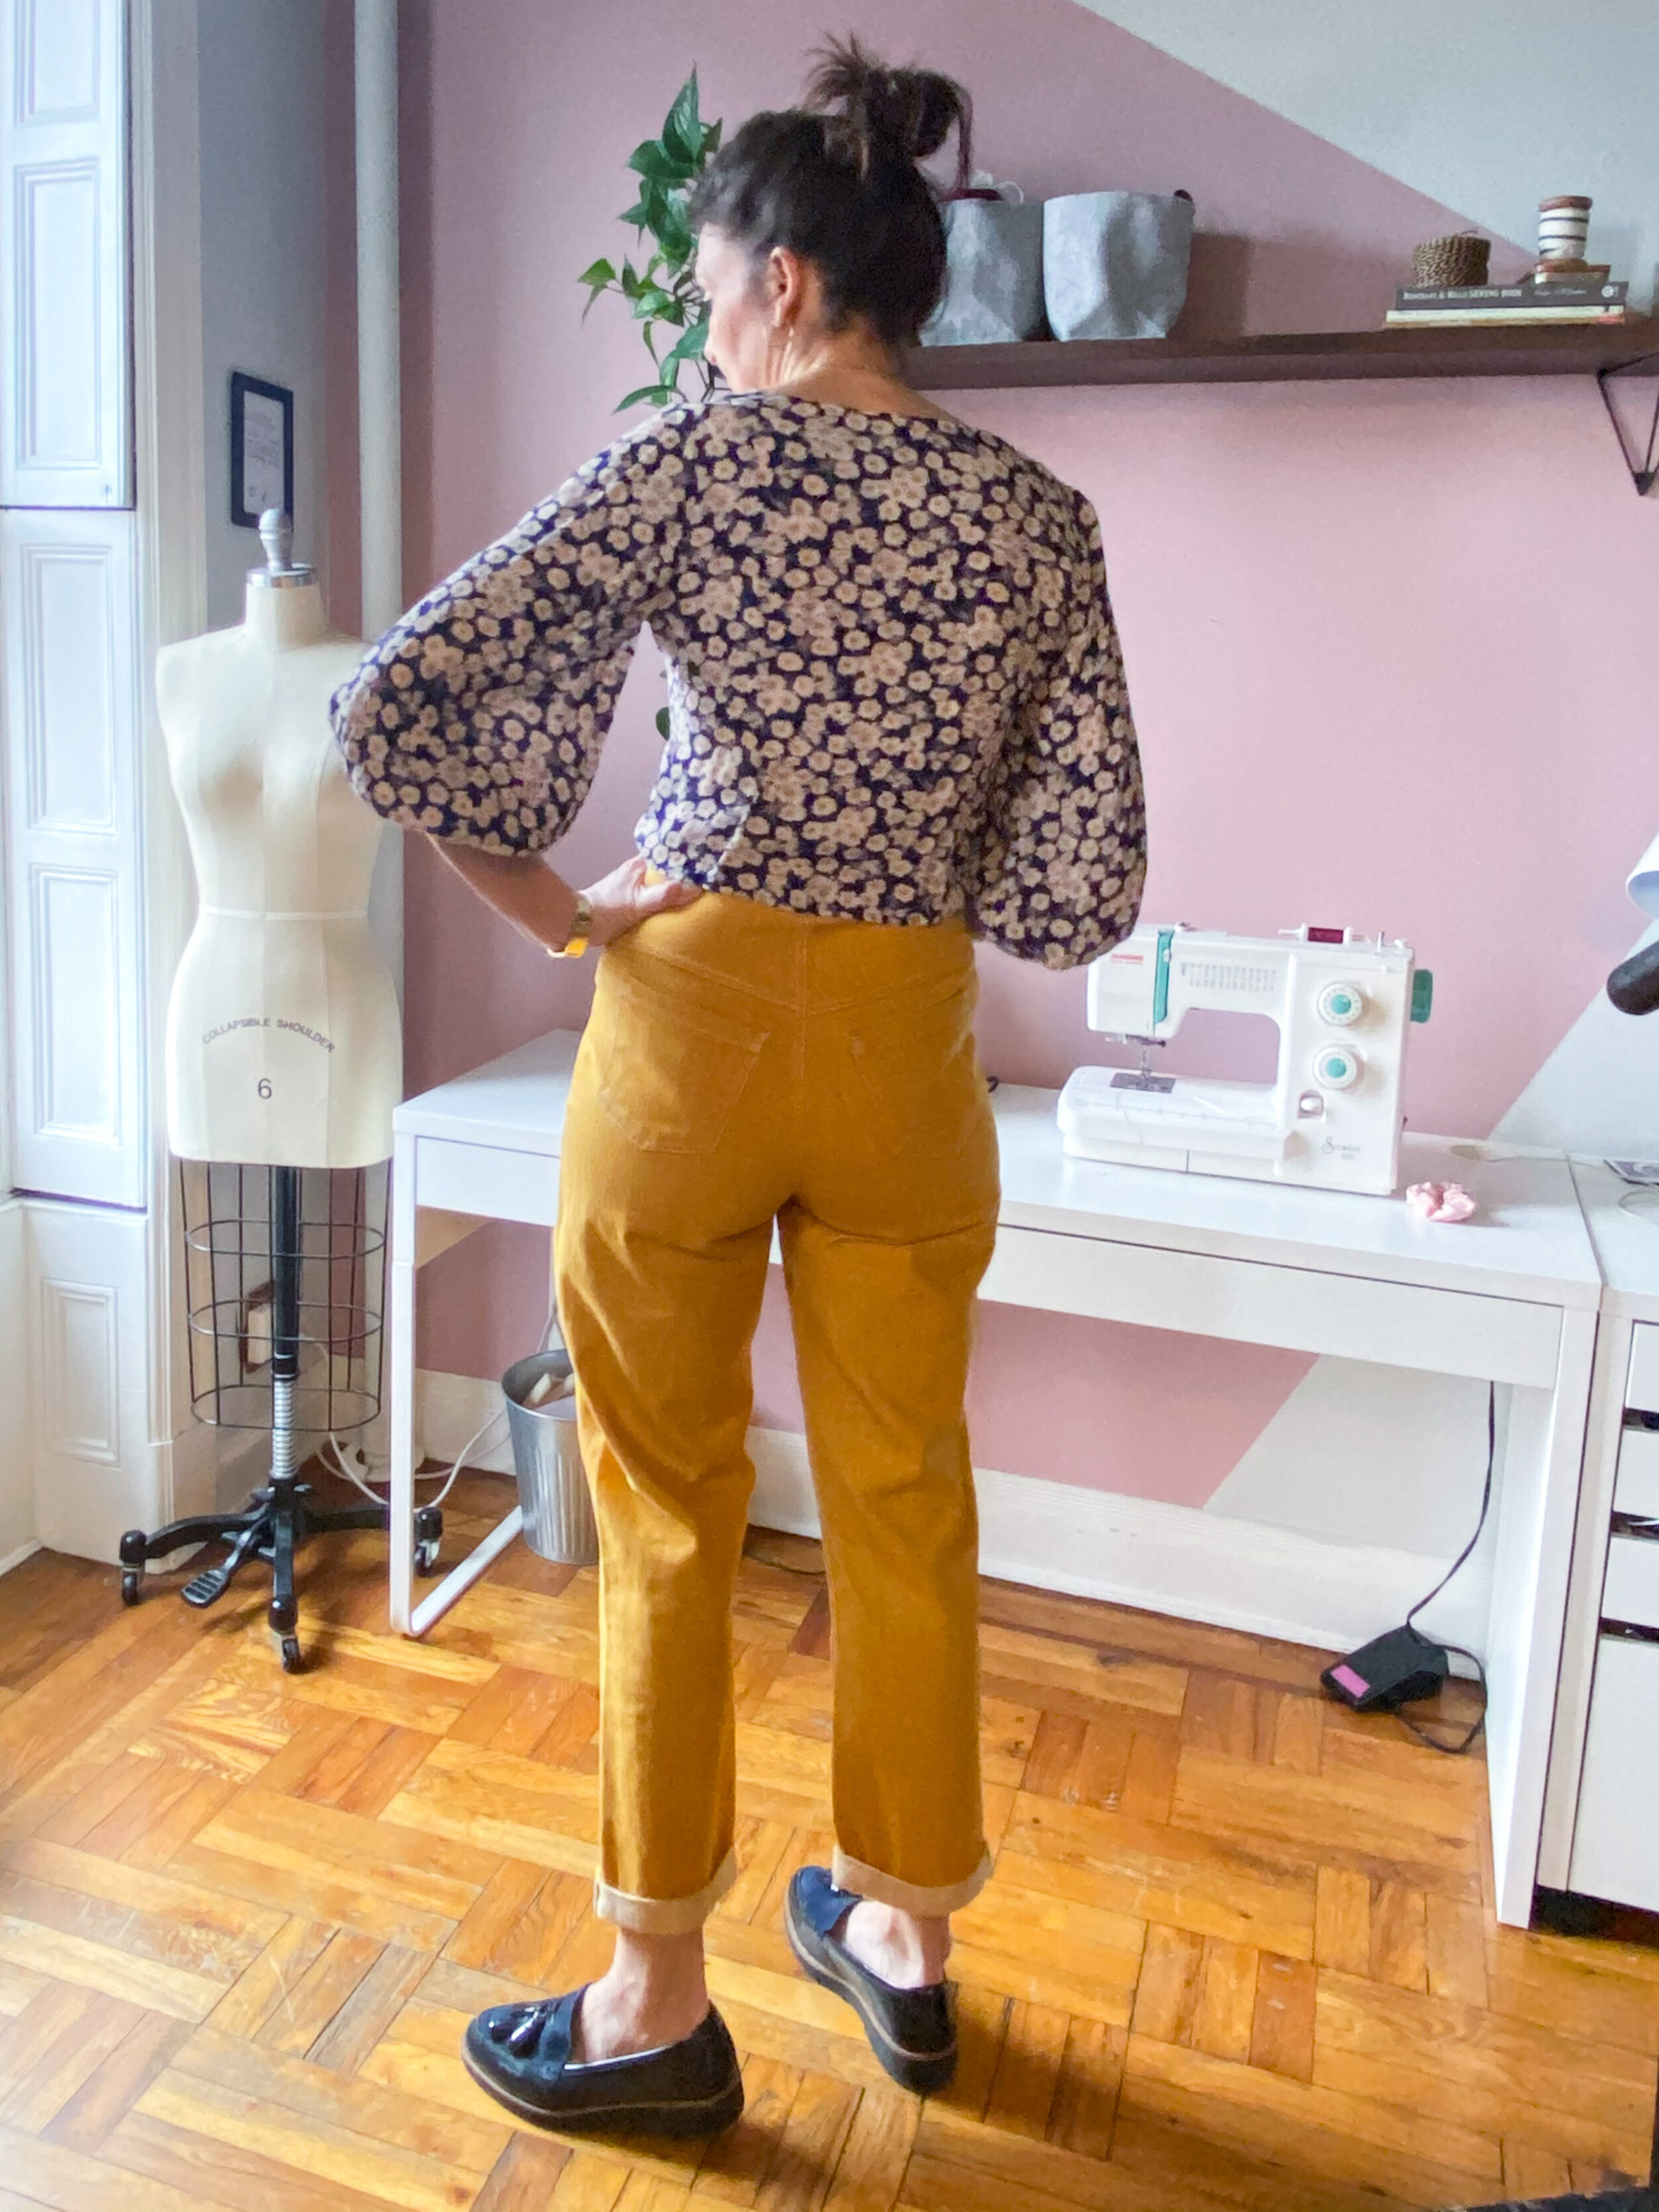
Gold - 9 oz denim from Blackbird. Blouse by Rollas. Loafers from Marks & Spencer UK.
(Unfortunately and inconceivably it seems the pattern is out of print.)
The pattern envelope is really unassuming but the design is very modern and so easy to wear. I’m skeptical about the variations other than C, but that’s just me.
The main reason I prefer these to the Hall pants is the more casual design. They are just so wearable. Sewn in denim they are like the perfect mom jeans - a slim / tapered but not too fitted leg and a really simple flat front with a yoke rather than darts at the back. And great shaped pockets.
And most excitingly, the fitting guidance is really good.
The designer of these is Palmer / Pletsch, which if you have ever sewed their patterns or read or used ‘Fit for Real People’ you’ll recognise the name and association with perfect fit. The major upside to this is that the pattern gives you very specific tissue fitting instructions. I combined these with my standard adjustments and have two pretty spot on fitting pairs of pants. I’ll caveat that by saying a) that’s my opinion and b) the pink ones are a little loose now, but did fit perfectly when I made them and are still totally wearable.
And because it’s a McCalls pattern it includes my preferred fly method. Another win.
However, this is a prime example of when even with tissue fitting a muslin is wise. While the most tricky bit of fitting i.e. the crotch was spot on, I managed to cut a size too large and had to take them in quite significantly on the side seam which impacted the pockets.
When it came to the second pair I knew how well the first pair fit but had forgotten the side seam issue and that plus having lost some weight meant I had to take even more off the side seam. In turn, that, combined with something odd I did with the waistband, has made the pockets do weird things. Plus I over fit the waistband. It’s OK - but I definitely can’t have even a medium sized meal without having to undo the top button!
I made the first pair in a bubblegum pink stretch cotton. I love the fit, hate the colour so will probably dye them this summer. I just don’t wear them and they truly deserve to be worn.
Then I rage sewed the gold denim pair in about eight hours after watching the first US presidential debate last September. (The rage is possibly why the pockets and waistband are funky.)
I LOVE these - the colour is so cheerful (even though I’m not a yellow person) and I feel great in them. I’ve worn them a lot this winter - even just around the apartment - just because I get so tired of dark jeans. They bring sunshine to some gloomy days.
Special mention:
TPC12

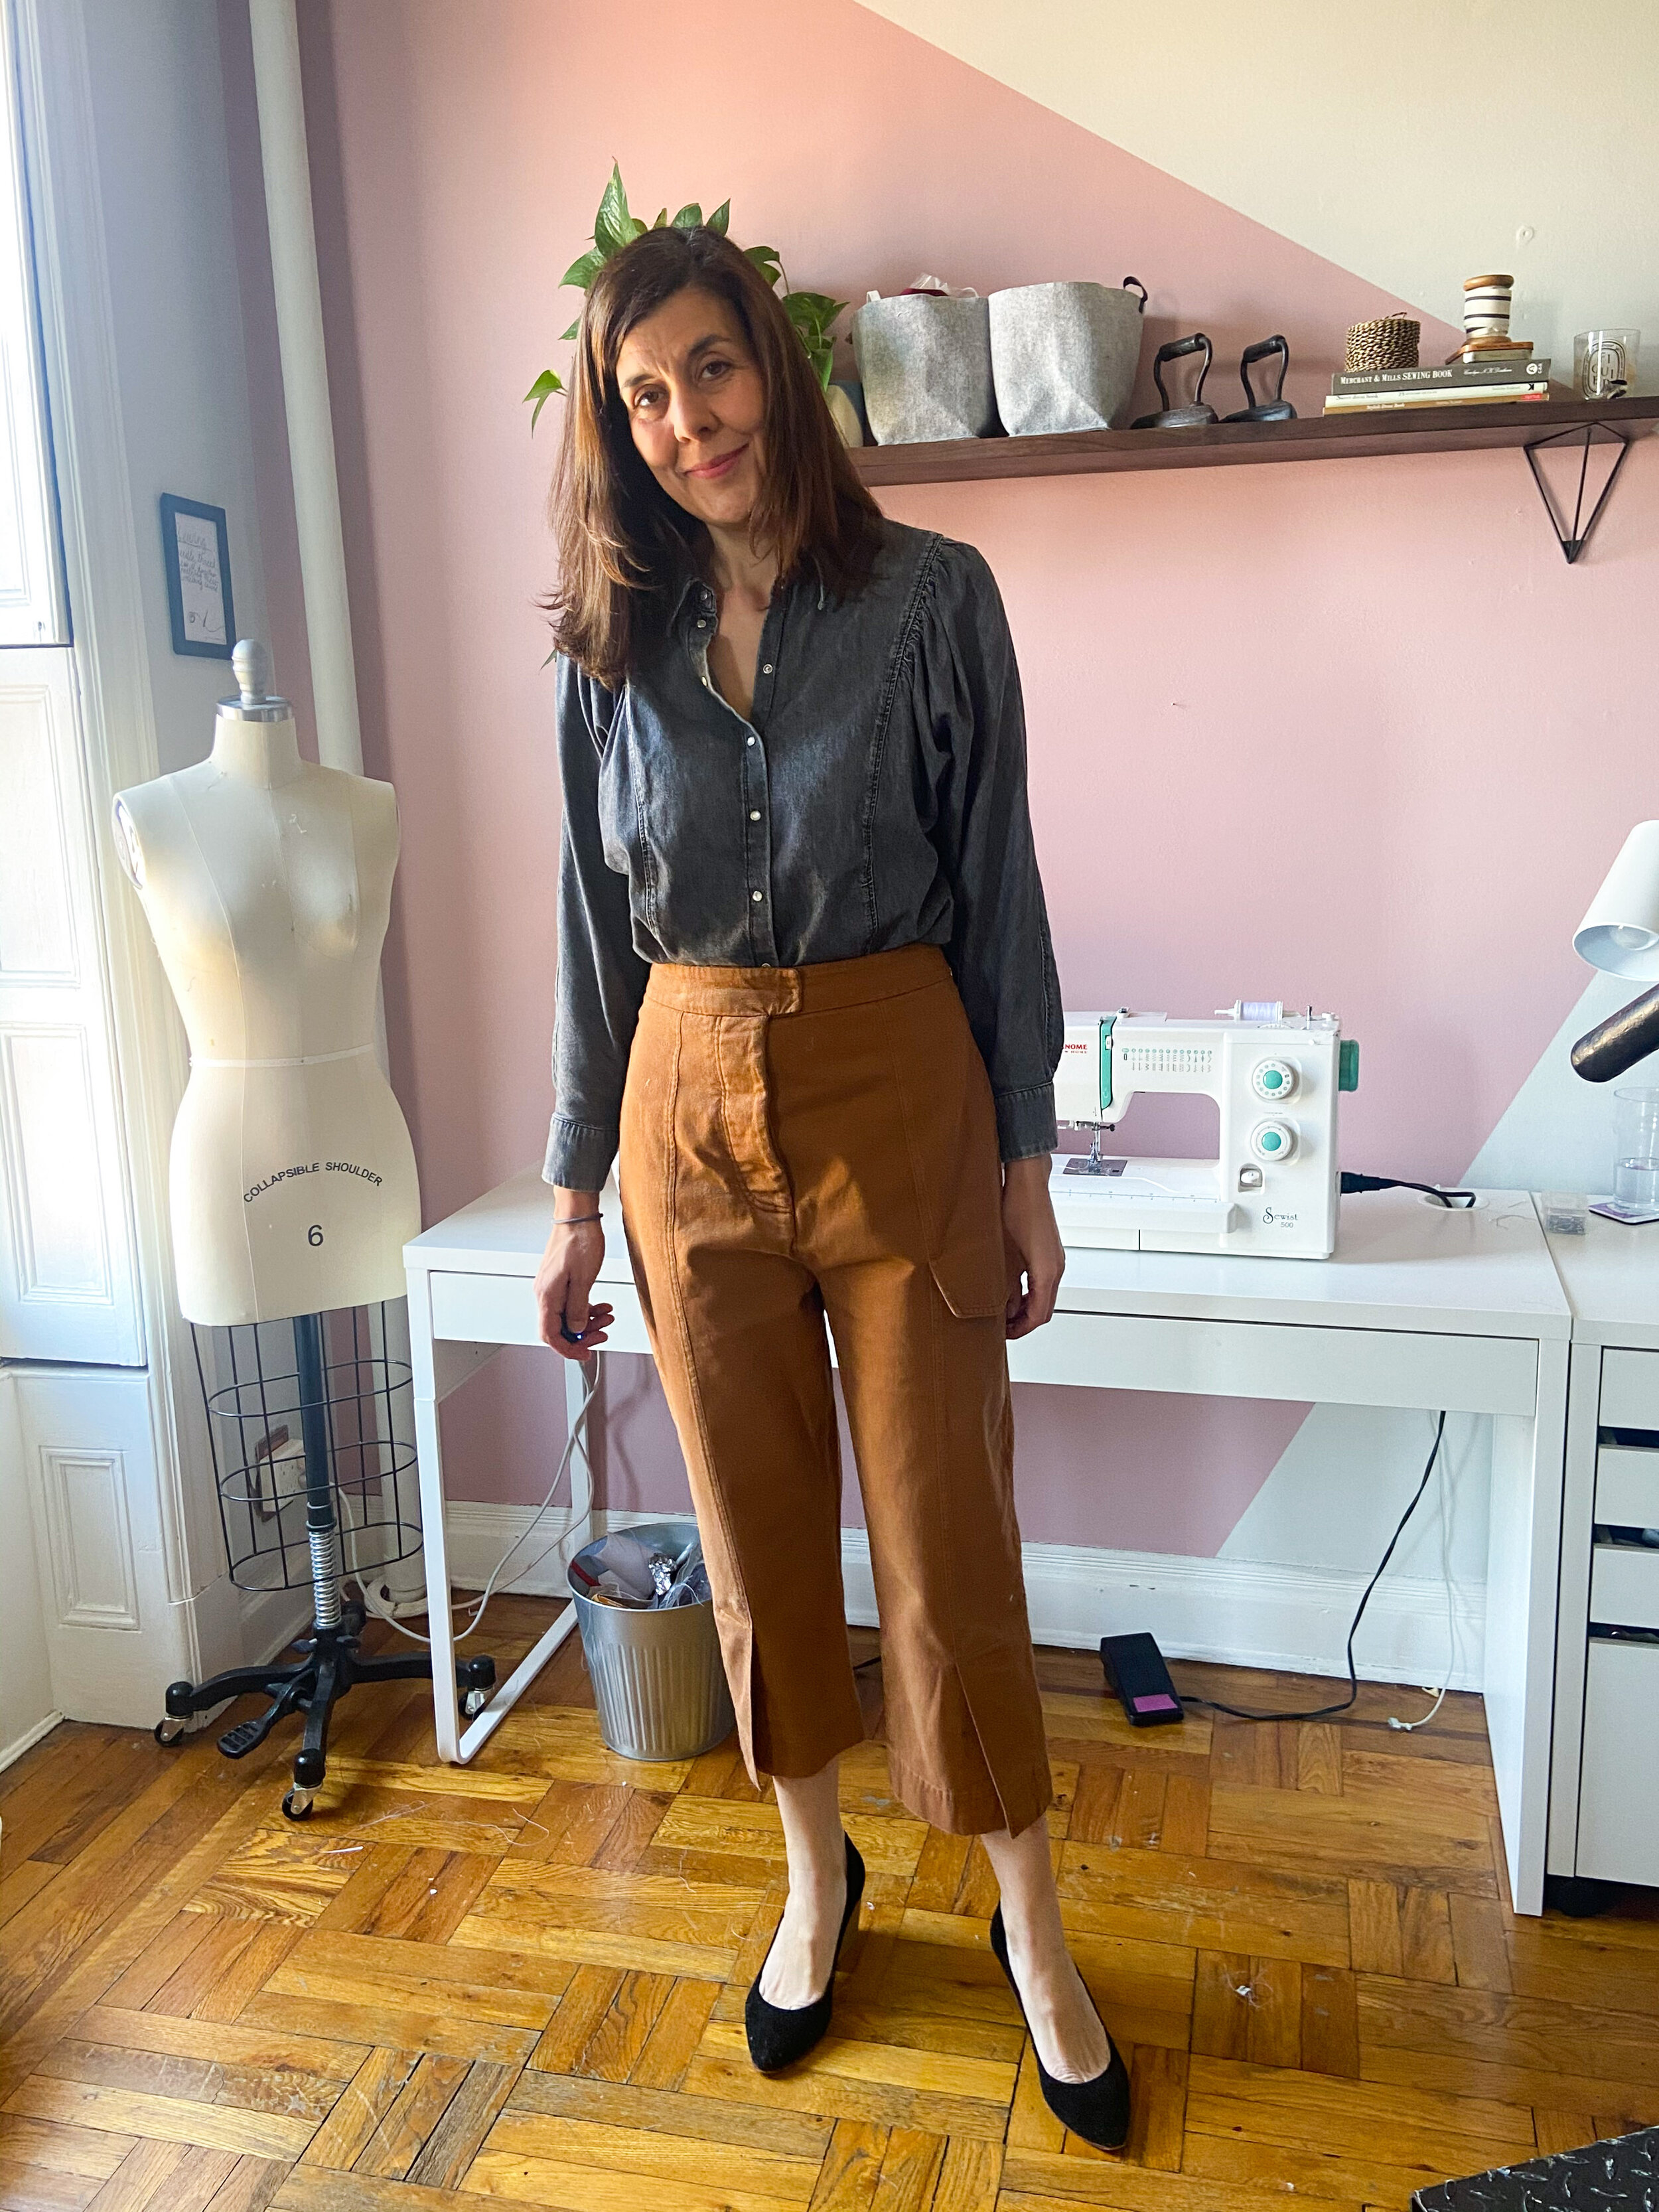

Ochre - Bull denim from Blackbird Fabrics. Blouse; And Other Stories. Heels; Détacher via a friend via Poshmark.
I can’t really end this without mentioning Trend Patterns Utility Trousers. I absolutely love the design of these - the centre front seam, the button fly, the slightly dropped crotch, the vents at the ankle and the random pocket flap. I have made one pair and intend to make more and lengthen them slightly.
The reason(s) these didn’t make the top three cut is they don’t have actual pockets and the instructions are so confusing - particularly in relation to the hem vents - that I almost gave up. The pocket situation is solvable - either inseam, or I know Katie made the flap a functioning pocket on one of her many versions, but the vent instructions more difficult. I’d have to be in a really patient frame of mind to tackle the hem again as naturally I can’t remember how I figured them out.
And finally
The next pair I want to make are the Acajou pants by Deer and Doe, View B. I like the wide tapered leg and the kind of nod to nineties cargo pants -and my days of wearing army surplus pants. I might even go the whole Jennifer Aniston 90’s parachute pants with a cord / toggle situation at the hem.
If you’re nervous about making pants / trousers (sorry for the constant switching between the two - 7 years in the US will do that to you), don’t be. Even if you end up with not great fitting pants you’ll likely still wear them, feel a massive sense of accomplishment, learn heaps and the next pair will be less daunting and fit better. Honestly!
If you have any other (non elastic waist wide leg) patterns you’d recommend I’d love to know.
See you soon x
ps: I really really love reading your comments, but Squarespace sites are annoying in that if you don’t have a Squarespace account you can leave comments but you won’t get a notification that I’ve responded. I do try to respond so if you want to see whether I have pop back!


Pants aren’t necessarily the easiest garments to make, but also not the hardest. In fact the hardest part is getting the fit right.